Search

Software Engineer's Notes

Tag

Software Testing

Unit Testing: The What, Why, and How (with Practical Examples)

What is unit test?

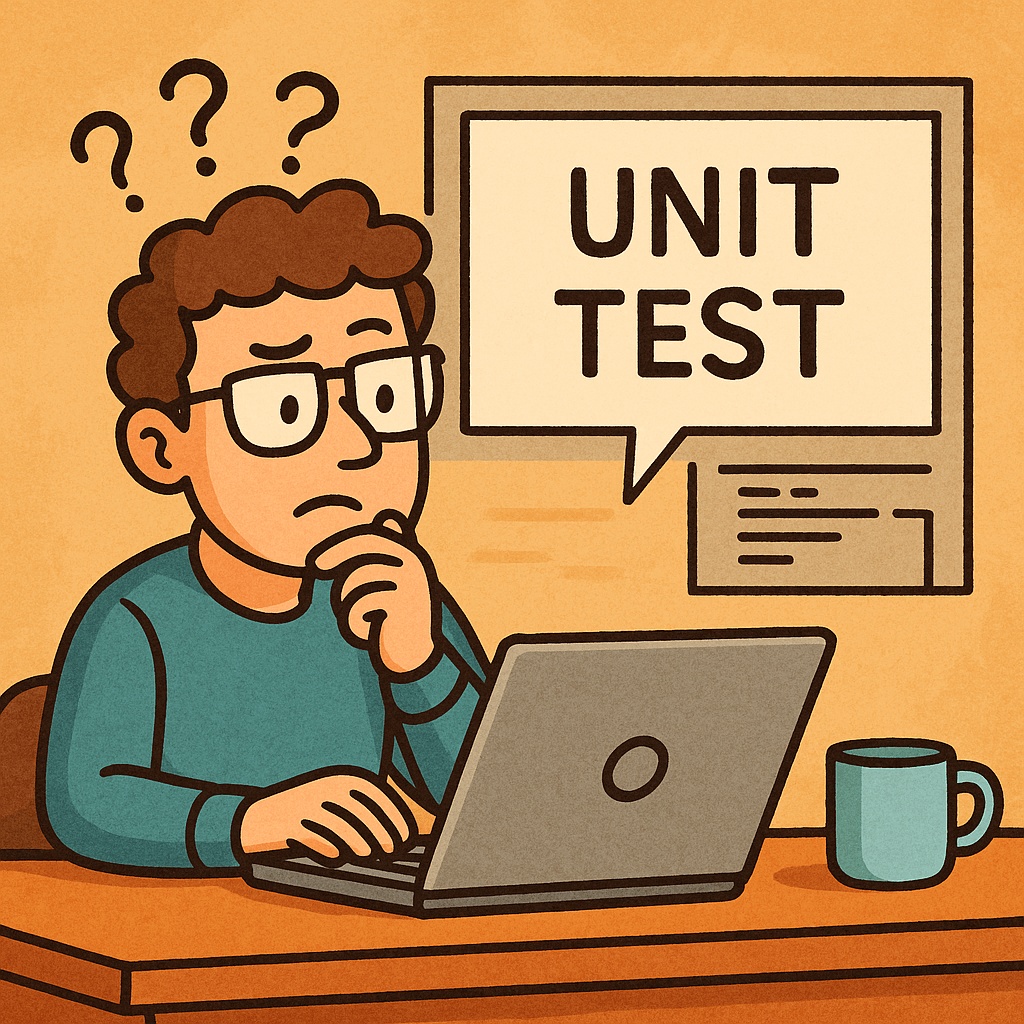
What is a Unit Test?

A unit test verifies the smallest testable part of your software—usually a single function, method, or class—in isolation. Its goal is to prove that, for a given input, the unit produces the expected output and handles edge cases correctly.

Key characteristics

  • Small & fast: millisecond execution, in-memory.
  • Isolated: no real network, disk, or database calls.
  • Repeatable & deterministic: same input → same result.
  • Self-documenting: communicates intended behavior.

A Brief History (How We Got Here)

  • 1960s–1980s: Early testing practices emerged with procedural languages, but were largely ad-hoc and manual.
  • 1990s: Object-oriented programming popularized more modular designs. Kent Beck introduced SUnit for Smalltalk; the “xUnit” family was born.
  • Late 1990s–2000s: JUnit (Java) and NUnit (.NET) pushed unit testing mainstream. Test-Driven Development (TDD) formalized “Red → Green → Refactor.”
  • 2010s–today: Rich ecosystems (pytest, Jest, JUnit 5, RSpec, Go’s testing pkg). CI/CD and DevOps turned unit tests into a daily, automated safety net.

How Unit Tests Work (The Mechanics)

Arrange → Act → Assert (AAA)

  1. Arrange: set up inputs, collaborators (often fakes/mocks).
  2. Act: call the method under test.
  3. Assert: verify outputs, state changes, or interactions.

Test Doubles (isolate the unit)

  • Dummy: unused placeholders to satisfy signatures.
  • Stub: returns fixed data (no behavior verification).
  • Fake: lightweight implementation (e.g., in-memory repo).
  • Mock: verifies interactions (e.g., method X called once).
  • Spy: records calls for later assertions.

Good Test Qualities (FIRST)

  • Fast, Isolated, Repeatable, Self-Validating, Timely.

Naming & Structure

  • Name: methodName_condition_expectedResult
  • One assertion concept per test (clarity > cleverness).
  • Avoid coupling to implementation details (test behavior).

When Should We Write Unit Tests?

  • New code: ideally before or while coding (TDD).
  • Bug fixes: add a unit test that reproduces the bug first.
  • Refactors: guard existing behavior before changing code.
  • Critical modules: domain logic, calculations, validation.

What not to unit test

  • Auto-generated code, trivial getters/setters, framework wiring (unless it encodes business logic).

Advantages (Why Unit Test?)

  • Confidence & speed: safer refactors, fewer regressions.
  • Executable documentation: shows intended behavior.
  • Design feedback: forces smaller, decoupled units.
  • Lower cost of defects: catch issues early and cheaply.
  • Developer velocity: faster iteration with guardrails.

Practical Examples

Java (JUnit 5 + Mockito)

// src/test/java/com/example/PriceServiceTest.java
import org.junit.jupiter.api.Test;
import static org.junit.jupiter.api.Assertions.*;
import static org.mockito.Mockito.*;

class PriceServiceTest {
    @Test
    void applyDiscount_whenVIP_shouldReduceBy10Percent() {
        DiscountPolicy policy = mock(DiscountPolicy.class);
        when(policy.discountFor("VIP")).thenReturn(0.10);

        PriceService service = new PriceService(policy);
        double result = service.applyDiscount(200.0, "VIP");

        assertEquals(180.0, result, 0.0001);
        verify(policy, times(1)).discountFor("VIP");
    }
}

// Production code (for context)
class PriceService {
    private final DiscountPolicy policy;
    PriceService(DiscountPolicy policy) { this.policy = policy; }
    double applyDiscount(double price, String tier) {
        return price * (1 - policy.discountFor(tier));
    }
}
interface DiscountPolicy { double discountFor(String tier); }

Python (pytest)

# app/discount.py
def apply_discount(price: float, tier: str, policy) -> float:
    return price * (1 - policy.discount_for(tier))

# tests/test_discount.py
class FakePolicy:
    def discount_for(self, tier):
        return {"VIP": 0.10, "STD": 0.0}.get(tier, 0.0)

def test_apply_discount_vip():
    from app.discount import apply_discount
    result = apply_discount(200.0, "VIP", FakePolicy())
    assert result == 180.0

In-Memory Fakes Beat Slow Dependencies

// In-memory repository for fast unit tests
class InMemoryUserRepo implements UserRepo {
    private final Map<String, User> store = new HashMap<>();
    public void save(User u){ store.put(u.id(), u); }
    public Optional<User> find(String id){ return Optional.ofNullable(store.get(id)); }
}

Integrating Unit Tests into Your Current Process

1) Organize Your Project

/src
  /main
    /java (or /python, /ts, etc.)
  /test
    /java ...

  • Mirror package/module structure under /test.
  • Name tests after the unit: PriceServiceTest, test_discount.py, etc.

2) Make Tests First-Class in CI

GitHub Actions (Java example)

name: build-and-test
on: [push, pull_request]
jobs:
  test:
    runs-on: ubuntu-latest
    steps:
      - uses: actions/checkout@v4
      - uses: actions/setup-java@v4
        with: { distribution: temurin, java-version: '21' }
      - run: ./gradlew test --no-daemon

GitHub Actions (Python example)

name: pytest
on: [push, pull_request]
jobs:
  test:
    runs-on: ubuntu-latest
    steps:
      - uses: actions/checkout@v4
      - uses: actions/setup-python@v5
        with: { python-version: '3.12' }
      - run: pip install -r requirements.txt
      - run: pytest -q

3) Define “Done” with Tests

  • Pull requests must include unit tests for new/changed logic.
  • Code review checklist: readability, edge cases, negative paths.
  • Coverage gate (sensible threshold; don’t chase 100%).
    Example (Gradle + JaCoCo):
jacocoTestCoverageVerification {
    violationRules {
        rule { limit { counter = 'INSTRUCTION'; minimum = 0.75 } }
    }
}
test.finalizedBy jacocoTestReport, jacocoTestCoverageVerification

4) Keep Tests Fast and Reliable

  • Avoid real I/O; prefer fakes/mocks.
  • Keep each test < 100ms; whole suite in seconds.
  • Eliminate flakiness (random time, real threads, sleeps).

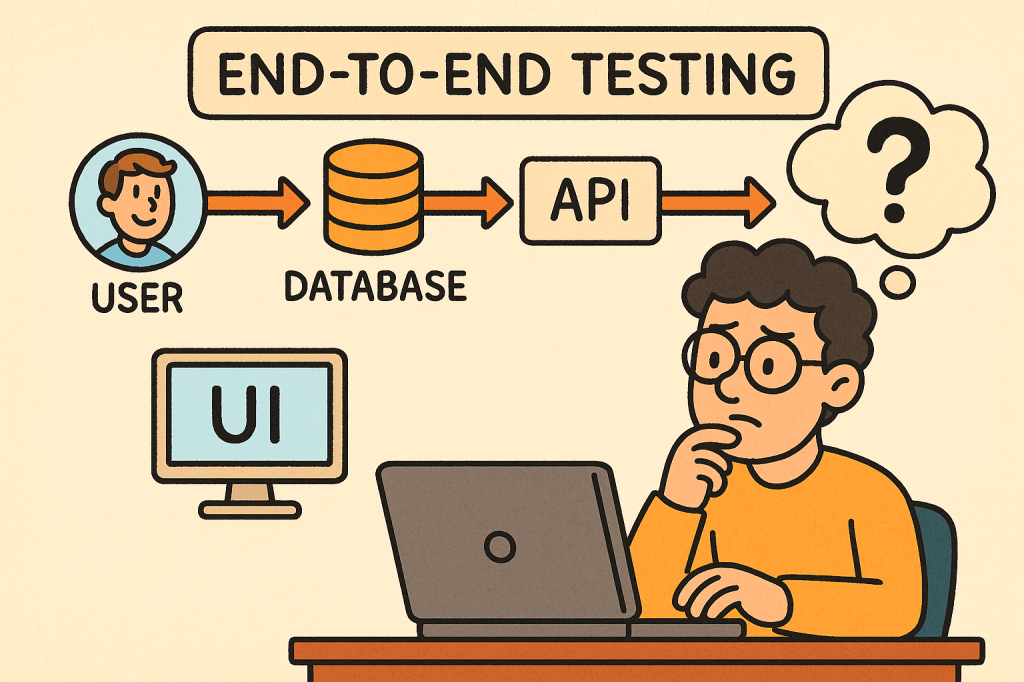
5) Use the Test Pyramid Wisely

  • Unit (broad base): thousands, fast, isolated.
  • Integration (middle): fewer, verify boundaries.
  • UI/E2E (tip): very few, critical user flows only.

A Simple TDD Loop You Can Adopt Tomorrow

  1. Red: write a failing unit test that expresses the requirement.
  2. Green: implement the minimum to pass.
  3. Refactor: clean design safely, keeping tests green.
  4. Repeat; keep commits small and frequent.

Common Pitfalls (and Fixes)

  • Mock-heavy tests that break on refactor → mock only at boundaries; prefer fakes for domain logic.
  • Testing private methods → test through public behavior; refactor if testing is too hard.
  • Slow suites → remove I/O, shrink fixtures, parallelize.
  • Over-asserting → one behavioral concern per test.

Rollout Plan (4 Weeks)

  • Week 1: Set up test frameworks, sample tests, CI pipeline, coverage reporting.
  • Week 2: Add tests for critical modules & recent bug fixes. Create a PR template requiring tests.
  • Week 3: Refactor hot spots guided by tests. Introduce an in-memory fake layer.
  • Week 4: Add coverage gates, stabilize the suite, document conventions in CONTRIBUTING.md.

Team Conventions

  • Folder structure mirrors production code.
  • Names: ClassNameTest or test_function_behavior.
  • AAA layout, one behavior per test.
  • No network/disk/DB in unit tests.
  • PRs must include tests for changed logic.

Final Thoughts

Unit tests pay dividends by accelerating safe change. Start small, keep them fast and focused, and wire them into your daily workflow (pre-commit, CI, PR reviews). Over time, they become living documentation and your best shield against regressions.

End-to-End Testing in Software Development

What is End to End testing?

In today’s fast-paced software world, ensuring your application works seamlessly from start to finish is critical. That’s where End-to-End (E2E) testing comes into play. It validates the entire flow of an application — from the user interface down to the database and back — making sure every component interacts correctly and the overall system meets user expectations.

What is End-to-End Testing?

End-to-End testing is a type of software testing that evaluates an application’s workflow from start to finish, simulating real-world user scenarios. The goal is to verify that the entire system — including external dependencies like databases, APIs, and third-party services — functions correctly together.

Instead of testing a single module or service in isolation, E2E testing ensures that the complete system behaves as expected when all integrated parts are combined.

For example, in an e-commerce system:

  • A user logs in,
  • Searches for a product,
  • Adds it to the cart,
  • Checks out using a payment gateway,
  • And receives a confirmation email.

E2E testing verifies that this entire sequence works flawlessly.

How Does End-to-End Testing Work?

End-to-End testing typically follows these steps:

  1. Identify User Scenarios
    Define the critical user journeys — the sequences of actions users perform in real life.
  2. Set Up the Test Environment
    Prepare a controlled environment that includes all necessary systems, APIs, and databases.
  3. Define Input Data and Expected Results
    Determine what inputs will be used and what the expected output or behavior should be.
  4. Execute the Test
    Simulate the actual user actions step by step using automated or manual scripts.
  5. Validate Outcomes
    Compare the actual behavior against expected results to confirm whether the test passes or fails.
  6. Report and Fix Issues
    Log any discrepancies and collaborate with the development team to address defects.

Main Components of End-to-End Testing

Let’s break down the key components that make up an effective E2E testing process:

1. Test Scenarios

These represent real-world user workflows. Each scenario tests a complete path through the system, ensuring functional correctness across modules.

2. Test Data

Reliable, representative test data is crucial. It mimics real user inputs and system states to produce accurate testing results.

3. Test Environment

A controlled setup that replicates the production environment — including databases, APIs, servers, and third-party systems — to validate integration behavior.

4. Automation Framework

Automation tools such as Cypress, Selenium, Playwright, or TestCafe are often used to run tests efficiently and repeatedly.

5. Assertions and Validation

Assertions verify that the actual output matches the expected result. These validations ensure each step in the workflow behaves correctly.

6. Reporting and Monitoring

After execution, results are compiled into reports for developers and QA engineers to analyze, helping identify defects quickly.

Benefits of End-to-End Testing

1. Ensures System Reliability

By testing complete workflows, E2E tests ensure that the entire application — not just individual components — works as intended.

2. Detects Integration Issues Early

Since E2E testing validates interactions between modules, it can catch integration bugs that unit or component tests might miss.

3. Improves User Experience

It simulates how real users interact with the system, guaranteeing that the most common paths are always functional.

4. Increases Confidence Before Release

With E2E testing, teams gain confidence that new code changes won’t break existing workflows.

5. Reduces Production Failures

Because it validates real-life scenarios, E2E testing minimizes the risk of major failures after deployment.

Challenges of End-to-End Testing

While E2E testing offers significant value, it also comes with some challenges:

  1. High Maintenance Cost
    Automated E2E tests can become fragile as UI or workflows change frequently.
  2. Slow Execution Time
    Full workflow tests take longer to run than unit or integration tests.
  3. Complex Setup
    Simulating a full production environment — with multiple services, APIs, and databases — can be complex and resource-intensive.
  4. Flaky Tests
    Tests may fail intermittently due to timing issues, network delays, or dependency unavailability.
  5. Difficult Debugging
    When something fails, tracing the root cause can be challenging since multiple systems are involved.

When and How to Use End-to-End Testing

E2E testing is best used when:

  • Critical user workflows need validation.
  • Cross-module integrations exist.
  • Major releases are scheduled.
  • You want confidence in production stability.

Typically, it’s conducted after unit and integration tests have passed.
In Agile or CI/CD environments, E2E tests are often automated and run before deployment to ensure regressions are caught early.

Integrating End-to-End Testing into Your Software Development Process

Here’s how you can effectively integrate E2E testing:

  1. Define Key User Journeys Early
    Collaborate with QA, developers, and business stakeholders to identify essential workflows.
  2. Automate with Modern Tools
    Use frameworks like Cypress, Selenium, or Playwright to automate repetitive E2E scenarios.
  3. Incorporate into CI/CD Pipeline
    Run E2E tests automatically as part of your build and deployment process.
  4. Use Staging Environments
    Always test in an environment that mirrors production as closely as possible.
  5. Monitor and Maintain Tests
    Regularly update test scripts as the UI, APIs, and workflows evolve.
  6. Combine with Other Testing Levels
    Balance E2E testing with unit, integration, and acceptance testing to maintain a healthy test pyramid.

Conclusion

End-to-End testing plays a vital role in ensuring the overall quality and reliability of modern software applications.
By validating real user workflows, it gives teams confidence that everything — from UI to backend — functions smoothly.

While it can be resource-heavy, integrating automated E2E testing within a CI/CD pipeline helps teams catch critical issues early and deliver stable, high-quality releases.

Integration Testing: A Practical Guide for Real-World Software Systems

What is integration testing?

Integration testing verifies that multiple parts of your system work correctly together—modules, services, databases, queues, third-party APIs, configuration, and infrastructure glue. Where unit tests validate small pieces in isolation, integration tests catch issues at the seams: misconfigured ports, serialization mismatches, transaction boundaries, auth headers, timeouts, and more.

What Is an Integration Test?

An integration test exercises a feature path across two or more components:

  • A web controller + service + database
  • Two microservices communicating over HTTP/REST or messaging
  • Your code + a real (or realistic) external system such as PostgreSQL, Redis, Kafka, S3, Stripe, or a mock double that replicates its behavior

It aims to answer: “Given realistic runtime conditions, do the collaborating parts interoperate as intended?”

How Integration Tests Work (Step-by-Step)

  1. Assemble the slice
    Decide which components to include (e.g., API layer + persistence) and what to substitute (e.g., real DB in a container vs. an in-memory alternative).
  2. Provision dependencies
    Spin up databases, message brokers, or third-party doubles. Popular approaches:
    • Ephemeral containers (e.g., Testcontainers for DBs/Brokers/Object stores)
    • Local emulators (e.g., LocalStack for AWS)
    • HTTP stubs (e.g., WireMock, MockServer) to simulate third-party APIs
  3. Seed test data & configuration
    Apply migrations, insert fixtures, set secrets/env vars, and configure network endpoints.
  4. Execute realistic scenarios
    Drive the system via its public interface (HTTP calls, messages on a topic/queue, method entry points that span layers).
  5. Assert outcomes
    Verify HTTP status/body, DB state changes, published messages, idempotency, retries, metrics/log signatures, and side effects.
  6. Teardown & isolate
    Clean up containers, reset stubs, and ensure tests are independent and order-agnostic.

Key Components of Integration Testing

  • System under test (SUT) boundary: Define exactly which modules/services are “in” vs. “out.”
  • Realistic dependencies: Databases, caches, queues, object stores, identity providers.
  • Test doubles where necessary:
    • Stubs for fixed responses (e.g., pricing API)
    • Mocks for interaction verification (e.g., “was /charge called with X?”)
  • Environment management: Containers, docker-compose, or cloud emulators; test-only configs.
  • Data management: Migrations + fixtures; factories/builders for readable setup.
  • Observability hooks: Logs, metrics, tracing assertions (useful for debugging flaky flows).
  • Repeatable orchestration: Scripts/Gradle/Maven/npm to run locally and in CI the same way.

Benefits

  • Catches integration bugs early: Contract mismatches, auth failures, connection strings, TLS issues.
  • Confidence in deploys: Reduced incidents due to configuration drift.
  • Documentation by example: Tests serve as living examples of real flows.
  • Fewer flaky end-to-end tests: Solid integration coverage means you need fewer slow, brittle E2E UI tests.

When (and How) to Use Integration Tests

Use integration tests when:

  • A unit test can’t surface real defects (e.g., SQL migrations, ORM behavior, transaction semantics).
  • Two or more services/modules must agree on contracts (schemas, headers, error codes).
  • You rely on infra features (indexes, isolation levels, topic partitions, S3 consistency).

How to apply effectively:

  • Target critical paths first: sign-up, login, payments, ordering, data ingestion.
  • Prefer ephemeral, production-like dependencies: containers over mocks for DBs/brokers.
  • Keep scope tight: Test one coherent flow per test; avoid sprawling “kitchen-sink” cases.
  • Make it fast enough: Parallelize tests, reuse containers per test class/suite.
  • Run in CI for each PR: Same commands locally and in the pipeline to avoid “works on my machine.”

Integration vs. Unit vs. End-to-End (Quick Table)

AspectUnit TestIntegration TestEnd-to-End (E2E)
ScopeSingle class/functionMultiple components/servicesFull system incl. UI
DependenciesAll mockedRealistic (DB, broker) or stubsAll real
SpeedMillisecondsSecondsSeconds–Minutes
FlakinessLowMedium (manageable)Higher
PurposeLogic correctnessInteroperation correctnessUser journey correctness

Tooling & Patterns (Common Stacks)

  • Containers & Infra: Testcontainers, docker-compose, LocalStack, Kind (K8s)
  • HTTP Stubs: WireMock, MockServer
  • Contract Testing: Pact (consumer-driven contracts)
  • DB Migrations/Fixtures: Flyway, Liquibase; SQL scripts; FactoryBoy/FactoryBot-style data builders
  • CI: GitHub Actions, GitLab CI, Jenkins with service containers

Real-World Examples (Detailed)

1) Service + Database (Java / Spring Boot + PostgreSQL)

Goal: Verify repository mappings, transactions, and API behavior.

// build.gradle (snippet)
testImplementation("org.testcontainers:junit-jupiter:1.20.1")
testImplementation("org.testcontainers:postgresql:1.20.1")
testImplementation("org.springframework.boot:spring-boot-starter-test")

// Example JUnit 5 test
@AutoConfigureMockMvc
@SpringBootTest
@Testcontainers
class ItemApiIT {

  @Container
  static PostgreSQLContainer<?> pg = new PostgreSQLContainer<>("postgres:16");

  @DynamicPropertySource
  static void dbProps(DynamicPropertyRegistry r) {
    r.add("spring.datasource.url", pg::getJdbcUrl);
    r.add("spring.datasource.username", pg::getUsername);
    r.add("spring.datasource.password", pg::getPassword);
  }

  @Autowired MockMvc mvc;
  @Autowired ItemRepository repo;

  @Test
  void createAndFetchItem() throws Exception {
    mvc.perform(post("/items")
        .contentType(MediaType.APPLICATION_JSON)
        .content("{\"group\":\"tools\",\"name\":\"wrench\",\"count\":5,\"cost\":12.5}"))
      .andExpect(status().isCreated());

    mvc.perform(get("/items?group=tools"))
      .andExpect(status().isOk())
      .andExpect(jsonPath("$[0].name").value("wrench"));

    assertEquals(1, repo.count());
  }
}

What this proves: Spring wiring, JSON (de)serialization, transactionality, schema/mappings, and HTTP contract all work together against a real Postgres.

2) Outbound HTTP to a Third-Party API (WireMock)

@WireMockTest(httpPort = 8089)
class PaymentClientIT {

  @Test
  void chargesCustomer() {
    // Stub Stripe-like API
    stubFor(post(urlEqualTo("/v1/charges"))
      .withRequestBody(containing("\"amount\": 2000"))
      .willReturn(aResponse().withStatus(200).withBody("{\"id\":\"ch_123\",\"status\":\"succeeded\"}")));

    PaymentClient client = new PaymentClient("http://localhost:8089", "test_key");
    ChargeResult result = client.charge("cust_1", 2000);

    assertEquals("succeeded", result.status());
    verify(postRequestedFor(urlEqualTo("/v1/charges")));
  }
}

What this proves: Your serialization, auth headers, timeouts/retries, and error handling match the third-party contract.

3) Messaging Flow (Kafka)

  • Start a Kafka container; publish a test message to the input topic.
  • Assert your consumer processes it and publishes to the output topic or persists to the DB.
  • Validate at-least-once handling and idempotency by sending duplicates.

Signals covered: Consumer group config, serialization (Avro/JSON/Protobuf), offsets, partitions, dead-letter behavior.

4) Python / Django API + Postgres (pytest + Testcontainers)

# pyproject.toml deps: pytest, pytest-django, testcontainers[postgresql], requests
def test_create_and_get_item(live_server, postgres_container):
    # Set DATABASE_URL from container, run migrations, then:
    r = requests.post(f"{live_server.url}/items", json={"group":"tools","name":"wrench","count":5,"cost":12.5})
    assert r.status_code == 201
    r2 = requests.get(f"{live_server.url}/items?group=tools")
    assert r2.status_code == 200 and r2.json()[0]["name"] == "wrench"

Design Tips & Best Practices

  • Define the “slice” explicitly (avoid accidental E2E tests).
  • One scenario per test; keep them readable and deterministic.
  • Prefer real infra where cheap (real DB > in-memory); use stubs for costly/unreliable externals.
  • Make tests parallel-safe: unique schema names, randomized ports, isolated fixtures.
  • Stabilize flakiness: time controls (freeze time), retry assertions for eventually consistent flows, awaitility patterns.
  • Contracts first: validate schemas and error shapes; consider consumer-driven contracts to prevent breaking changes.
  • Observability: assert on logs/metrics/traces for non-functional guarantees (retries, circuit-breakers).

Common Pitfalls (and Fixes)

  • Slow suites → Parallelize, reuse containers per class, trim scope, share fixtures.
  • Brittle external dependencies → Stub third-party APIs; only run “full-real” tests in nightly builds.
  • Data leakage across tests → Wrap in transactions or reset DB/containers between tests.
  • Environment drift → Pin container versions, manage migrations in tests, keep CI parity.

Minimal “Getting Started” Checklist

  • Choose your test runner (JUnit/pytest/jest) and container strategy (Testcontainers/compose).
  • Add migrations + seed data.
  • Wrap external APIs with clients that are easy to stub.
  • Write 3–5 critical path tests (create/read/update; publish/consume; happy + failure paths).
  • Wire into CI; make it part of the pull-request checks.

Conclusion

Integration tests give you real confidence that your system’s moving parts truly work together. Start with critical flows, run against realistic dependencies, keep scenarios focused, and automate them in CI. You’ll ship faster with fewer surprises—and your end-to-end suite can stay lean and purposeful.

Acceptance Testing: A Complete Guide

What is acceptance testing?

What is Acceptance Testing?

Acceptance Testing is a type of software testing conducted to determine whether a system meets business requirements and is ready for deployment. It is the final phase of testing before software is released to production. The primary goal is to validate that the product works as expected for the end users and stakeholders.

Unlike unit or integration testing, which focus on technical correctness, acceptance testing focuses on business functionality and usability.

Main Features and Components of Acceptance Testing

  1. Business Requirement Focus
    • Ensures the product aligns with user needs and business goals.
    • Based on functional and non-functional requirements.
  2. Stakeholder Involvement
    • End users, product owners, or business analysts validate the results.
  3. Predefined Test Cases and Scenarios
    • Tests are derived directly from user stories or requirement documents.
  4. Pass/Fail Criteria
    • Each test has a clear outcome: if all criteria are met, the system is accepted.
  5. Types of Acceptance Testing
    • User Acceptance Testing (UAT): Performed by end users.
    • Operational Acceptance Testing (OAT): Focuses on operational readiness (backup, recovery, performance).
    • Contract Acceptance Testing (CAT): Ensures software meets contractual obligations.
    • Regulation Acceptance Testing (RAT): Ensures compliance with industry standards and regulations.

How Does Acceptance Testing Work?

  1. Requirement Analysis
    • Gather business requirements, user stories, and acceptance criteria.
  2. Test Planning
    • Define objectives, entry/exit criteria, resources, timelines, and tools.
  3. Test Case Design
    • Create test cases that reflect real-world business processes.
  4. Environment Setup
    • Prepare a production-like environment for realistic testing.
  5. Execution
    • Stakeholders or end users execute tests to validate features.
  6. Defect Reporting and Retesting
    • Any issues are reported, fixed, and retested.
  7. Sign-off
    • Once all acceptance criteria are met, the software is approved for release.

Benefits of Acceptance Testing

  • Ensures Business Alignment: Confirms that the software meets real user needs.
  • Improves Quality: Reduces the chance of defects slipping into production.
  • Boosts User Satisfaction: End users are directly involved in validation.
  • Reduces Costs: Catching issues before release is cheaper than fixing post-production bugs.
  • Regulatory Compliance: Ensures systems meet industry or legal standards.

When and How Should We Use Acceptance Testing?

  • When to Use:
    • At the end of the development cycle, after system and integration testing.
    • Before product release or delivery to the customer.
  • How to Use:
    • Involve end users early in test planning.
    • Define clear acceptance criteria at the requirement-gathering stage.
    • Automate repetitive acceptance tests for efficiency (e.g., using Cucumber, FitNesse).

Real-World Use Cases of Acceptance Testing

  1. E-commerce Platforms
    • Testing if users can successfully search, add products to cart, checkout, and receive order confirmations.
  2. Banking Systems
    • Verifying that fund transfers, account balance checks, and statement generations meet regulatory and business expectations.
  3. Healthcare Software
    • Ensuring that patient data is stored securely and workflows comply with HIPAA regulations.
  4. Government Systems
    • Confirming that online tax filing applications meet both citizen needs and legal compliance.

How to Integrate Acceptance Testing into the Software Development Process

  1. Agile & Scrum Integration
    • Define acceptance criteria in each user story.
    • Automate acceptance tests as part of the CI/CD pipeline.
  2. Shift-Left Approach
    • Involve stakeholders early in requirement definition and acceptance test design.
  3. Tool Support
    • Use tools like Cucumber, Behave, Selenium, FitNesse for automation.
    • Integrate with Jenkins, GitLab CI/CD, or Azure DevOps for continuous validation.
  4. Feedback Loops
    • Provide immediate feedback to developers and business owners when acceptance criteria fail.

Conclusion

Acceptance Testing is the bridge between technical correctness and business value. By validating the system against business requirements, organizations ensure higher quality, regulatory compliance, and user satisfaction. When properly integrated into the development process, acceptance testing reduces risks, improves product reliability, and builds stakeholder confidence.

System Testing: A Complete Guide

What is system testing?

Software development doesn’t end with writing code—it must be tested thoroughly to ensure it works as intended. One of the most comprehensive testing phases is System Testing, where the entire system is evaluated as a whole. This blog will explore what system testing is, its features, how it works, benefits, real-world examples, and how to integrate it into your software development process.

What is System Testing?

System Testing is a type of software testing where the entire integrated system is tested as a whole. Unlike unit testing (which focuses on individual components) or integration testing (which focuses on interactions between modules), system testing validates that the entire software product meets its requirements.

It is typically the final testing stage before user acceptance testing (UAT) and deployment.

Main Features and Components of System Testing

System testing includes several important features and components:

1. End-to-End Testing

Tests the software from start to finish, simulating real user scenarios.

2. Black-Box Testing Approach

Focuses on the software’s functionality rather than its internal code. Testers don’t need knowledge of the source code.

3. Requirement Validation

Ensures that the product meets all functional and non-functional requirements.

4. Comprehensive Coverage

Covers a wide variety of testing types such as:

  • Functional testing
  • Performance testing
  • Security testing
  • Usability testing
  • Compatibility testing

5. Environment Similarity

Conducted in an environment similar to production to detect environment-related issues.

How Does System Testing Work?

The process of system testing typically follows these steps:

  1. Requirement Review – Analyze functional and non-functional requirements.
  2. Test Planning – Define test strategy, scope, resources, and tools.
  3. Test Case Design – Create detailed test cases simulating user scenarios.
  4. Test Environment Setup – Configure hardware, software, and databases similar to production.
  5. Test Execution – Execute test cases and record results.
  6. Defect Reporting and Tracking – Log issues and track them until resolution.
  7. Regression Testing – Retest the system after fixes to ensure stability.
  8. Final Evaluation – Ensure the system is ready for deployment.

Benefits of System Testing

System testing provides multiple advantages:

  • Validates Full System Behavior – Ensures all modules and integrations work together.
  • Detects Critical Bugs – Finds issues missed during unit or integration testing.
  • Improves Quality – Increases confidence that the system meets requirements.
  • Reduces Risks – Helps prevent failures in production.
  • Ensures Compliance – Confirms the system meets legal, industry, and business standards.

When and How Should We Use System Testing?

When to Use:

  • After integration testing is completed.
  • Before user acceptance testing (UAT) and deployment.

How to Use:

  • Define clear acceptance criteria.
  • Automate repetitive system-level test cases where possible.
  • Simulate real-world usage scenarios to mimic actual customer behavior.

Real-World Use Cases of System Testing

  1. E-commerce Website
    • Verifying user registration, product search, cart, checkout, and payment workflows.
    • Ensuring the system handles high traffic loads during sales events.
  2. Banking Applications
    • Validating transactions, loan applications, and account security.
    • Checking compliance with financial regulations.
  3. Healthcare Systems
    • Testing appointment booking, patient data access, and medical records security.
    • Ensuring HIPAA compliance and patient safety.
  4. Mobile Applications
    • Confirming compatibility across devices, screen sizes, and operating systems.
    • Testing notifications, performance, and offline capabilities.

How to Integrate System Testing into the Software Development Process

  1. Adopt a Shift-Left Approach – Start planning system tests early in the development lifecycle.
  2. Use Continuous Integration (CI/CD) – Automate builds and deployments so system testing can be executed frequently.
  3. Automate Where Possible – Use tools like Selenium, JUnit, or Cypress for functional and regression testing.
  4. Define Clear Test Environments – Keep staging environments as close as possible to production.
  5. Collaborate Across Teams – Ensure developers, testers, and business analysts work together.
  6. Track Metrics – Measure defect density, test coverage, and execution time to improve continuously.

Conclusion

System testing is a critical step in delivering high-quality software. It validates the entire system as a whole, ensuring that all functionalities, integrations, and requirements are working correctly. By integrating system testing into your development process, you can reduce risks, improve reliability, and deliver products that users can trust.

Regression Testing: A Complete Guide for Software Teams

What is Regression Testing?

What is Regression Testing?

Regression testing is a type of software testing that ensures recent code changes, bug fixes, or new features do not negatively impact the existing functionality of an application. In simple terms, it verifies that what worked before still works now, even after updates.

This type of testing is crucial because software evolves continuously, and even small code changes can unintentionally break previously working features.

Main Features and Components of Regression Testing

  1. Test Re-execution
    • Previously executed test cases are run again after changes are made.
  2. Automated Test Suites
    • Automation is often used to save time and effort when repeating test cases.
  3. Selective Testing
    • Not all test cases are rerun; only those that could be affected by recent changes.
  4. Defect Tracking
    • Ensures that previously fixed bugs don’t reappear in later builds.
  5. Coverage Analysis
    • Focuses on areas where changes are most likely to cause side effects.

How Regression Testing Works

  1. Identify Changes
    Developers or QA teams determine which parts of the system were modified (new features, bug fixes, refactoring, etc.).
  2. Select Test Cases
    Relevant test cases from the test repository are chosen. This selection may include:
    • Critical functional tests
    • High-risk module tests
    • Frequently used features
  3. Execute Tests
    Test cases are rerun manually or through automation tools (like Selenium, JUnit, TestNG, Cypress).
  4. Compare Results
    The new test results are compared with the expected results to detect failures.
  5. Report and Fix Issues
    If issues are found, developers fix them, and regression testing is repeated until stability is confirmed.

Benefits of Regression Testing

  • Ensures Software Stability
    Protects against accidental side effects when new code is added.
  • Improves Product Quality
    Guarantees existing features continue working as expected.
  • Boosts Customer Confidence
    Users get consistent and reliable performance.
  • Supports Continuous Development
    Essential for Agile and DevOps environments where changes are frequent.
  • Reduces Risk of Production Failures
    Early detection of reappearing bugs lowers the chance of system outages.

When and How Should We Use Regression Testing?

  • After Bug Fixes
    Ensures the fix does not cause problems in unrelated features.
  • After Feature Enhancements
    New functionalities can sometimes disrupt existing flows.
  • After Code Refactoring or Optimization
    Even performance improvements can alter system behavior.
  • In Continuous Integration (CI) Pipelines
    Automated regression testing should be a standard step in CI/CD workflows.

Real World Use Cases of Regression Testing

  1. E-commerce Websites
    • Adding a new payment gateway may unintentionally break existing checkout flows.
    • Regression tests ensure the cart, discount codes, and order confirmations still work.
  2. Banking Applications
    • A bug fix in the fund transfer module could affect balance calculations or account statements.
    • Regression testing confirms financial transactions remain accurate.
  3. Mobile Applications
    • Adding a new push notification feature might impact login or navigation features.
    • Regression testing validates that old features continue working smoothly.
  4. Healthcare Systems
    • When updating electronic health record (EHR) software, regression tests confirm patient history retrieval still works correctly.

How to Integrate Regression Testing Into Your Software Development Process

  1. Maintain a Test Repository
    Keep all test cases in a structured and reusable format.
  2. Automate Regression Testing
    Use automation tools like Selenium, Cypress, or JUnit to reduce manual effort.
  3. Integrate with CI/CD Pipelines
    Trigger regression tests automatically with each code push.
  4. Prioritize Test Cases
    Focus on critical features first to optimize test execution time.
  5. Schedule Regular Regression Cycles
    Combine full regression tests with partial (smoke/sanity) regression tests for efficiency.
  6. Monitor and Update Test Suites
    As your application evolves, continuously update regression test cases to match new requirements.

Conclusion

Regression testing is not just a safety measure—it’s a vital process that ensures stability, reliability, and confidence in your software. By carefully selecting, automating, and integrating regression tests into your development pipeline, you can minimize risks, reduce costs, and maintain product quality, even in fast-moving Agile and DevOps environments.

Smoke Testing in Software Development: A Complete Guide

What is smoke testing?

In modern software development, testing is a crucial step to ensure the stability, quality, and reliability of applications. Among different types of testing, Smoke Testing stands out as one of the simplest yet most effective methods to quickly assess whether a build is stable enough for further testing.

This blog explores what smoke testing is, how it works, its features, benefits, real-world use cases, and how you can integrate it into your software development process.

What is Smoke Testing?

Smoke Testing (also called Build Verification Testing) is a type of software testing that ensures the most important functions of an application work correctly after a new build or release.

The term comes from hardware testing, where engineers would power up a device for the first time and check if it “smoked.” In software, the idea is similar — if the application fails during smoke testing, it’s not ready for deeper functional or regression testing.

Main Features and Components of Smoke Testing

  1. Build Verification
    • Performed on new builds to check if the application is stable enough for further testing.
  2. Critical Functionality Check
    • Focuses only on the essential features like login, navigation, data input, and core workflows.
  3. Shallow and Wide Testing
    • Covers all major areas of the application without going into too much detail.
  4. Automation or Manual Execution
    • Can be executed manually for small projects or automated for CI/CD pipelines.
  5. Fast Feedback
    • Provides developers and testers with immediate insights into build quality.

How Does Smoke Testing Work?

The process of smoke testing generally follows these steps:

  1. Receive the Build
    • A new build is deployed from the development team.
  2. Deploy in Test Environment
    • The build is installed in a controlled testing environment.
  3. Execute Smoke Test Cases
    • Testers run predefined test cases focusing on core functionality (e.g., login, saving records, basic navigation).
  4. Evaluate the Results
    • If the smoke test passes, the build is considered stable for further testing.
    • If it fails, the build is rejected, and the issues are reported back to developers.

Benefits of Smoke Testing

  1. Early Detection of Major Defects
    • Prevents wasted effort on unstable builds.
  2. Saves Time and Effort
    • Quickly identifies whether further testing is worthwhile.
  3. Improves Build Stability
    • Ensures only stable builds reach deeper levels of testing.
  4. Supports Continuous Integration
    • Automated smoke tests provide fast feedback in CI/CD pipelines.
  5. Boosts Confidence
    • Developers and testers gain assurance that the software is fundamentally working.

When and How Should We Use Smoke Testing?

  • After Every New Build
    • Run smoke tests to validate basic functionality before regression or system testing.
  • During Continuous Integration/Delivery (CI/CD)
    • Automate smoke tests to ensure each code commit does not break critical functionality.
  • In Agile Environments
    • Use smoke testing at the end of every sprint to ensure incremental builds remain stable.

Real-World Use Cases of Smoke Testing

  1. Web Applications
    • Example: After a new deployment of an e-commerce platform, smoke tests might check if users can log in, add items to a cart, and proceed to checkout.
  2. Mobile Applications
    • Example: For a banking app, smoke tests ensure users can log in, view account balances, and transfer funds before more advanced testing begins.
  3. Enterprise Systems
    • Example: In large ERP systems, smoke tests verify whether dashboards load, reports generate, and user roles function properly.
  4. CI/CD Pipelines
    • Example: Automated smoke tests run after every commit in Jenkins or GitHub Actions, ensuring no critical features are broken.

How to Integrate Smoke Testing Into Your Software Development Process

  1. Define Critical Features
    • Identify the most important features that must always work.
  2. Create Reusable Test Cases
    • Write simple but broad test cases that cover the entire system’s core functionalities.
  3. Automate Whenever Possible
    • Use testing frameworks like Selenium, Cypress, or JUnit to automate smoke tests.
  4. Integrate With CI/CD Tools
    • Configure Jenkins, GitLab CI, or GitHub Actions to trigger smoke tests after every build.
  5. Continuous Monitoring
    • Regularly review and update smoke test cases as the application evolves.

Conclusion

Smoke testing acts as the first line of defense in software testing. It ensures that critical functionalities are intact before investing time and resources into deeper testing activities. Whether you’re working with web apps, mobile apps, or enterprise systems, smoke testing helps maintain build stability and improves overall software quality.

By integrating smoke testing into your CI/CD pipeline, you can speed up development cycles, reduce risks, and deliver stable, reliable software to your users.

Contact Testing in Software Development: A Complete Guide

What is contact testing?

What is Contact Testing?

Contact testing is a software testing approach where different components, services, or systems that “contact” each other are tested to ensure they communicate correctly. It focuses on the integration points between units or modules, rather than testing each component in isolation.

The goal is to verify that the interfaces, data exchanges, and dependencies between components work as expected. While unit tests validate the logic inside a module, contact tests validate the correctness of the connections between modules.

In short: contact testing ensures that pieces of software can talk to each other reliably.

How Does Contact Testing Work?

Contact testing works by simulating real interactions between two or more components in a controlled environment.

  1. Identify contact points – Determine where modules, APIs, or services interact (e.g., function calls, REST endpoints, message brokers).
  2. Define contracts and expectations – Define what inputs, outputs, and protocols the interaction should follow.
  3. Set up a test environment – Create a test harness or mock services to replicate real communication.
  4. Execute tests – Run tests that validate requests, responses, data formats, error handling, and edge cases.
  5. Validate results – Ensure both sides of the interaction behave correctly.

Example:
If a front-end application makes a call to a backend API, contact tests check if:

  • The request is formatted correctly (headers, payload, authentication).
  • The backend responds with the correct status codes and data structures.
  • Error scenarios (timeouts, invalid data) are handled properly.

Features and Components of Contact Testing

  1. Interface Validation
    • Ensures APIs, methods, and endpoints conform to expected definitions.
  2. Data Contract Verification
    • Confirms that the structure, types, and formats of exchanged data are correct.
  3. Dependency Testing
    • Validates that dependent services respond as expected.
  4. Error Handling Checks
    • Tests how systems behave under failures (network issues, incorrect inputs).
  5. Automation Support
    • Easily integrated into CI/CD pipelines for continuous validation.
  6. Environment Simulation
    • Uses stubs, mocks, or test doubles to mimic dependencies when the real ones are unavailable.

Advantages and Benefits

  1. Early Bug Detection
    • Detects integration issues before deployment.
  2. Improved Reliability
    • Ensures systems interact smoothly, reducing runtime errors.
  3. Better Communication Between Teams
    • Clearly defined contracts improve collaboration between frontend, backend, and third-party teams.
  4. Supports Agile and Microservices
    • Critical in distributed systems where many services interact.
  5. Reduced Production Failures
    • By validating assumptions early, fewer surprises occur in production.

When and How Should We Use Contact Testing?

  • When to Use
    • When multiple teams build components independently.
    • When integrating third-party APIs or services.
    • In microservices architectures with many dependencies.
    • Before full end-to-end testing to catch issues early.
  • How to Use
    • Define contracts (OpenAPI/Swagger for REST APIs, Protobuf for gRPC).
    • Create automated tests that verify requests and responses.
    • Run tests as part of CI/CD pipelines after unit tests but before full system tests.
    • Use tools like Pact, WireMock, or Postman/Newman for contract and contact testing.

Real-World Examples

  1. E-commerce Platform
    • Frontend calls backend to fetch product details. Contact tests verify that product IDs, prices, and stock status are correctly retrieved.
  2. Payment Gateway Integration
    • Contact tests ensure the application sends payment requests correctly and handles responses (success, failure, timeout) as expected.
  3. Microservices in Banking
    • Account service and transaction service communicate via REST APIs. Contact tests validate data formats (account number, balance) and error handling (invalid accounts, insufficient funds).
  4. Healthcare System
    • Contact tests ensure patient records shared between hospital modules follow the correct format and confidentiality rules.

How to Integrate Contact Testing into the Software Development Process

  1. Define Contracts Early
    • Use schemas or interface definitions as a shared agreement between teams.
  2. Implement Contact Tests Alongside Unit Tests
    • Ensure each service’s contact points are tested before integration.
  3. Automate in CI/CD Pipelines
    • Run contact tests automatically on pull requests and deployments.
  4. Use Mock Servers
    • For unavailable or costly dependencies, use mock servers to simulate interactions.
  5. Continuous Monitoring
    • Extend contact testing into production with monitoring tools to detect real-world deviations.

Conclusion

Contact testing is a crucial step between unit testing and full system testing. It ensures that modules, services, and APIs can communicate correctly, reducing integration risks. By incorporating contact tests into your development lifecycle, you improve software reliability, minimize production issues, and enable smoother collaboration across teams.

Whether you’re building microservices, APIs, or integrating third-party tools, contact testing helps validate trust at every connection point.

Fuzzing: A practical guide for software engineers

What is fuzzing?

Fuzzing is an automated testing technique that feeds large numbers of malformed, unexpected, or random inputs to a program to find crashes, hangs, memory corruption, and other security/robustness bugs. This post explains what fuzzing is, key features and types, how it works (step-by-step), advantages and limitations, real-world use cases, and exactly how to integrate fuzzing into a modern software development process.

What is fuzzing?

Fuzzing (or “fuzz testing”) is an automated technique for finding bugs by supplying a program with many inputs that are unusual, unexpected, or deliberately malformed, and observing for failures (crashes, assertion failures, timeouts, resource leaks, incorrect output, etc.). Fuzzers range from simple random-input generators to sophisticated, feedback-driven engines that learn which inputs exercise new code paths.

Fuzzing is widely used both for security (discovering vulnerabilities an attacker could exploit) and for general robustness testing (finding crashes and undefined behaviour).

Key features (explained)

  1. Automated input generation
    • Fuzzers automatically produce a large volume of test inputs — orders of magnitude more than manual testing — which increases the chance of hitting rare edge cases.
  2. Monitoring and detection
    • Fuzzers monitor the program for signals of failure: crashes, memory-safety violations (use-after-free, buffer overflow), assertion failures, infinite loops/timeouts, and sanitizer reports.
  3. Coverage / feedback guidance
    • Modern fuzzers use runtime feedback (e.g., code coverage) to prefer inputs that exercise previously unvisited code paths, greatly improving effectiveness over pure random mutation.
  4. Instrumentation
    • Instrumentation (compile-time or runtime) gathers execution information such as branch coverage, comparisons, or tainting. This enables coverage-guided fuzzing and faster discovery of interesting inputs.
  5. Test harness / drivers
    • The target often needs a harness — a small wrapper that feeds inputs to a specific function or module — letting fuzzers target internal code directly instead of whole applications.
  6. Minimization and corpus management
    • Good fuzzing workflows reduce (minimize) crashing inputs to the smallest test case that still reproduces the issue, and manage corpora of “interesting” seeds to guide future fuzzing.
  7. Triage and deduplication
    • After crashes are detected, automated triage groups duplicates (same root cause), classifies severity, and collects debugging artifacts (stack trace, sanitizer output).

How fuzzing works — step by step

  1. Choose the target
    • Could be a file parser (image, audio), protocol handler, CLI, library function, or an API endpoint.
  2. Prepare a harness
    • Create a small driver that receives raw bytes (or structured samples), calls the function under test, and reports failures. For binaries, you can fuzz the whole process; for libraries, fuzz the API function directly.
  3. Select a fuzzer and configure
    • Pick a fuzzer (mutation-based, generation-based, coverage-guided, etc.) and configure timeouts, memory limits, sanitizers, and the initial corpus (seed files).
  4. Instrumentation / sanitizers
    • Build the target with sanitizers (AddressSanitizer, UndefinedBehaviorSanitizer, LeakSanitizer) and with coverage hooks (if using coverage-guided fuzzing). Instrumentation enables detection and feedback.
  5. Run the fuzzer
    • The fuzzer runs thousands to millions of inputs, mutating seeds, tracking coverage, and prioritizing inputs that increase coverage.
  6. Detect and record failures
    • On crash or sanitizer report, the fuzzer saves the input and a log, optionally minimizing the input and capturing a stack trace.
  7. Triage
    • Deduplicate crashes (e.g., by stack trace), prioritize (security impact, reproducibility), and assign to developers with reproduction steps.
  8. Fix & regress
    • Developers fix bugs and add new regression tests (the minimized crashing input) to the test suite to prevent regressions.
  9. Continuous fuzzing
    • Add long-running fuzzing to nightly/CI (or to a fuzzing infrastructure) to keep finding issues as code changes.

Types of fuzzing

By knowledge of the target

  • Black-box fuzzing
    • No knowledge of internal structure. Inputs are sent to the program and only external outcomes are observed (e.g., crash/no crash).
    • Cheap and easy to set up, but less efficient for deep code.
  • White-box fuzzing
    • Uses program analysis (symbolic execution or constraint solving) to craft inputs that satisfy specific paths/conditions.
    • Can find deep logical bugs but is computationally expensive and may not scale to large codebases.
  • Grey-box fuzzing
    • Hybrid approach: uses lightweight instrumentation (coverage) to guide mutations. Most modern practical fuzzers (AFL-family, libFuzzer) are grey-box.
    • Good balance of performance and depth.

By generation strategy

  • Mutation-based
    • Start from seed inputs and apply random or guided mutations (bit flips, splice, insert). Effective when good seeds exist.
  • Generation-based
    • Inputs are generated from a model/grammar (e.g., a JSON generator or network protocol grammar). Good for structured inputs and when valid format is critical.
  • Grammar-based
    • Use a formal grammar of the input format to generate syntactically valid/interesting inputs, often combined with mutation.

By goal/technique

  • Coverage-guided fuzzing
    • Uses runtime coverage to prefer inputs that exercise new code paths. Highly effective for native code.
  • Differential fuzzing
    • Runs the same input against multiple implementations (e.g., different JSON parsers) and looks for inconsistencies in outputs.
  • Mutation + symbolic (concolic)
    • Combines concrete execution with symbolic analysis to solve comparisons and reach guarded branches.
  • Network / protocol fuzzing
    • Sends malformed packets/frames to network services; may require stateful harnesses to exercise authentication or session flows.
  • API / REST fuzzing
    • Targets HTTP APIs with unexpected payloads, parameter fuzzing, header fuzzing, and sequence fuzzing (order of calls).

Advantages and benefits

  • High bug-finding power
    • Finds crashes, memory errors, and edge cases that manual tests and static analysis often miss.
  • Scalable and parallelizable
    • Many fuzzers scale horizontally — run multiple instances on many cores/machines.
  • Security-driven
    • Effective at revealing exploitable memory-safety bugs (especially for C/C++), reducing attack surface.
  • Automatable
    • Can be integrated into CI/CD or as long-running background jobs (nightly fuzzers).
  • Low human effort per test
    • After harness creation and configuration, fuzzing generates and runs vast numbers of tests automatically.
  • Regression prevention
    • Crashes found by fuzzing become regression tests that prevent reintroduction of bugs.

Limitations and considerations

  • Need a good harness or seeds
    • Mutation fuzzers need representative seed corpus; generation fuzzers need accurate grammars/models.
  • Can be noisy
    • Many crashes may be duplicates or low priority; triage is essential.
  • Not a silver bullet
    • Fuzzing targets runtime bugs; it won’t find logical errors that don’t cause abnormal behaviour unless you instrument checks.
  • Resource usage
    • Fuzzing can be CPU- and time-intensive. Long-running fuzzing infrastructure helps.
  • Coverage vs depth tradeoff
    • Coverage-guided fuzzers are excellent for code coverage, but for complex semantic checks you may need white-box techniques or custom checks.

Real-world examples (practical case studies)

Example 1 — Image parser in a media library

Scenario: A C++ image decoding library processes user-supplied images.
What you do:

  • Create a harness that takes raw bytes and calls the image decode function.
  • Seed with a handful of valid image files (PNG, JPEG).
  • Build with AddressSanitizer (ASan) and compile-time coverage instrumentation.
  • Run a coverage-guided fuzzer (mutation-based) for several days.
    Outcome: Fuzzer generates a malformed chunk that causes a heap buffer overflow. ASan detects it; the input is minimized and stored. Developer fixes bounds check and adds the minimized file as a regression test.

Why effective: Parsers contain lots of complex branches; small malformed bytes often trigger deep logic leading to memory safety issues.

Example 2 — HTTP API fuzzing for a microservice

Scenario: A REST microservice parses JSON payloads and stores data.
What you do:

  • Use a REST fuzzer that mutates fields, numbers, strings, and structure (or use generation from OpenAPI spec + mutation).
  • Include authentication tokens and sequence flows (create → update → delete).
  • Monitor for crashes, unhandled exceptions, incorrect status codes, and resource consumption.
    Outcome: Fuzzer finds an unexpected null pointer when a certain nested structure is missing — leads to 500 errors. Fix adds input validation and better error handling.

Why effective: APIs often trust input structure; fuzzing uncovers missing validation, parsing edge cases, or unintended code paths.

Example 3 — Kernel / driver fuzzing (security focused)

Scenario: Fuzzing a kernel-facing driver interface (e.g., ioctls).
What you do:

  • Use a specialized kernel fuzzer that generates syscall sequences or malformed ioctl payloads, and runs on instrumented kernel builds.
  • Use persistent fuzzing clusters to run millions of testcases.
    Outcome: Discover a use-after-free triggered by a race of ioctl calls; leads to CVE fix.

Why effective: Low-level concise interfaces are high-risk; fuzzers explore sequences and inputs that humans rarely test.

How and when to use fuzzing (practical guidance)

When to fuzz

  • Parsers and deserializers (image, audio, video, document formats).
  • Protocol implementations (HTTP, TLS, custom binary protocols).
  • Native libraries in C/C++ — memory safety bugs are common here.
  • Security-critical code paths (authentication, cryptography wrappers, input validation).
  • Newly written code — fuzz early to catch regressions.
  • Third-party code you integrate: fuzzing can reveal hidden assumptions.

How to pick a strategy

  • If you have sample files → start with coverage-guided mutation fuzzer and seeds.
  • If input is structured (grammar) → use grammar-based or generation fuzzers.
  • If testing across implementations → differential fuzzing.
  • If deep logical constraints exist → consider white-box/concolic tooling or property-based tests.

Integrating fuzzing into your development process

Here’s a practical, step-by-step integration plan that works for teams of all sizes.

1) Start small — pick one high-value target

  • Choose a small, high-risk component (parser, protocol handler, or a library function).
  • Create a minimal harness that feeds arbitrary bytes (or structured inputs) to the function.

2) Build for fuzzing

  • Compile with sanitizers (ASan, UBSan) and enable coverage instrumentation (clang’s libFuzzer or AFL compile options).
  • Add deterministic seed corpus (valid samples) and known edge cases.

3) Local experiments

  • Run quick local fuzzing sessions to ensure harness is stable and crashes are reproducible.
  • Implement simple triage: crash minimization and stack traces.

4) Add fuzzing to CI (short runs)

  • Add a lightweight fuzz job to CI that runs for a short time (e.g., 10–30 minutes) on PRs that touch the target code.
  • If new issues are found, the PR should fail or annotate with findings.

5) Long-running fuzzing infrastructure

  • Run continuous/overnight fuzzing on dedicated workers (or cloud instances). Persist corpora and crashes.
  • Use parallel instances with different seeds and mutation strategies.

6) Automate triage and ticket creation

  • Use existing tools (or scripts) to group duplicate crashes, collect sanitizer outputs, and file tickets or create GitHub issues with reproducer and stack trace.

7) Make regressions tests mandatory

  • Every fix must include the minimized crashing input as a unit/regression test. Add file to tests/fuzz/regressors.

8) Expand coverage across the codebase

  • Once comfortable, gradually add more targets, including third-party libraries, and integrate API fuzzing for microservices.

9) Operational practices

  • Monitor fuzzing metrics: code coverage, unique crashes, time to first crash, triage backlog.
  • Rotate seeds, update grammars, and re-run fuzzers after major changes.
  • Educate developers on writing harnesses and interpreting sanitizer output.

Practical tips & best practices

  • Use sanitizers (ASan/UBSan/MSan) to catch subtle memory and undefined behaviour.
  • Start with good seeds — a few valid samples dramatically improves mutation fuzzers.
  • Minimize crashing inputs automatically to simplify debugging.
  • Keep harnesses stable — harnesses that themselves crash or leak make fuzzing results noisy.
  • Persist and version corpora — adding new seeds that found coverage helps future fuzzes.
  • Prioritize triage — a backlog of unanalyzed crashes wastes value.
  • Use fuzzing results as developer-owned responsibilities — failing to fix crashes undermines confidence in fuzzing.

Example minimal harness (pseudocode)

C (using libFuzzer-style entry):

#include <stddef.h>
#include <stdint.h>

// target function in your library
extern int parse_image(const uint8_t *data, size_t size);

int LLVMFuzzerTestOneInput(const uint8_t *data, size_t size) {
    // call into the library under test
    parse_image(data, size);
    return 0; // non-zero indicates error to libFuzzer
}

Python harness for a CLI program (mutation via custom fuzzer):

import subprocess, tempfile

def run_one(input_bytes):
    with tempfile.NamedTemporaryFile() as f:
        f.write(input_bytes)
        f.flush()
        subprocess.run(["/path/to/mytool", f.name], timeout=5)

# fuzzing loop (very simple)
import os, random
seeds = [b"\x89PNG...", b"\xff\xd8..."]
while True:
    s = bytearray(random.choice(seeds))
    # random mutation
    for _ in range(10):
        i = random.randrange(len(s))
        s[i] = random.randrange(256)
    try:
        run_one(bytes(s))
    except Exception as e:
        print("Crash:", e)
        break

Suggested tools & ecosystem (conceptual, pick what fits your stack)

  • Coverage-guided fuzzers: libFuzzer, AFL/AFL++ family, honggfuzz.
  • Grammar/generation: Peach, LangFuzz, custom generators (JSON/XML/ASN.1).
  • API/HTTP fuzzers: OWASP ZAP, Burp Intruder/Extender, custom OpenAPI-based fuzzers.
  • Infrastructure: OSS-Fuzz (for open source projects), self-hosted clusters, cloud instances.
  • Sanitizers: AddressSanitizer, UndefinedBehaviorSanitizer, LeakSanitizer, MemorySanitizer.
  • CI integration: run short fuzz sessions in PR checks; long runs on scheduled runners.

Note: choose tools that match your language and build system. For many C/C++ projects, libFuzzer + ASan is a well-supported starter combo; for binaries without recompilation, AFL with QEMU mode or network fuzzers may be used.

Quick checklist to get started (copy into your project README)

  • Pick target (parser, API, library function).
  • Create minimal harness and seed corpus.
  • Build with sanitizers and coverage instrumentation.
  • Run a local fuzzing session and collect crashes.
  • Minimize crashes and add regressors to test suite.
  • Add short fuzz job to PR CI; schedule long fuzz runs nightly.
  • Automate triage and track issues.

Conclusion

Fuzzing is one of the highest-leverage testing techniques for finding low-level crashes and security bugs. Start with one target, instrument with sanitizers and coverage, run both short CI fuzz jobs and long-running background fuzzers, and make fixing and regressing fuzz-found issues part of your development flow. Over time you’ll harden parsers, network stacks, and critical code paths — often catching bugs that would have become security incidents in production.

Blog at WordPress.com.

Up ↑