Search

Software Engineer's Notes

Tag

programming

Understanding Dependency Injection in Software Development

Understanding Dependency Injection

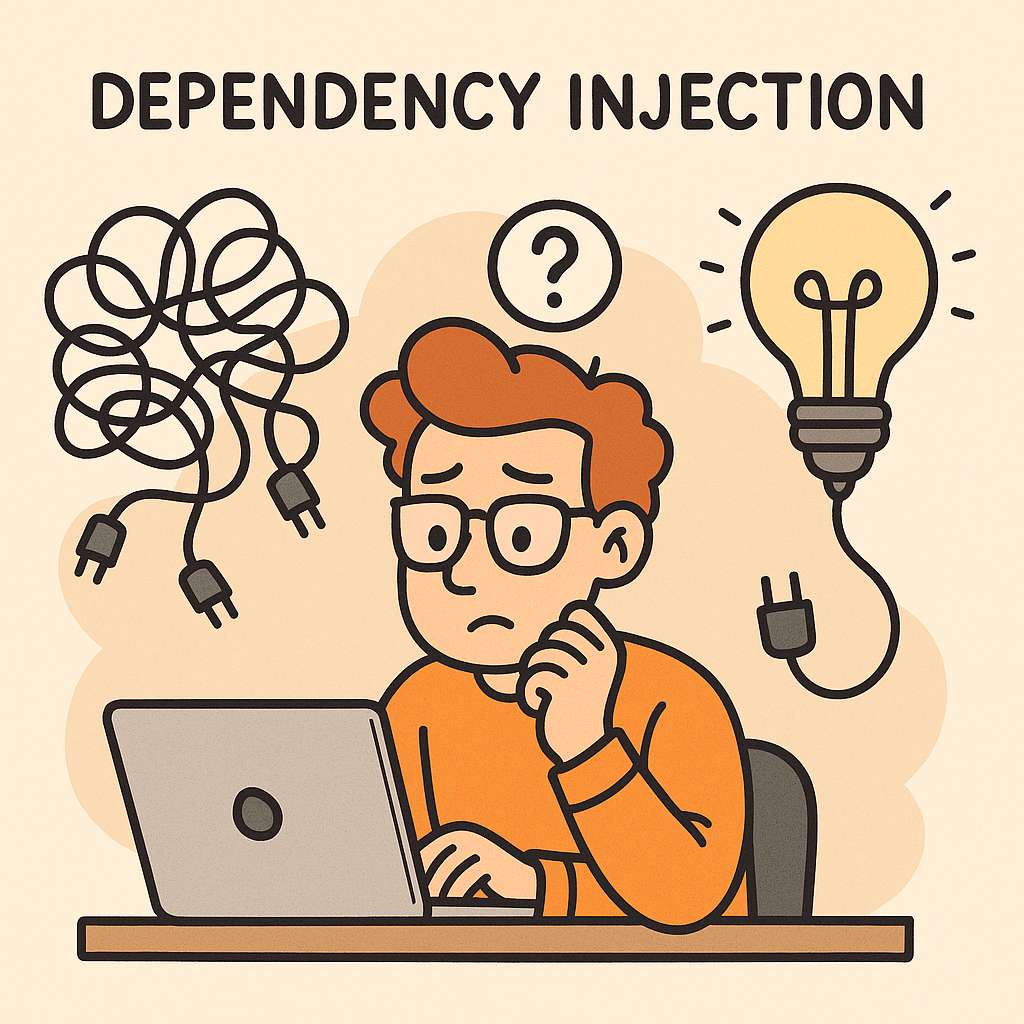
What is Dependency Injection?

Dependency Injection (DI) is a design pattern in software engineering where the dependencies of a class or module are provided from the outside, rather than being created internally. In simpler terms, instead of a class creating the objects it needs, those objects are “injected” into it. This approach decouples components, making them more flexible, testable, and maintainable.

For example, instead of a class instantiating a database connection itself, the connection object is passed to it. This allows the class to work with different types of databases without changing its internal logic.

A Brief History of Dependency Injection

The concept of Dependency Injection has its roots in the Inversion of Control (IoC) principle, which was popularized in the late 1990s and early 2000s. Martin Fowler formally introduced the term “Dependency Injection” in 2004, describing it as a way to implement IoC. Frameworks like Spring (Java) and later .NET Core made DI a first-class citizen in modern software development, encouraging developers to separate concerns and write loosely coupled code.

Main Components of Dependency Injection

Dependency Injection typically involves the following components:

  • Service (Dependency): The object that provides functionality (e.g., a database service, logging service).
  • Client (Dependent Class): The object that depends on the service to function.
  • Injector (Framework or Code): The mechanism responsible for providing the service to the client.

For example, in Java Spring:

  • The database service is the dependency.
  • The repository class is the client.
  • The Spring container is the injector that wires them together.

Why is Dependency Injection Important?

DI plays a crucial role in writing clean and maintainable code because:

  • It decouples the creation of objects from their usage.
  • It makes code more adaptable to change.
  • It enables easier testing by allowing dependencies to be replaced with mocks or stubs.
  • It reduces the “hardcoding” of configurations and promotes flexibility.

Benefits of Dependency Injection

  1. Loose Coupling: Clients are independent of specific implementations.
  2. Improved Testability: You can easily inject mock dependencies for unit testing.
  3. Reusability: Components can be reused in different contexts.
  4. Flexibility: Swap implementations without modifying the client.
  5. Cleaner Code: Reduces boilerplate code and centralizes dependency management.

When and How Should We Use Dependency Injection?

  • When to Use:
    • In applications that require flexibility and maintainability.
    • When components need to be tested in isolation.
    • In large systems where dependency management becomes complex.
  • How to Use:
    • Use frameworks like Spring (Java), Guice (Java), Dagger (Android), or ASP.NET Core built-in DI.
    • Apply DI principles when designing classes—focus on interfaces rather than concrete implementations.
    • Configure injectors (containers) to manage dependencies automatically.

Real World Examples of Dependency Injection

Spring Framework (Java):
A service class can be injected into a controller without explicitly creating an instance.

    @Service
    public class UserService {
        public String getUser() {
            return "Emre";
        }
    }
    
    @RestController
    public class UserController {
        private final UserService userService;
    
        @Autowired
        public UserController(UserService userService) {
            this.userService = userService;
        }
    
        @GetMapping("/user")
        public String getUser() {
            return userService.getUser();
        }
    }


    Conclusion

    Dependency Injection is more than just a pattern—it’s a fundamental approach to building flexible, testable, and maintainable software. By externalizing the responsibility of managing dependencies, developers can focus on writing cleaner code that adapts easily to change. Whether you’re building a small application or a large enterprise system, DI can simplify your architecture and improve long-term productivity.

    Understanding the YAGNI Principle in Software Development

    Understanding YAGNI principle

    In software engineering, simplicity and focus are two of the most important values for building sustainable systems. One of the principles that embodies this mindset is YAGNI. Let’s dive deep into what it is, why it matters, and how you can apply it effectively in your projects.

    What is the YAGNI Principle?

    YAGNI stands for “You Aren’t Gonna Need It”.
    It is a principle from Extreme Programming (XP) that reminds developers not to implement functionality until it is absolutely necessary.

    In other words, don’t build features, classes, methods, or infrastructure just in case they might be useful in the future. Instead, focus on what is required right now.

    How Do You Apply YAGNI?

    Applying YAGNI in practice requires discipline and clear communication within the development team. Here are key ways to apply it:

    • Implement only what is needed today: Build features to meet current requirements, not hypothetical future ones.
    • Rely on requirements, not assumptions: Only code against documented and confirmed user stories.
    • Refactor instead of overdesigning: When new requirements emerge, refactor your existing system instead of building speculative features in advance.
    • Keep feedback loops short: Use Agile methods like iterative sprints and regular demos to ensure you’re only building what’s needed.

    Benefits of the YAGNI Principle

    1. Reduced Complexity
      By avoiding unnecessary code, your system remains easier to understand, maintain, and test.
    2. Lower Development Costs
      Every line of code written has a cost. YAGNI prevents waste by ensuring developers don’t spend time on features that might never be used.
    3. Improved Focus
      Developers can concentrate on solving the real problems instead of theoretical ones.
    4. Flexibility and Adaptability
      Since you’re not tied down to speculative designs, your software can evolve naturally as real requirements change.

    Key Considerations When Using YAGNI

    • Balance with Future-Proofing: While YAGNI warns against overengineering, you still need good architecture and coding standards that allow future changes to be integrated smoothly.
    • Avoid “Shortcut” Thinking: YAGNI doesn’t mean ignoring best practices like clean code, tests, or proper design patterns. It only discourages unnecessary features.
    • Understand the Context: In some industries (e.g., healthcare, finance), regulatory or compliance requirements may require upfront planning. Use YAGNI carefully in such cases.

    Real-World Examples of YAGNI

    1. Over-Engineering a Login System
      A startup might only need email/password login for their MVP. Adding OAuth integrations with Facebook, Google, and GitHub from day one would waste time if the product hasn’t even validated its user base yet.
    2. Premature Optimization
      Developers sometimes write highly complex caching logic before knowing if performance is actually an issue. With YAGNI, you wait until performance bottlenecks appear before optimizing.
    3. Unused API Endpoints
      Teams sometimes build API endpoints “because we might need them later.” YAGNI says to avoid this—add them only when there is a confirmed use case.

    How Can We Apply YAGNI in Our Software Development Process?

    • Adopt Agile Methodologies: Use Scrum or Kanban to deliver small increments of value based on actual requirements.
    • Prioritize Requirements Clearly: Work with product owners to ensure that only validated, high-value features are included in the backlog.
    • Practice Test-Driven Development (TDD): Write tests for real, existing requirements instead of speculative scenarios.
    • Encourage Code Reviews: Reviewers can identify overengineered code and push back on “just in case” implementations.
    • Refactor Regularly: Accept that your system will change and evolve; keep it lean so changes are manageable.

    Conclusion

    The YAGNI principle is about restraint, focus, and pragmatism in software development. By resisting the temptation to overbuild and sticking to what is truly necessary, you not only save time and resources but also keep your systems cleaner, simpler, and more adaptable for the future.

    When applied with discipline, YAGNI can significantly improve the agility and sustainability of your software development process.

    KISS Principle in Computer Science

    What is KISS principle?

    What is the KISS Principle?

    The KISS principle stands for “Keep It Simple, Stupid”, a design philosophy that emphasizes simplicity in systems, software, and problem-solving. Originally coined in the 1960s by the U.S. Navy, the principle highlights that most systems work best when they are kept simple rather than made unnecessarily complex.

    In computer science, KISS means writing code, designing architectures, and creating solutions that are straightforward, easy to understand, and easy to maintain. Simplicity reduces the likelihood of errors, speeds up development, and ensures long-term scalability.

    How Do You Apply the KISS Principle?

    Applying KISS requires conscious effort to avoid over-engineering or introducing complexity that is not needed. Some ways to apply it include:

    • Write readable code: Use clear naming conventions, simple logic, and avoid clever but confusing shortcuts.
    • Break problems into smaller pieces: Solve problems with modular, self-contained components.
    • Avoid unnecessary abstractions: Don’t add extra layers, classes, or patterns unless they solve a real need.
    • Leverage existing solutions: Use built-in language features or libraries rather than reinventing the wheel.
    • Document simply: Ensure documentation is concise and easy to follow.

    Benefits of the KISS Principle

    Keeping things simple offers multiple advantages:

    1. Maintainability – Simple systems are easier to maintain and update over time.
    2. Readability – Developers can quickly understand the logic without deep onboarding.
    3. Fewer bugs – Simplicity reduces the risk of introducing hidden issues.
    4. Faster development – Less complexity means faster coding, testing, and deployment.
    5. Better collaboration – Teams can work more effectively on systems that are easier to grasp.

    Main Considerations When Using KISS

    While simplicity is powerful, there are important considerations:

    • Balance with functionality: Simplicity should not come at the cost of missing essential features.
    • Avoid oversimplification: Stripping away too much may lead to fragile designs.
    • Think ahead, but not too far: Plan for scalability, but don’t build for problems that don’t exist yet.
    • Consistency matters: Simplicity is most effective when applied consistently across the entire codebase.

    Real-World Examples of KISS

    1. Unix Philosophy – Each tool does one thing well (e.g., grep, ls, cat). Instead of one complex tool, simple utilities are combined for powerful results.
    2. Hello World programs – A minimal program to test environments. It demonstrates clarity without unnecessary detail.
    3. RESTful APIs – Designed with simple, stateless principles that are easier to understand and scale compared to overly complex RPC systems.
    4. Version Control (Git) – Core commands like commit, push, and pull follow simple workflows. Advanced features exist, but the basics are simple and intuitive.

    Applying KISS in Software Development Processes

    Here are practical ways to embed KISS into your workflow:

    • Code reviews: Encourage reviewers to question unnecessary complexity.
    • Agile and iterative development: Build simple versions first (MVPs) and expand only if needed.
    • Design discussions: Ask, “Can this be made simpler?” before finalizing architectures.
    • Testing strategies: Simple unit tests are often more reliable than over-engineered test suites.
    • Refactoring sessions: Regularly revisit old code to simplify it as the system grows.

    Conclusion

    The KISS principle is a timeless guide for software engineers: simplicity is the key to robustness, maintainability, and efficiency. By applying it consistently, teams can build systems that last longer, are easier to maintain, and deliver more value with fewer headaches.

    Understanding the DRY Principle in Computer Science

    What is dry principle?

    In software engineering, one of the most valuable design principles is the DRY principle. DRY stands for “Don’t Repeat Yourself”, and it is a fundamental guideline that helps developers write cleaner, more maintainable, and efficient code.

    What is the DRY Principle?

    The DRY principle was first introduced in the book The Pragmatic Programmer by Andy Hunt and Dave Thomas. It emphasizes that every piece of knowledge should have a single, unambiguous, authoritative representation within a system.

    In simpler terms, it means avoiding code or logic duplication. When functionality is repeated in multiple places, it increases the risk of errors, makes maintenance harder, and slows down development.

    How Do You Apply the DRY Principle?

    Applying DRY involves identifying repetition in code, logic, or even processes, and then refactoring them into reusable components. Here are some ways:

    • Functions and Methods: If you see the same block of code in multiple places, extract it into a method or function.
    • Classes and Inheritance: Use object-oriented design to encapsulate shared behavior.
    • Libraries and Modules: Group reusable logic into shared libraries or modules to avoid rewriting the same code.
    • Configuration Files: Store common configurations (like database connections or API endpoints) in a single place instead of scattering them across multiple files.
    • Database Normalization: Apply DRY at the data level by ensuring information is stored in one place and referenced where needed.

    Benefits of the DRY Principle

    1. Improved Maintainability
      When changes are needed, you only update the logic in one place, reducing the chance of introducing bugs.
    2. Reduced Code Size
      Less duplication means fewer lines of code, making the codebase easier to read and navigate.
    3. Better Consistency
      Logic stays uniform throughout the system since it comes from a single source of truth.
    4. Faster Development
      Reusing well-tested components speeds up feature development and reduces time spent debugging.

    Main Considerations When Using DRY

    While DRY is powerful, it must be applied thoughtfully:

    • Over-Abstraction: Extracting too early or without enough context may lead to unnecessary complexity.
    • Readability vs. Reuse: Sometimes, duplicating a small piece of code is better than forcing developers to chase references across multiple files.
    • Context Awareness: Just because two code blocks look similar doesn’t mean they serve the same purpose. Blindly merging them could create confusion.

    Real-World Examples of DRY in Action

    1. Web Development
      Instead of writing the same HTML header and footer on every page, developers use templates or components (e.g., React components, Thymeleaf templates in Spring, or partials in Django).
    2. Database Design
      Instead of storing customer address details in multiple tables, create one address table and reference it with foreign keys. This avoids inconsistency.
    3. API Development
      Common error handling logic is extracted into a middleware or filter instead of repeating the same try-catch blocks in every endpoint.
    4. Configuration Management
      Storing connection strings, API keys, or environment variables in a central config file instead of embedding them across multiple services.

    How to Apply DRY in Software Development Projects

    1. Code Reviews
      Encourage teams to identify duplicated code during reviews and suggest refactoring.
    2. Use Frameworks and Libraries
      Leverage well-established libraries to handle common tasks (logging, authentication, database access) instead of rewriting them.
    3. Refactor Regularly
      As projects grow, revisit the codebase to consolidate repeating logic.
    4. Adopt Best Practices
      • Write modular code.
      • Follow design patterns (like Singleton, Factory, or Strategy) when applicable.
      • Use version control to track refactoring safely.
    5. Balance DRY with Other Principles
      Combine DRY with principles like KISS (Keep It Simple, Stupid) and YAGNI (You Aren’t Gonna Need It) to avoid unnecessary abstractions.

    Conclusion

    The DRY principle is more than just a coding style rule—it’s a mindset that reduces duplication, improves maintainability, and keeps software consistent. By applying it carefully, balancing reuse with clarity, and leveraging it in real-world contexts, teams can significantly improve the quality and scalability of their projects.

    Understanding Heisenbugs in Software Development

    Understanding Heisenbugs

    What is a Heisenbug?

    A Heisenbug is a type of software bug that seems to disappear or alter its behavior when you attempt to study, debug, or isolate it. In other words, the very act of observing or interacting with the system changes the conditions that make the bug appear.

    These bugs are particularly frustrating because they are inconsistent and elusive. Sometimes, they only appear under specific conditions like production workloads, certain timing scenarios, or hardware states. When you add debugging statements, logs, or step through the code, the problem vanishes, leaving you puzzled.

    The term is derived from the Heisenberg Uncertainty Principle in quantum physics, which states that you cannot precisely measure both the position and momentum of a particle at the same time. Similarly, a Heisenbug resists measurement or observation.

    History of the Term

    The term Heisenbug originated in the 1980s among computer scientists and software engineers. It became popular in the field of debugging complex systems, where timing and concurrency played a critical role. The concept was closely tied to emerging issues in multithreading, concurrent programming, and distributed systems, where software behavior could shift when studied.

    The word became part of hacker jargon and was documented in The New Hacker’s Dictionary (based on the Jargon File), spreading the concept widely among programmers.

    Real-World Examples of Heisenbugs

    1. Multithreading race conditions
      A program that crashes only when two threads access shared data simultaneously. Adding a debug log alters the timing, preventing the crash.
    2. Memory corruption in C/C++
      A program that overwrites memory accidentally may behave unpredictably. When compiled with debug flags, memory layout changes, and the bug disappears.
    3. Network communication issues
      A distributed application that fails when many requests arrive simultaneously, but behaves normally when slowed down during debugging.
    4. UI rendering bugs
      A graphical application where a glitch appears in release mode but never shows up when using a debugger or extra logs.

    How Do We Know If We Encounter a Heisenbug?

    You may be dealing with a Heisenbug if:

    • The issue disappears when you add logging or debugging code.
    • The bug only shows up in production but not in development or testing.
    • Timing, workload, or environment changes make the bug vanish or behave differently.
    • You cannot consistently reproduce the error under controlled debugging conditions.

    Best Practices to Handle Heisenbugs

    1. Use Non-Intrusive Logging
      Instead of adding print statements everywhere, rely on structured logging, performance counters, or telemetry that doesn’t change timing drastically.
    2. Reproduce in Production-like Environments
      Set up staging environments that mirror production workloads, hardware, and configurations as closely as possible.
    3. Automated Stress and Concurrency Testing
      Run automated tests with randomized workloads, race condition detection tools, or fuzzing to expose hidden timing issues.
    4. Version Control Snapshots
      Keep precise build and configuration records. Small environment differences can explain why the bug shows up in one setting but not another.
    5. Use Tools Designed for Concurrency Bugs
      Tools like Valgrind, AddressSanitizer, ThreadSanitizer, or specialized profilers can sometimes catch hidden issues.

    How to Debug a Heisenbug

    • Record and Replay: Use software or hardware that captures execution traces so you can replay the exact scenario later.
    • Binary Search Debugging: Narrow down suspicious sections of code by selectively enabling/disabling features.
    • Deterministic Testing Frameworks: Run programs under controlled schedulers that force thread interleavings to be repeatable.
    • Minimize Side Effects of Debugging: Avoid adding too much logging or breakpoints, which may hide the issue.
    • Look for Uninitialized Variables or Race Conditions: These are the most common causes of Heisenbugs.

    Suggestions for Developers

    • Accept that Heisenbugs are part of software development, especially in complex or concurrent systems.
    • Invest in robust testing strategies like chaos engineering, stress testing, and fuzzing.
    • Encourage peer code reviews to catch subtle concurrency or memory issues before they make it to production.
    • Document the conditions under which the bug appears so future debugging sessions can be more targeted.

    Conclusion

    Heisenbugs are some of the most frustrating problems in software development. Like quantum particles, they change when you try to observe them. However, with careful testing, logging strategies, and specialized tools, developers can reduce the impact of these elusive bugs. The key is persistence, systematic debugging, and building resilient systems that account for unpredictability.

    Understanding Model-View-ViewModel (MVVM)

    Understanding Model-View-ViewModel

    What is MVVM?

    What is MVVM?

    Model-View-ViewModel (MVVM) is a software architectural pattern that helps organize code by separating the user interface (UI) from the business logic. It acts as an evolution of the Model-View-Controller (MVC) pattern, designed to make applications more testable, maintainable, and scalable. MVVM is particularly popular in applications with complex user interfaces, such as desktop and mobile apps.

    A Brief History

    MVVM was introduced by Microsoft around 2005 as part of the development of Windows Presentation Foundation (WPF). The goal was to provide a clean separation between the UI and underlying application logic, making it easier for designers and developers to collaborate. Over time, the pattern has spread beyond WPF and is now used in many frameworks and platforms, including Xamarin, Angular, and even some JavaScript libraries.

    Main Components of MVVM

    MVVM is built on three main components:

    Model

    • Represents the data and business logic of the application.
    • Responsible for managing the application state, retrieving data from databases or APIs, and applying business rules.
    • Example: A Customer class containing fields like Name, Email, and methods for validation.

    View

    • Represents the user interface.
    • Displays the data and interacts with the user.
    • Ideally, the view should contain minimal logic and be as declarative as possible.
    • Example: A screen layout in WPF, Android XML, or an HTML template.

    ViewModel

    • Acts as a bridge between the Model and the View.
    • Handles UI logic, state management, and provides data in a format the View can easily consume.
    • Exposes commands and properties that the View binds to.
    • Example: A CustomerViewModel exposing properties like FullName or commands like SaveCustomer.

    Benefits of MVVM

    • Separation of Concerns: UI code is decoupled from business logic, making the system more maintainable.
    • Improved Testability: Since the ViewModel doesn’t depend on UI elements, it can be easily unit tested.
    • Reusability: The same ViewModel can be used with different Views, increasing flexibility.
    • Collaboration: Designers can work on Views while developers work on ViewModels independently.

    Advantages and Disadvantages

    Advantages

    • Cleaner and more organized code structure.
    • Reduces duplication of logic across UI components.
    • Makes it easier to scale applications with complex user interfaces.

    Disadvantages

    • Can introduce complexity for smaller projects where the overhead is unnecessary.
    • Learning curve for developers new to data binding and command patterns.
    • Requires careful planning to avoid over-engineering.

    When Can We Use MVVM?

    MVVM is best suited for:

    • Applications with complex or dynamic user interfaces.
    • Projects requiring strong separation of responsibilities.
    • Teams where designers and developers work closely together.
    • Applications needing high test coverage for business and UI logic.

    Real World Example

    Consider a banking application with a dashboard displaying account balances, recent transactions, and quick actions.

    • Model: Manages account data retrieved from a server.
    • View: The dashboard screen the user interacts with.
    • ViewModel: Provides observable properties like Balance, TransactionList, and commands such as TransferMoney.

    This allows changes in the Model (like a new transaction) to automatically update the View without direct coupling.

    Integrating MVVM into Our Software Development Process

    1. Identify UI Components: Break down your application into Views and determine the data each needs.
    2. Design ViewModels: Create ViewModels to expose the required data and commands.
    3. Implement Models: Build Models that handle business rules and data access.
    4. Apply Data Binding: Bind Views to ViewModels for real-time updates.
    5. Testing: Write unit tests for ViewModels to ensure correctness without relying on the UI.
    6. Iterate: As requirements change, update ViewModels and Models while keeping the View lightweight.

    Code Review in Software Development

    Learning code review

    What is a Code Review?

    A code review is the process of systematically examining source code written by a developer to identify mistakes, improve quality, and ensure adherence to coding standards. It is a peer-based activity where one or more team members review the code before it is merged into the main codebase.

    History of Code Review

    The concept of code review dates back to the early days of software engineering in the 1970s, when formal inspections were introduced by Michael Fagan at IBM. These inspections were strict, document-driven, and involved structured meetings. Over time, the practice evolved into more lightweight and flexible processes, especially with the rise of Agile and open-source development, where code review became a standard part of daily workflows.

    Importance of Code Review

    Code reviews are critical in modern software development. They:

    • Improve code quality and maintainability
    • Detect bugs early in the development cycle
    • Facilitate knowledge sharing among developers
    • Encourage collaboration and collective ownership of the code
    • Enforce coding standards and best practices

    Components of a Code Review

    A successful code review process usually involves:

    • Author: The developer who wrote the code.
    • Reviewers: Team members who evaluate the code.
    • Tools: Platforms such as GitHub, GitLab, Bitbucket, or specialized review tools.
    • Guidelines: Coding standards, project-specific conventions, and review checklists.
    • Feedback: Constructive comments, suggestions, and clarifications.

    How to Perform a Code Review

    • Start by understanding the purpose of the code changes.
    • Review smaller code changes instead of very large pull requests.
    • Check for correctness, readability, performance, and security.
    • Ensure the code follows style guides and project conventions.
    • Provide clear, respectful, and actionable feedback.
    • Encourage discussion instead of one-sided judgment.

    Is There a Formal Process?

    Yes, organizations often define formal processes for code reviews. A typical process may include:

    1. Developer submits code changes (pull request or merge request).
    2. Automated tests and linters run first.
    3. One or more reviewers analyze the code and leave comments.
    4. The author addresses feedback and makes changes.
    5. Reviewers approve the changes.
    6. Code is merged into the main branch.

    Some teams also use pair programming or walkthroughs as part of the process.

    Important Details to Pay Attention To

    Reviewers should pay attention to:

    • Logic and correctness of the code
    • Security vulnerabilities
    • Performance implications
    • Readability and maintainability
    • Compliance with coding standards
    • Proper documentation and comments

    While it’s important to catch issues, reviewers should avoid nitpicking too much on trivial details unless they affect the project long-term.

    How Much Time Should We Spend?

    Research suggests that effective code reviews should be 30 to 60 minutes per session, focusing on chunks of code not exceeding 400 lines at a time. Longer reviews often reduce effectiveness due to reviewer fatigue. The key is consistency—review regularly, not occasionally.

    Applying Code Review in Current Projects

    To integrate code reviews into your development process:

    • Use pull requests as the entry point for reviews.
    • Automate tests to catch basic issues before review.
    • Define clear review guidelines for your team.
    • Encourage collaborative discussions.
    • Use tools like GitHub, GitLab, or Bitbucket that integrate seamlessly with workflows.
    • Monitor review metrics (time spent, defects found, review coverage) to improve efficiency.

    String vs StringBuilder vs StringBuffer in Java

    String vs StringBuilder vs StringBuffer in Java

    Why Are There Three Similar Types?

    Java offers three string-related types to balance readability, safety, and performance:

    • String is simple and safe because it’s immutable.
    • StringBuilder is fast for single-threaded, heavy concatenation.
    • StringBuffer is like StringBuilder but synchronized for thread safety.

    Immutability (String) prevents accidental changes and enables pooling/caching. Mutability (StringBuilder/StringBuffer) avoids creating many temporary objects during repeated modifications.

    What Are They?

    String (Immutable, Thread-Safe by Design)

    • Once created, its content never changes.
    • Any “change” (e.g., concatenation) returns a new String.
    • String literals are stored in the string pool for memory efficiency.
    • Great for constants, keys, logging messages that don’t change, and APIs that return stable values.

    StringBuilder (Mutable, Not Synchronized)

    • Designed for fast, frequent modifications (append, insert, delete) in a single thread.
    • No synchronization overhead → typically the fastest way to build strings dynamically.

    StringBuffer (Mutable, Synchronized)

    • Like StringBuilder but synchronized methods for thread safety if the same builder is shared across threads.
    • Synchronization adds overhead, so it’s slower than StringBuilder in single-threaded code.

    Key Differences at a Glance

    Mutability

    • String: Immutable
    • StringBuilder: Mutable
    • StringBuffer: Mutable

    Thread Safety

    • String: Safe to share (cannot change)
    • StringBuilder: Not thread-safe
    • StringBuffer: Thread-safe (synchronized)

    Performance (Typical)

    • String: Fine for few ops; costly in large loops with + or +=
    • StringBuilder: Fastest for many concatenations in one thread
    • StringBuffer: Slower than StringBuilder due to synchronization

    Common APIs

    • String: rich APIs (substring, replace, split, equals, hashCode, compareTo)
    • StringBuilder/StringBuffer: builder-style APIs (append, insert, delete, reverse, setCharAt), then toString()

    How Do I Choose?

    Quick Decision Guide

    • Need a constant or rarely change the text? Use String.
    • Building text in a loop or via many appends in one thread? Use StringBuilder.
    • Building text shared across threads without external locks? Use StringBuffer (or prefer StringBuilder with your own synchronization strategy if you control access).

    Rule of Thumb

    • Use String by default for readability and safety.
    • Switch to StringBuilder when performance matters during repeated concatenations.
    • Use StringBuffer only when you truly need shared mutation across threads.

    Practical Examples

    Example 1: Costly Loop with String

    String s = "";
    for (int i = 0; i < 10000; i++) {
        s += i; // creates many temporary objects → avoid
    }


    Example 2: Efficient Loop with StringBuilder

    StringBuilder sb = new StringBuilder(10000); // optional capacity hint
    for (int i = 0; i < 10000; i++) {
        sb.append(i);
    }
    String s = sb.toString();


    Example 3: When StringBuffer Makes Sense

    // Only if 'shared' is truly accessed by multiple threads concurrently.
    StringBuffer shared = new StringBuffer();
    Runnable task = () -> {
        for (int i = 0; i < 1000; i++) {
            shared.append(i).append(",");
        }
    };


    Benefits of Each

    String

    • Simplicity and clarity
    • Inherent thread safety via immutability
    • Works well with string pooling (memory optimization)
    • Safe as map keys and for caching

    StringBuilder

    • Best performance for intensive concatenation
    • Low GC pressure versus many temporary Strings
    • Fluent, builder-style API

    StringBuffer

    • Built-in thread safety without external locks
    • Drop-in API similarity to StringBuilder

    When to Use Them (and When Not To)

    Use String When

    • Defining constants and literals
    • Passing values across layers/APIs
    • Storing keys in collections (immutability prevents surprises)

    Avoid String When

    • You’re repeatedly concatenating in loops (prefer StringBuilder)

    Use StringBuilder When

    • Building JSON, CSV, logs, or messages in loops
    • Formatting output dynamically in a single thread

    Avoid StringBuilder When

    • The builder is accessed by multiple threads simultaneously (unless you guard it externally)

    Use StringBuffer When

    • Multiple threads must mutate the same buffer at the same time and you can’t refactor for confinement

    Avoid StringBuffer When

    • You’re single-threaded or can confine builders per thread (prefer StringBuilder for speed)

    Additional Tips

    About the + Operator

    • In a single expression, the compiler typically uses an internal StringBuilder.
    • In loops, += often creates many intermediate objects. Prefer an explicit StringBuilder.

    Capacity Planning

    • Builders start with a default capacity and grow (usually doubling plus a small constant).
    • If you can estimate size, call new StringBuilder(expectedLength) or ensureCapacity to reduce reallocations.

    Interoperability

    • Convert builders to String with toString().
    • For equality checks, compare String values, not builders.

    Summary

    • String: Immutable, simple, safe → use by default for stable text.
    • StringBuilder: Mutable, fastest for repeated concatenations in one thread.
    • StringBuffer: Mutable, synchronized for shared multi-threaded mutation—use only when you truly need it.

    With these guidelines, choose the simplest type that meets your thread-safety and performance needs, and only optimize to builders when profiling or repeated concatenation calls for it.

    Understanding MVC Frameworks in Software Development

    Understanding MVC Frameworks

    What is an MVC Framework?

    What is an MVC Framework?

    MVC stands for Model–View–Controller, a popular architectural pattern used in software engineering. An MVC framework provides a structured way to separate concerns in an application, making development, testing, and maintenance more manageable. Instead of mixing data, logic, and presentation in one place, MVC enforces a separation that leads to cleaner and more scalable applications.

    A Brief History of MVC

    The concept of MVC was introduced in the late 1970s by Trygve Reenskaug while working on Smalltalk at Xerox PARC. It was designed as a way to build graphical user interfaces (GUIs) where data and display could be managed independently. Over the years, MVC gained traction in desktop applications and later became one of the dominant architectural patterns for web development frameworks like Ruby on Rails, Django, Angular (early versions), and ASP.NET MVC.

    Principles and Components of MVC

    The MVC pattern is based on the principle of separation of concerns, ensuring that each part of the application has a distinct role. It consists of three main components:

    1. Model

    • Represents the data and the business logic of the application.
    • It is responsible for retrieving, storing, and updating information (often interacting with a database).
    • Example: In a blog system, the Post model defines the structure of a blog post and manages operations like saving or fetching posts.

    2. View

    • Handles the presentation layer.
    • Responsible for displaying the data from the model in a user-friendly way (HTML, JSON, templates, etc.).
    • Example: A web page showing a list of blog posts retrieved by the model.

    3. Controller

    • Acts as the middle layer between the Model and View.
    • Receives input from the user, processes it, communicates with the model, and selects the appropriate view for the response.
    • Example: When a user clicks “Create Post,” the controller processes the request, updates the model, and sends the user to a confirmation view.

    Advantages of MVC Frameworks

    • Separation of concerns: Each component handles a specific responsibility, reducing code complexity.
    • Maintainability: Easier to update or modify individual parts without affecting the entire system.
    • Testability: Each component can be tested independently, leading to more reliable applications.
    • Reusability: Models, views, or controllers can be reused across different parts of the application.
    • Collaboration: Teams can work on different parts (UI, backend, logic) simultaneously without conflicts.

    Benefits for Today’s Software Development

    In today’s world of fast-paced, large-scale software development, MVC frameworks provide a foundation for:

    • Scalability: Applications can grow in features and users while remaining stable.
    • Agility: Easier to adopt Agile and DevOps practices, since MVC frameworks often integrate well with CI/CD pipelines.
    • Cross-platform use: MVC works for both web and mobile applications, making it versatile.
    • Community and support: Many popular frameworks (Spring MVC, Laravel, Rails, Django) are built on MVC principles, offering strong ecosystems and libraries.

    Why Do People Prefer to Use MVC?

    • Familiarity: MVC is widely taught and used, so developers are comfortable with it.
    • Productivity: Built-in structures and conventions reduce the need to “reinvent the wheel.”
    • Efficiency: Development is faster because teams can work in parallel on models, views, and controllers.
    • Integration: Works well with modern tools, cloud services, and databases.

    How to Integrate MVC into Your Software Development Process

    1. Choose a framework: Pick one suited to your programming language (e.g., Spring MVC for Java, Laravel for PHP, Django for Python).
    2. Define models: Identify your application’s data structures and business rules.
    3. Design views: Create templates or interfaces to present data clearly to users.
    4. Implement controllers: Connect user actions to business logic and select views for responses.
    5. Test each layer: Write unit tests for models, functional tests for controllers, and UI tests for views.
    6. Iterate and refine: Continuously improve your architecture as your project grows.

    Blog at WordPress.com.

    Up ↑