Search

Software Engineer's Notes

Tag

devops

System Testing: A Complete Guide

What is system testing?

Software development doesn’t end with writing code—it must be tested thoroughly to ensure it works as intended. One of the most comprehensive testing phases is System Testing, where the entire system is evaluated as a whole. This blog will explore what system testing is, its features, how it works, benefits, real-world examples, and how to integrate it into your software development process.

What is System Testing?

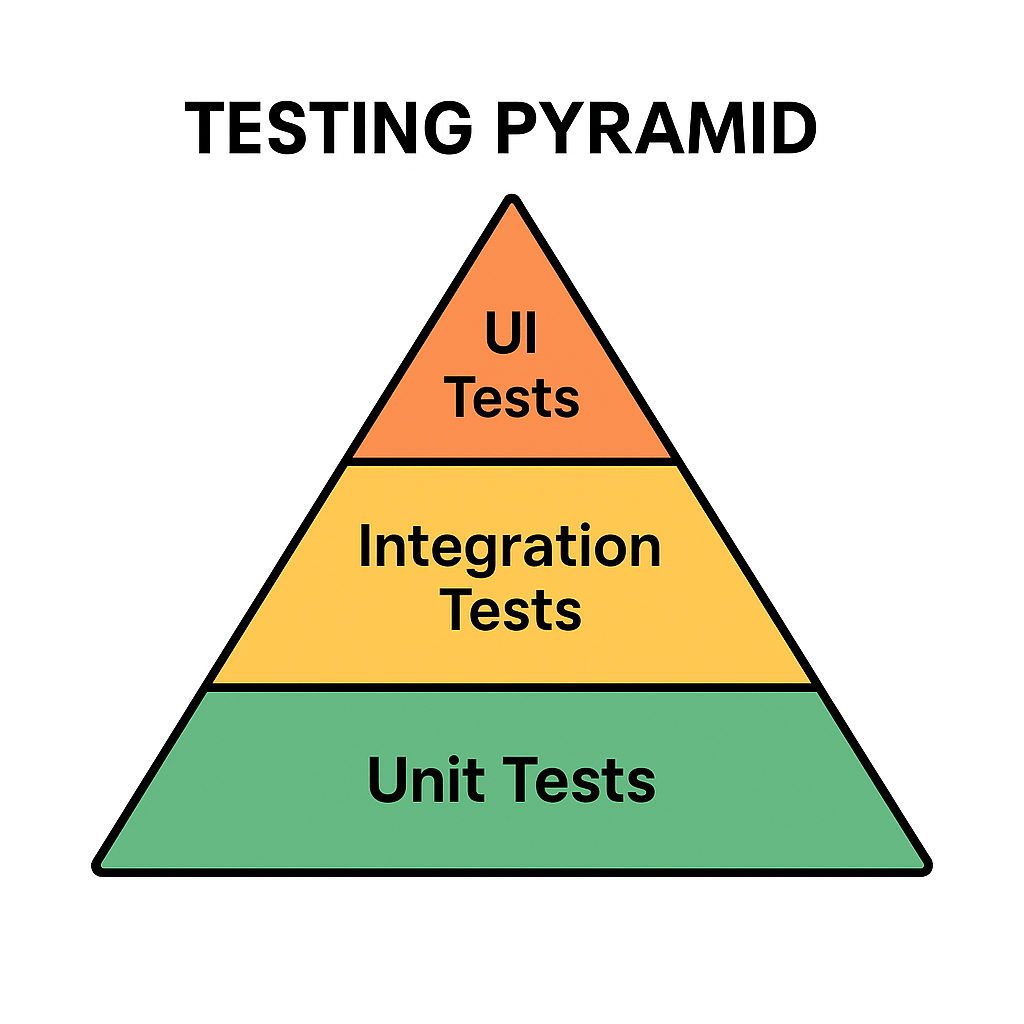
System Testing is a type of software testing where the entire integrated system is tested as a whole. Unlike unit testing (which focuses on individual components) or integration testing (which focuses on interactions between modules), system testing validates that the entire software product meets its requirements.

It is typically the final testing stage before user acceptance testing (UAT) and deployment.

Main Features and Components of System Testing

System testing includes several important features and components:

1. End-to-End Testing

Tests the software from start to finish, simulating real user scenarios.

2. Black-Box Testing Approach

Focuses on the software’s functionality rather than its internal code. Testers don’t need knowledge of the source code.

3. Requirement Validation

Ensures that the product meets all functional and non-functional requirements.

4. Comprehensive Coverage

Covers a wide variety of testing types such as:

  • Functional testing
  • Performance testing
  • Security testing
  • Usability testing
  • Compatibility testing

5. Environment Similarity

Conducted in an environment similar to production to detect environment-related issues.

How Does System Testing Work?

The process of system testing typically follows these steps:

  1. Requirement Review – Analyze functional and non-functional requirements.
  2. Test Planning – Define test strategy, scope, resources, and tools.
  3. Test Case Design – Create detailed test cases simulating user scenarios.
  4. Test Environment Setup – Configure hardware, software, and databases similar to production.
  5. Test Execution – Execute test cases and record results.
  6. Defect Reporting and Tracking – Log issues and track them until resolution.
  7. Regression Testing – Retest the system after fixes to ensure stability.
  8. Final Evaluation – Ensure the system is ready for deployment.

Benefits of System Testing

System testing provides multiple advantages:

  • Validates Full System Behavior – Ensures all modules and integrations work together.
  • Detects Critical Bugs – Finds issues missed during unit or integration testing.
  • Improves Quality – Increases confidence that the system meets requirements.
  • Reduces Risks – Helps prevent failures in production.
  • Ensures Compliance – Confirms the system meets legal, industry, and business standards.

When and How Should We Use System Testing?

When to Use:

  • After integration testing is completed.
  • Before user acceptance testing (UAT) and deployment.

How to Use:

  • Define clear acceptance criteria.
  • Automate repetitive system-level test cases where possible.
  • Simulate real-world usage scenarios to mimic actual customer behavior.

Real-World Use Cases of System Testing

  1. E-commerce Website
    • Verifying user registration, product search, cart, checkout, and payment workflows.
    • Ensuring the system handles high traffic loads during sales events.
  2. Banking Applications
    • Validating transactions, loan applications, and account security.
    • Checking compliance with financial regulations.
  3. Healthcare Systems
    • Testing appointment booking, patient data access, and medical records security.
    • Ensuring HIPAA compliance and patient safety.
  4. Mobile Applications
    • Confirming compatibility across devices, screen sizes, and operating systems.
    • Testing notifications, performance, and offline capabilities.

How to Integrate System Testing into the Software Development Process

  1. Adopt a Shift-Left Approach – Start planning system tests early in the development lifecycle.
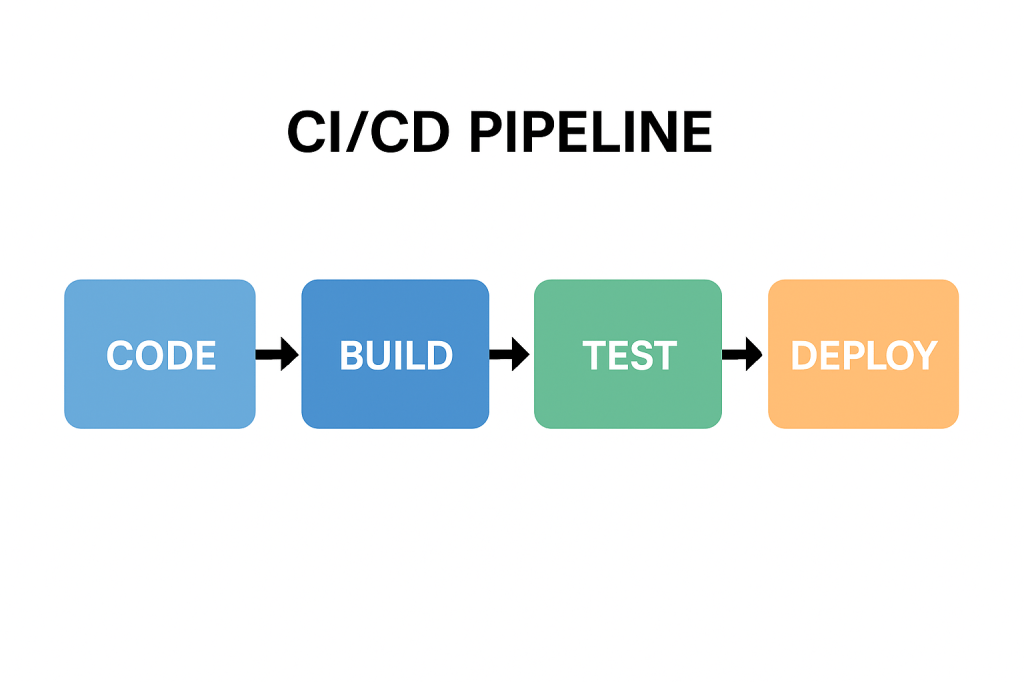
  2. Use Continuous Integration (CI/CD) – Automate builds and deployments so system testing can be executed frequently.
  3. Automate Where Possible – Use tools like Selenium, JUnit, or Cypress for functional and regression testing.
  4. Define Clear Test Environments – Keep staging environments as close as possible to production.
  5. Collaborate Across Teams – Ensure developers, testers, and business analysts work together.
  6. Track Metrics – Measure defect density, test coverage, and execution time to improve continuously.

Conclusion

System testing is a critical step in delivering high-quality software. It validates the entire system as a whole, ensuring that all functionalities, integrations, and requirements are working correctly. By integrating system testing into your development process, you can reduce risks, improve reliability, and deliver products that users can trust.

Regression Testing: A Complete Guide for Software Teams

What is Regression Testing?

What is Regression Testing?

Regression testing is a type of software testing that ensures recent code changes, bug fixes, or new features do not negatively impact the existing functionality of an application. In simple terms, it verifies that what worked before still works now, even after updates.

This type of testing is crucial because software evolves continuously, and even small code changes can unintentionally break previously working features.

Main Features and Components of Regression Testing

  1. Test Re-execution
    • Previously executed test cases are run again after changes are made.
  2. Automated Test Suites
    • Automation is often used to save time and effort when repeating test cases.
  3. Selective Testing
    • Not all test cases are rerun; only those that could be affected by recent changes.
  4. Defect Tracking
    • Ensures that previously fixed bugs don’t reappear in later builds.
  5. Coverage Analysis
    • Focuses on areas where changes are most likely to cause side effects.

How Regression Testing Works

  1. Identify Changes
    Developers or QA teams determine which parts of the system were modified (new features, bug fixes, refactoring, etc.).
  2. Select Test Cases
    Relevant test cases from the test repository are chosen. This selection may include:
    • Critical functional tests
    • High-risk module tests
    • Frequently used features
  3. Execute Tests
    Test cases are rerun manually or through automation tools (like Selenium, JUnit, TestNG, Cypress).
  4. Compare Results
    The new test results are compared with the expected results to detect failures.
  5. Report and Fix Issues
    If issues are found, developers fix them, and regression testing is repeated until stability is confirmed.

Benefits of Regression Testing

  • Ensures Software Stability
    Protects against accidental side effects when new code is added.
  • Improves Product Quality
    Guarantees existing features continue working as expected.
  • Boosts Customer Confidence
    Users get consistent and reliable performance.
  • Supports Continuous Development
    Essential for Agile and DevOps environments where changes are frequent.
  • Reduces Risk of Production Failures
    Early detection of reappearing bugs lowers the chance of system outages.

When and How Should We Use Regression Testing?

  • After Bug Fixes
    Ensures the fix does not cause problems in unrelated features.
  • After Feature Enhancements
    New functionalities can sometimes disrupt existing flows.
  • After Code Refactoring or Optimization
    Even performance improvements can alter system behavior.
  • In Continuous Integration (CI) Pipelines
    Automated regression testing should be a standard step in CI/CD workflows.

Real World Use Cases of Regression Testing

  1. E-commerce Websites
    • Adding a new payment gateway may unintentionally break existing checkout flows.
    • Regression tests ensure the cart, discount codes, and order confirmations still work.
  2. Banking Applications
    • A bug fix in the fund transfer module could affect balance calculations or account statements.
    • Regression testing confirms financial transactions remain accurate.
  3. Mobile Applications
    • Adding a new push notification feature might impact login or navigation features.
    • Regression testing validates that old features continue working smoothly.
  4. Healthcare Systems
    • When updating electronic health record (EHR) software, regression tests confirm patient history retrieval still works correctly.

How to Integrate Regression Testing Into Your Software Development Process

  1. Maintain a Test Repository
    Keep all test cases in a structured and reusable format.
  2. Automate Regression Testing
    Use automation tools like Selenium, Cypress, or JUnit to reduce manual effort.
  3. Integrate with CI/CD Pipelines
    Trigger regression tests automatically with each code push.
  4. Prioritize Test Cases
    Focus on critical features first to optimize test execution time.
  5. Schedule Regular Regression Cycles
    Combine full regression tests with partial (smoke/sanity) regression tests for efficiency.
  6. Monitor and Update Test Suites
    As your application evolves, continuously update regression test cases to match new requirements.

Conclusion

Regression testing is not just a safety measure—it’s a vital process that ensures stability, reliability, and confidence in your software. By carefully selecting, automating, and integrating regression tests into your development pipeline, you can minimize risks, reduce costs, and maintain product quality, even in fast-moving Agile and DevOps environments.

Online Certificate Status Protocol (OCSP): A Practical Guide for Developers

What is Online Certificate Status Protocol?

What is the Online Certificate Status Protocol (OCSP)?

OCSP is an IETF standard that lets clients (browsers, apps, services) check whether an X.509 TLS certificate is valid, revoked, or unknownin real time—without downloading large Certificate Revocation Lists (CRLs). Instead of pulling a massive list of revoked certificates, a client asks an OCSP responder a simple question: “Is certificate X still good?” The responder returns a signed “good / revoked / unknown” answer.

OCSP is a cornerstone of modern Public Key Infrastructure (PKI) and the HTTPS ecosystem, improving performance and revocation freshness versus legacy CRLs.

Why OCSP Exists (The Problem It Solves)

  • Revocation freshness: CRLs can be hours or days old; OCSP responses can be minutes old.
  • Bandwidth & latency: CRLs are bulky; OCSP answers are tiny.
  • Operational clarity: OCSP provides explicit status per certificate rather than shipping a giant list.

How OCSP Works (Step-by-Step)

1) The players

  • Client: Browser, mobile app, API client, or service.
  • Server: The site or API you’re connecting to (presents a cert).
  • OCSP Responder: Operated by the Certificate Authority (CA) or delegated responder that signs OCSP responses.

2) The basic flow (without stapling)

  1. Client receives the server’s certificate chain during TLS handshake.
  2. Client extracts the OCSP URL from the certificate’s Authority Information Access (AIA) extension.
  3. Client builds an OCSP request containing the certificate’s serial number and issuer info.
  4. Client sends the request (usually HTTP/HTTPS) to the OCSP responder.
  5. Responder returns a digitally signed OCSP response: good, revoked, or unknown, plus validity (ThisUpdate/NextUpdate) and optional Nonces to prevent replay.
  6. Client verifies the responder’s signature and freshness window. If valid, it trusts the status.

3) OCSP Stapling (recommended)

To avoid per-client lookups:

  • The server (e.g., Nginx/Apache/CDN) periodically fetches a fresh OCSP response from the CA.
  • During the TLS handshake, the server staples (attaches) this response to the Certificate message using the TLS status_request extension.
  • The client validates the stapled response—no extra round trip to the CA, no privacy leak, and faster page loads.

4) Must-Staple (optional, stricter)

Some certificates include a “must-staple” extension indicating clients should require a valid stapled OCSP response. If missing/expired, the connection may be rejected. This boosts security but demands strong ops discipline (fresh stapling, good monitoring).

Core Features & Components

  • Per-certificate status: Query by serial number, get a clear “good/revoked/unknown”.
  • Signed responses: OCSP responses are signed by the CA or a delegated responder cert with the appropriate EKU (Extended Key Usage).
  • Freshness & caching: Responses carry ThisUpdate/NextUpdate and caching hints. Servers/clients cache within that window.
  • Nonce support: Guards against replay (client includes a nonce; responder echoes it back). Not all responders use nonces because they reduce cacheability.
  • Transport: Typically HTTP(S). Many responders now support HTTPS to prevent tampering.
  • Stapling support: Offloads lookups to the server and improves privacy/performance.

Benefits & Advantages

  • Lower latency & better UX: With stapling, there’s no extra client-to-CA trip.
  • Privacy: Stapling prevents the CA from learning which sites a specific client visits.
  • Operational resilience: Clients aren’t blocked by transient CA OCSP outages when stapled responses are fresh.
  • Granular revocation: Revoke a compromised cert quickly and propagate status within minutes.
  • Standards-based & broadly supported: Works across modern browsers, servers, and libraries.

When & How to Use OCSP

Use OCSP whenever you operate TLS-protected endpoints (websites, APIs, gRPC, SMTP/TLS, MQTT/TLS). Always enable OCSP stapling on your servers or CDN. Consider must-staple for high-assurance apps (financial, healthcare, enterprise SSO) where failing “closed” on revocation is acceptable and you can support the operational load.

Patterns:

  • Public websites & APIs: Enable stapling at the edge (load balancer, CDN, reverse proxy).
  • Service-to-service (mTLS): Internal clients (Envoy, Nginx, Linkerd, Istio) use OCSP or short-lived certs issued by your internal CA.
  • Mobile & desktop apps: Let the platform’s TLS stack do OCSP; if you pin, prefer pinning the CA/issuer key and keep revocation in mind.

Real-World Examples

  1. Large e-commerce site:
    Moved from CRL checks to OCSP stapling on an Nginx tier. Result: shaved ~100–200 ms on cold connections in some geos, reduced CA request volume, and eliminated privacy concerns from client lookups.
  2. CDN at the edge:
    CDN nodes fetch and staple OCSP responses for millions of certs. Clients validate instantly; outages at the CA OCSP endpoint don’t cause widespread page load delays because staples are cached and rotated.
  3. Enterprise SSO (must-staple):
    An identity provider uses must-staple certificates so that any missing/expired OCSP staple breaks login flows loudly. Ops monitors staple freshness aggressively to avoid false breaks.
  4. mTLS microservices:
    Internal PKI issues short-lived certs (hours/days) and enables OCSP on the service mesh. Short-lived certs reduce reliance on revocation, but OCSP still provides a kill-switch for emergency revokes.

Operational Considerations & Pitfalls

  • Soft-fail vs. hard-fail: Browsers often “soft-fail” if the OCSP responder is unreachable (they proceed). Must-staple pushes you toward hard-fail, which increases availability requirements on your side.
  • Staple freshness: If your server serves an expired staple, strict clients may reject the connection. Monitor NextUpdate and refresh early.
  • Responder outages: Use stapling + caching and multiple upstream OCSP responder endpoints where possible.
  • Nonce vs. cacheability: Nonces reduce replay risk but can hurt caching. Many deployments rely on time-bounded caching instead.
  • Short-lived certs: Greatly reduce revocation reliance, but you still want OCSP for emergency cases (key compromise).
  • Privacy & telemetry: Without stapling, client lookups can leak browsing behavior to the CA. Prefer stapling.

How to Integrate OCSP in Your Software Development Process

1) Design & Architecture

  • Decide your revocation posture:
    • Public web: Stapling at the edge; soft-fail acceptable for most consumer sites.
    • High-assurance: Must-staple + aggressive monitoring; consider short-lived certs.
  • Standardize on servers/LBs that support OCSP stapling (Nginx, Apache, HAProxy, Envoy, popular CDNs).

2) Dev & Config (Common Stacks)

Nginx (TLS):

ssl_stapling on;
ssl_stapling_verify on;
resolver 1.1.1.1 8.8.8.8 valid=300s;
resolver_timeout 5s;
# Ensure the full chain is served so stapling works:
ssl_certificate /etc/ssl/fullchain.pem;
ssl_certificate_key /etc/ssl/privkey.pem;

Apache (httpd):

SSLUseStapling          on
SSLStaplingResponderTimeout 5
SSLStaplingReturnResponderErrors off
SSLStaplingCache "shmcb:/var/run/ocsp(128000)"

3) CI/CD & Automation

  • Lint certs in CI: verify AIA OCSP URL presence, chain order, key usage.
  • Fetch & validate OCSP during pipeline or pre-deploy checks:
    • openssl ocsp -issuer issuer.pem -cert server.pem -url http://ocsp.ca.example -VAfile ocsp_signer.pem
  • Renewals: If you use Let’s Encrypt/ACME, ensure your automation reloads the web server so it refreshes stapled responses.

4) Monitoring & Alerting

  • Track staple freshness (time until NextUpdate), OCSP HTTP failures, and unknown/revoked statuses.
  • Add synthetic checks from multiple regions to catch CA or network-path issues.
  • Alert well before NextUpdate to avoid serving stale responses.

5) Security & Policy

  • Define when to hard-fail (must-staple, admin consoles, SSO) vs soft-fail (public brochureware).
  • Document an emergency revocation playbook (CA portal access, contact points, rotate keys, notify customers).

Testing OCSP in Practice

Check stapling from a client:

# Shows if server is stapling a response and whether it's valid
openssl s_client -connect example.com:443 -status -servername example.com </dev/null

Direct OCSP query:

# Query the OCSP responder for a given cert
openssl ocsp \
  -issuer issuer.pem \
  -cert server.pem \
  -url http://ocsp.ca.example \
  -CAfile ca_bundle.pem \
  -resp_text -noverify

Look for good status and confirm This Update / Next Update are within acceptable windows.

FAQs

Is OCSP enough on its own?
No. Pair it with short-lived certs, strong key management (HSM where possible), and sound TLS configuration.

What happens if the OCSP responder is down?
With stapling, clients rely on the stapled response (within freshness). Without stapling, many clients soft-fail. High-assurance apps should avoid a single point of failure via must-staple + robust monitoring.

Do APIs and gRPC clients use OCSP?
Most rely on the platform TLS stack. When building custom clients, ensure the TLS library you use validates stapled responses (or perform explicit OCSP checks if needed).

Integration Checklist (Copy into your runbook)

  • Enable OCSP stapling on every internet-facing TLS endpoint.
  • Serve the full chain and verify stapling works in staging.
  • Monitor staple freshness and set alerts before NextUpdate.
  • Decide soft-fail vs hard-fail per system; consider must-staple where appropriate.
  • Document revocation procedures and practice a drill.
  • Prefer short-lived certificates; integrate with ACME for auto-renewal.
  • Add CI checks for cert chain correctness and AIA fields.
  • Include synthetic OCSP tests from multiple regions.
  • Educate devs on how to verify stapling (openssl s_client -status).

Call to action:
If you haven’t already, enable OCSP stapling on your staging environment, run the openssl s_client -status check, and wire up monitoring for staple freshness. It’s one of the highest-leverage HTTPS hardening steps you can make in under an hour.

Secure Socket Layer (SSL): A Practical Guide for Modern Developers

What is Secure Socket Layer?

What is Secure Socket Layer (SSL)?

Secure Socket Layer (SSL) is a cryptographic protocol originally designed to secure communication over networks. Modern “SSL” in practice means TLS (Transport Layer Security)—the standardized, more secure successor to SSL. Although people say “SSL certificate,” what you deploy today is TLS (prefer TLS 1.2+, ideally TLS 1.3).

Goal: ensure that data sent between a client (browser/app) and a server is confidential, authentic, and untampered.

How SSL/TLS Works (Step by Step)

  1. Client Hello
    The client initiates a connection, sending supported TLS versions, cipher suites, and a random value.
  2. Server Hello & Certificate
    The server picks the best mutual cipher suite, returns its certificate chain (proving its identity), and sends its own random value.
  3. Key Agreement
    Using Diffie–Hellman (typically ECDHE), client and server derive a shared session key. This provides forward secrecy (a future key leak won’t decrypt past traffic).
  4. Certificate Validation (Client-side)
    The client verifies the server’s certificate:
    • Issued by a trusted Certificate Authority (CA)
    • Hostname matches the certificate’s CN/SAN
    • Certificate is valid (not expired/revoked)
  5. Finished Messages
    Both sides confirm handshake integrity. From now on, application data is encrypted with the session keys.
  6. Secure Data Transfer
    Data is encrypted (confidentiality), MAC’d or AEAD-authenticated (integrity), and tied to the server identity (authentication).

Key Features & Components (In Detail)

1) Certificates & Public Key Infrastructure (PKI)

  • End-Entity Certificate (the “SSL certificate”): issued to your domain/service.
  • Chain of Trust: your cert → intermediate CA(s) → root CA (embedded in OS/browser trust stores).
  • SAN (Subject Alternative Name): lists all domain names the certificate covers.
  • Wildcard Certs: e.g., *.example.com—useful for many subdomains.
  • EV/OV/DV: validation levels; DV is common and free via Let’s Encrypt.

2) TLS Versions & Cipher Suites

  • Prefer TLS 1.3 (simpler, faster, more secure defaults).
  • Cipher suites define algorithms for key exchange, encryption, and authentication.
  • Favor AEAD ciphers (e.g., AES-GCM, ChaCha20-Poly1305).

3) Perfect Forward Secrecy (PFS)

  • Achieved via (EC)DHE key exchange. Protects past sessions even if the server key is compromised later.

4) Authentication Models

  • Server Auth (typical web browsing).
  • Mutual TLS (mTLS) for APIs/microservices: both client and server present certificates.

5) Session Resumption

  • TLS session tickets or session IDs speed up repeat connections and reduce handshake overhead.

6) Integrity & Replay Protection

  • Each record has an integrity check (AEAD tag). Sequence numbers and nonces prevent replays.

Benefits & Advantages

  • Confidentiality: prevents eavesdropping (e.g., passwords, tokens, PII).
  • Integrity: detects tampering and man-in-the-middle (MITM) attacks.
  • Authentication: clients know they’re talking to the real server.
  • Compliance: many standards (PCI DSS, HIPAA, GDPR) expect encryption in transit.
  • SEO & Browser UX: HTTPS is a ranking signal; modern browsers label HTTP as “Not Secure.”
  • Performance: TLS 1.3 plus HTTP/2 or HTTP/3 (QUIC) can be faster than legacy HTTP due to fewer round trips and better multiplexing.

When & How Should We Use It?

Short answer: Always use HTTPS for public websites and TLS for all internal services and APIs—including development and staging—unless there’s a compelling, temporary reason not to.

Use cases:

  • Public web apps and websites (user logins, checkout, dashboards)
  • REST/gRPC APIs between services (often with mTLS)
  • Mobile apps calling backends
  • Messaging systems (MQTT over TLS for IoT)
  • Email in transit (SMTP with STARTTLS, IMAP/POP3 over TLS)
  • Data pipelines (Kafka, Postgres/MySQL connections over TLS)

Real-World Examples

  1. E-commerce Checkout
    • Browser ↔ Storefront: HTTPS with TLS 1.3
    • Storefront ↔ Payment Gateway: TLS with pinned CA or mTLS
    • Benefits: protects cardholder data; meets PCI DSS; builds user trust.
  2. B2B API Integration
    • Partner systems exchange JSON over HTTPS with mTLS.
    • Mutual auth plus scopes/claims reduces risk of credential leakage and MITM.
  3. Service Mesh in Kubernetes
    • Sidecars (e.g., Envoy) automatically enforce mTLS between pods.
    • Central policy defines minimum TLS version/ciphers; cert rotation is automatic.
  4. IoT Telemetry
    • Device ↔ Broker: MQTT over TLS with client certs.
    • Even if devices live on hostile networks, data remains confidential and authenticated.
  5. Email Security
    • SMTP with STARTTLS opportunistic encryption; for stricter guarantees, use MTA-STS and TLSRPT policies.

Integrating TLS Into Your Software Development Process

Phase 1 — Foundation & Inventory

  • Asset Inventory: list all domains, subdomains, services, and ports that accept connections.
  • Threat Modeling: identify data sensitivity and where mTLS is required.

Phase 2 — Certificates & Automation

  • Issue Certificates: Use a reputable CA. For web domains, Let’s Encrypt via ACME (e.g., Certbot) is ideal for automation.
  • Automated Renewal: never let certs expire. Integrate renewal hooks and monitoring.
  • Key Management: generate keys on the server or HSM; restrict file permissions; back up securely.

Phase 3 — Server Configuration (Web/App/API)

  • Enforce TLS: redirect HTTP→HTTPS; enable HSTS (with preload once you’re confident).
  • TLS Versions: enable TLS 1.2+, prefer TLS 1.3; disable SSLv2/3, TLS 1.0/1.1.
  • Ciphers: choose modern AEAD ciphers; disable weak/legacy ones.
  • OCSP Stapling: improve revocation checking performance.
  • HTTP/2 or HTTP/3: enable for multiplexing performance benefits.

Phase 4 — Client & API Hardening

  • Certificate Validation: ensure hostname verification and full chain validation.
  • mTLS (where needed): issue client certs; manage lifecycle (provision, rotate, revoke).
  • Pinning (cautious): consider HPKP alternatives (TLSA/DANE in DNSSEC or CA pinning in apps) to avoid bricking clients.

Phase 5 — CI/CD & Testing

  • Automated Scans: add TLS configuration checks (e.g., linting scripts) in CI.
  • Integration Tests: verify HTTPS endpoints, expected protocols/ciphers, and mTLS paths.
  • Dynamic Tests: run handshake checks in staging before prod deploys.

Phase 6 — Monitoring & Governance

  • Observability: track handshake errors, protocol use, cert expiry, ticket keys.
  • Logging: log TLS version and cipher used (sans secrets).
  • Policy: minimum TLS version, allowed CAs, rotation intervals, and incident runbooks.

Practical Snippets & Commands

Generate a Private Key & CSR (OpenSSL)

# 1) Private key (ECDSA P-256)
openssl ecparam -genkey -name prime256v1 -noout -out privkey.pem

# 2) Certificate Signing Request (CSR)
openssl req -new -key privkey.pem -out domain.csr -subj "/CN=example.com"

Use Let’s Encrypt (Certbot) – Typical Webserver

# Install certbot per your OS, then:
sudo certbot --nginx -d example.com -d www.example.com
# or for Apache:
sudo certbot --apache -d example.com

cURL: Verify TLS & Show Handshake Details

curl -Iv https://example.com

Java (OkHttp) with TLS (hostname verification is on by default)

OkHttpClient client = new OkHttpClient.Builder().build();
Request req = new Request.Builder().url("https://api.example.com").build();
Response res = client.newCall(req).execute();

Python (requests) with Certificate Verification

import requests
r = requests.get("https://api.example.com", timeout=10)  # verifies by default
print(r.status_code)

Enforcing HTTPS in Nginx (Basic)

server {
listen 80;
server_name example.com http://www.example.com;
return 301 https://$host$request_uri;
}

server {
listen 443 ssl http2;
server_name example.com http://www.example.com;

ssl_protocols TLSv1.2 TLSv1.3;
ssl_ciphers TLS_AES_256_GCM_SHA384:TLS_AES_128_GCM_SHA256:TLS_CHACHA20_POLY1305_SHA256;
ssl_prefer_server_ciphers on;

# Provide full chain and key
ssl_certificate /etc/letsencrypt/live/example.com/fullchain.pem;
ssl_certificate_key /etc/letsencrypt/live/example.com/privkey.pem;

# HSTS (enable after testing redirects)
add_header Strict-Transport-Security “max-age=31536000; includeSubDomains; preload” always;

location / {
proxy_pass http://app:8080;
}
}

Common Pitfalls (and How to Avoid Them)

  • Forgetting renewals: automate via ACME; alert on expiry ≥30 days out.
  • Serving incomplete chains: always deploy the full chain (leaf + intermediates).
  • Weak ciphers/old protocols: disable TLS 1.0/1.1 and legacy ciphers.
  • No HSTS after go-live: once redirects are stable, enable HSTS (careful with preload).
  • Skipping internal encryption: internal traffic is valuable to attackers—use mTLS.
  • Certificate sprawl: track ownership and expiry across teams and environments.

FAQ

Is SSL different from TLS?
Yes. SSL is the older protocol. Today, we use TLS; the term “SSL certificate” persists out of habit.

Which TLS version should I use?
TLS 1.3 preferred; keep TLS 1.2 for compatibility. Disable older versions.

Do I need a paid certificate?
Not usually. DV certs via Let’s Encrypt are trusted and free. For enterprise identity needs, OV/EV may be required by policy.

When should I use mTLS?
For service-to-service trust, partner APIs, and environments where client identity must be cryptographically proven.

Developer Checklist (Revision List)

  • Inventory all domains/services needing TLS
  • Decide: public DV vs internal PKI; mTLS where needed
  • Automate issuance/renewal (ACME) and monitor expiry
  • Enforce HTTPS, redirects, and HSTS
  • Enable TLS 1.3 (keep 1.2), disable legacy protocols
  • Choose modern AEAD ciphers (AES-GCM/ChaCha20-Poly1305)
  • Configure OCSP stapling and session resumption
  • Add TLS tests to CI/CD; pre-prod handshake checks
  • Log TLS version/cipher; alert on handshake errors
  • Document policy (min version, CAs, rotation, mTLS rules)

Smoke Testing in Software Development: A Complete Guide

What is smoke testing?

In modern software development, testing is a crucial step to ensure the stability, quality, and reliability of applications. Among different types of testing, Smoke Testing stands out as one of the simplest yet most effective methods to quickly assess whether a build is stable enough for further testing.

This blog explores what smoke testing is, how it works, its features, benefits, real-world use cases, and how you can integrate it into your software development process.

What is Smoke Testing?

Smoke Testing (also called Build Verification Testing) is a type of software testing that ensures the most important functions of an application work correctly after a new build or release.

The term comes from hardware testing, where engineers would power up a device for the first time and check if it “smoked.” In software, the idea is similar — if the application fails during smoke testing, it’s not ready for deeper functional or regression testing.

Main Features and Components of Smoke Testing

  1. Build Verification
    • Performed on new builds to check if the application is stable enough for further testing.
  2. Critical Functionality Check
    • Focuses only on the essential features like login, navigation, data input, and core workflows.
  3. Shallow and Wide Testing
    • Covers all major areas of the application without going into too much detail.
  4. Automation or Manual Execution
    • Can be executed manually for small projects or automated for CI/CD pipelines.
  5. Fast Feedback
    • Provides developers and testers with immediate insights into build quality.

How Does Smoke Testing Work?

The process of smoke testing generally follows these steps:

  1. Receive the Build
    • A new build is deployed from the development team.
  2. Deploy in Test Environment
    • The build is installed in a controlled testing environment.
  3. Execute Smoke Test Cases
    • Testers run predefined test cases focusing on core functionality (e.g., login, saving records, basic navigation).
  4. Evaluate the Results
    • If the smoke test passes, the build is considered stable for further testing.
    • If it fails, the build is rejected, and the issues are reported back to developers.

Benefits of Smoke Testing

  1. Early Detection of Major Defects
    • Prevents wasted effort on unstable builds.
  2. Saves Time and Effort
    • Quickly identifies whether further testing is worthwhile.
  3. Improves Build Stability
    • Ensures only stable builds reach deeper levels of testing.
  4. Supports Continuous Integration
    • Automated smoke tests provide fast feedback in CI/CD pipelines.
  5. Boosts Confidence
    • Developers and testers gain assurance that the software is fundamentally working.

When and How Should We Use Smoke Testing?

  • After Every New Build
    • Run smoke tests to validate basic functionality before regression or system testing.
  • During Continuous Integration/Delivery (CI/CD)
    • Automate smoke tests to ensure each code commit does not break critical functionality.
  • In Agile Environments
    • Use smoke testing at the end of every sprint to ensure incremental builds remain stable.

Real-World Use Cases of Smoke Testing

  1. Web Applications
    • Example: After a new deployment of an e-commerce platform, smoke tests might check if users can log in, add items to a cart, and proceed to checkout.
  2. Mobile Applications
    • Example: For a banking app, smoke tests ensure users can log in, view account balances, and transfer funds before more advanced testing begins.
  3. Enterprise Systems
    • Example: In large ERP systems, smoke tests verify whether dashboards load, reports generate, and user roles function properly.
  4. CI/CD Pipelines
    • Example: Automated smoke tests run after every commit in Jenkins or GitHub Actions, ensuring no critical features are broken.

How to Integrate Smoke Testing Into Your Software Development Process

  1. Define Critical Features
    • Identify the most important features that must always work.
  2. Create Reusable Test Cases
    • Write simple but broad test cases that cover the entire system’s core functionalities.
  3. Automate Whenever Possible
    • Use testing frameworks like Selenium, Cypress, or JUnit to automate smoke tests.
  4. Integrate With CI/CD Tools
    • Configure Jenkins, GitLab CI, or GitHub Actions to trigger smoke tests after every build.
  5. Continuous Monitoring
    • Regularly review and update smoke test cases as the application evolves.

Conclusion

Smoke testing acts as the first line of defense in software testing. It ensures that critical functionalities are intact before investing time and resources into deeper testing activities. Whether you’re working with web apps, mobile apps, or enterprise systems, smoke testing helps maintain build stability and improves overall software quality.

By integrating smoke testing into your CI/CD pipeline, you can speed up development cycles, reduce risks, and deliver stable, reliable software to your users.

Understanding CI/CD Pipelines: A Complete Guide

Learning CI/CD pipelines

What Are CI/CD Pipelines?

What is CI/CD pipeline?

CI/CD stands for Continuous Integration and Continuous Delivery (or Deployment).
A CI/CD pipeline is a series of automated steps that help developers build, test, and deploy software more efficiently. Instead of waiting for long release cycles, teams can deliver updates to production quickly and reliably.

In simple terms, it is the backbone of modern DevOps practices, ensuring that code changes move smoothly from a developer’s laptop to production with minimal friction.

A Brief History of CI/CD

The idea of Continuous Integration was first popularized in the early 2000s through Extreme Programming (XP) practices. Developers aimed to merge code frequently and test it automatically to prevent integration issues.
Later, the concept of Continuous Delivery emerged, emphasizing that software should always be in a deployable state. With the rise of cloud computing and DevOps in the 2010s, Continuous Deployment extended this idea further, automating the final release step.

Today, CI/CD has become a standard in software engineering, supported by tools such as Jenkins, GitLab CI, GitHub Actions, CircleCI, and Azure DevOps.

Why Do We Need CI/CD Pipelines?

Without CI/CD, teams often face:

  • Integration problems when merging code late in the process.
  • Manual testing bottlenecks that slow down releases.
  • Risk of production bugs due to inconsistent environments.

CI/CD addresses these challenges by:

  • Automating builds and tests.
  • Providing rapid feedback to developers.
  • Reducing the risks of human error.

Key Benefits of CI/CD

  1. Faster Releases – Automations allow frequent deployments.
  2. Improved Quality – Automated tests catch bugs earlier.
  3. Better Collaboration – Developers merge code often, avoiding “integration hell.”
  4. Increased Confidence – Teams can push changes to production knowing the pipeline validates them.
  5. Scalability – Works well across small teams and large enterprises.

How Can We Use CI/CD in Our Projects?

Implementing CI/CD starts with:

  • Version Control Integration – Use Git repositories (GitHub, GitLab, Bitbucket).
  • CI/CD Tool Setup – Configure Jenkins, GitHub Actions, or other services.
  • Defining Stages – Common pipeline stages include:
    • Build – Compile the code and create artifacts.
    • Test – Run unit, integration, and functional tests.
    • Deploy – Push to staging or production environments.

Managing pipelines requires:

  • Infrastructure as Code (IaC) to keep environments consistent.
  • Monitoring and Logging to track pipeline health.
  • Regular maintenance of dependencies, tools, and scripts.

Can We Test the Pipelines?

Yes—and we should!
Testing pipelines ensures that the automation itself is reliable. Common practices include:

  • Pipeline Linting – Validate the configuration syntax.
  • Dry Runs – Run pipelines in a safe environment before production.
  • Self-Testing Pipelines – Use automated tests to verify the pipeline logic.
  • Chaos Testing – Intentionally break steps to confirm resilience.

Just as we test our applications, testing the pipeline gives confidence that deployments won’t fail when it matters most.

Conclusion

CI/CD pipelines are no longer a “nice to have”—they are essential for modern software development. They speed up delivery, improve code quality, and reduce risks. By implementing and maintaining well-designed pipelines, teams can deliver value to users continuously and confidently.

If you haven’t already, start small—integrate automated builds and tests, then expand toward full deployment automation. Over time, your CI/CD pipeline will become one of the most powerful assets in your software delivery process.

Related Posts

Understanding the Testing Pyramid in Software Development

Learning testing pyramid

What is Software Testing and Why is it Important?

Software testing is the process of verifying that an application behaves as expected under different scenarios. It helps identify bugs, ensures that requirements are met, and improves overall software quality.

Without testing, defects can slip into production, leading to downtime, financial loss, and reduced user trust. Testing ensures reliability, maintainability, and customer satisfaction, which are critical for any successful software product.

A Brief History of Software Testing

The roots of software testing go back to the 1950s, when debugging was the main approach for identifying issues. In the 1970s and 1980s, formal testing methods and structured test cases emerged, as software systems grew more complex.

By the 1990s, unit tests, integration tests, and automated testing frameworks became more common, especially with the rise of Agile and Extreme Programming (XP). Today, testing is an integral part of the DevOps pipeline, ensuring continuous delivery of high-quality software.

What is the Testing Pyramid?

What is testing pyramid?

The Testing Pyramid is a concept introduced by Mike Cohn in his book Succeeding with Agile (2009). It illustrates the ideal distribution of automated tests across different levels of the software.

The pyramid has three main layers:

  • Unit Tests (Base): Small, fast tests that check individual components or functions.
  • Integration Tests (Middle): Tests that ensure multiple components work together correctly.
  • UI/End-to-End Tests (Top): High-level tests that simulate real user interactions with the system.

This structure emphasizes having many unit tests, fewer integration tests, and even fewer UI tests.

Why is the Testing Pyramid Important?

Modern applications are complex, and not all tests provide the same value. If teams rely too heavily on UI tests, testing becomes slow, brittle, and costly.

The pyramid encourages:

  • Speed: Unit tests are fast, allowing developers to catch issues early.
  • Reliability: A solid base of tests provides confidence that core logic works correctly.
  • Cost Efficiency: Fixing bugs early at the unit level is cheaper than discovering them at production.
  • Balance: Ensures that test coverage is spread across different levels without overloading any one type.

Benefits of the Testing Pyramid

Faster Feedback: Developers get immediate results from unit tests.
Reduced Costs: Bugs are caught before they cascade into bigger problems.
Better Test Coverage: A layered approach covers both individual components and overall workflows.
Maintainable Test Suite: Avoids having too many slow, brittle UI tests.
Supports Agile and DevOps: Fits seamlessly into CI/CD pipelines for continuous delivery.

Conclusion

The Testing Pyramid is more than just a model—it’s a guideline for building a scalable and maintainable test strategy. By understanding the history of software testing and adopting this layered approach, teams can ensure their applications are reliable, cost-effective, and user-friendly.

Whether you’re building a small project or a large enterprise system, applying the Testing Pyramid principles will strengthen your software delivery process.

Related Posts

Blog at WordPress.com.

Up ↑