Search

Software Engineer's Notes

Tag

cybersecurity

One-Time Password (OTP): A Practical Guide for Engineers

What is One-Time Password?

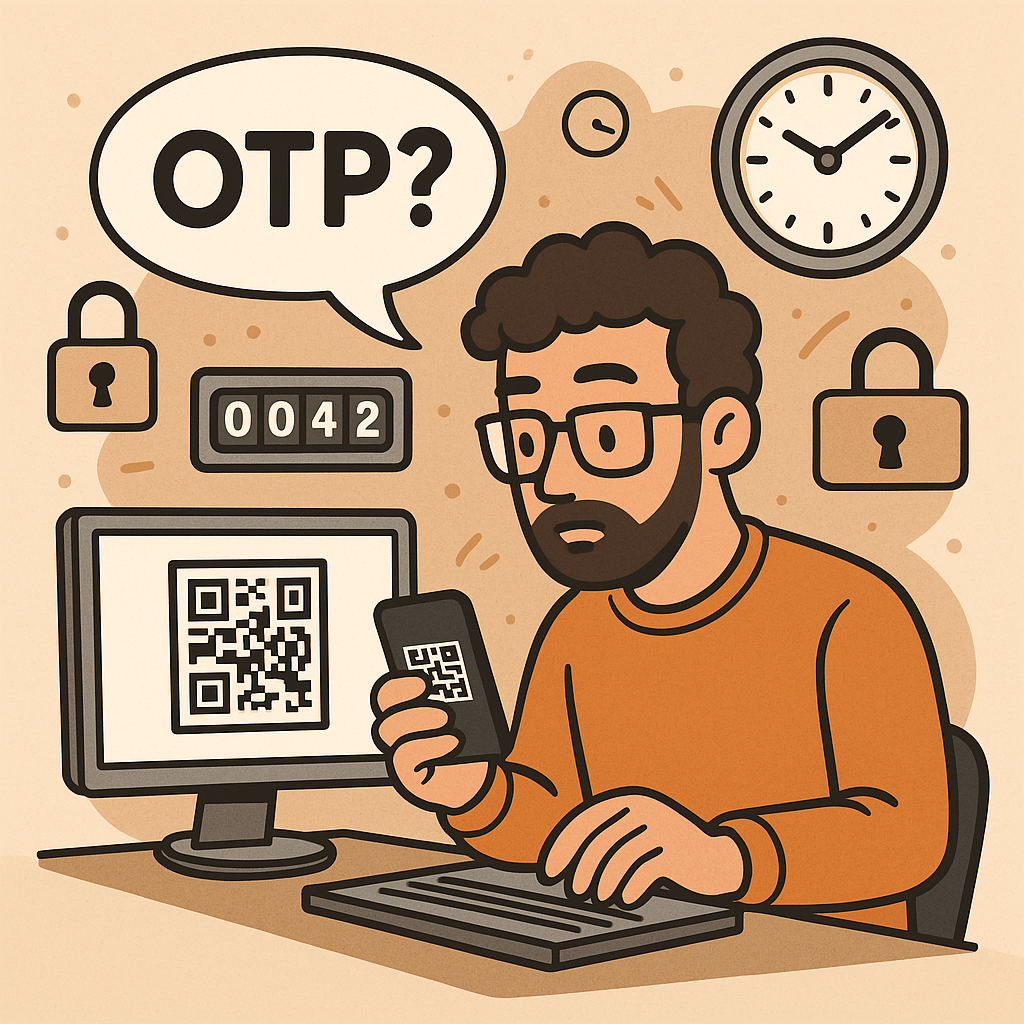
What is a One-Time Password?

A One-Time Password (OTP) is a code (e.g., 6–8 digits) that’s valid for a single use and typically expires quickly (e.g., 30–60 seconds). OTPs are used to:

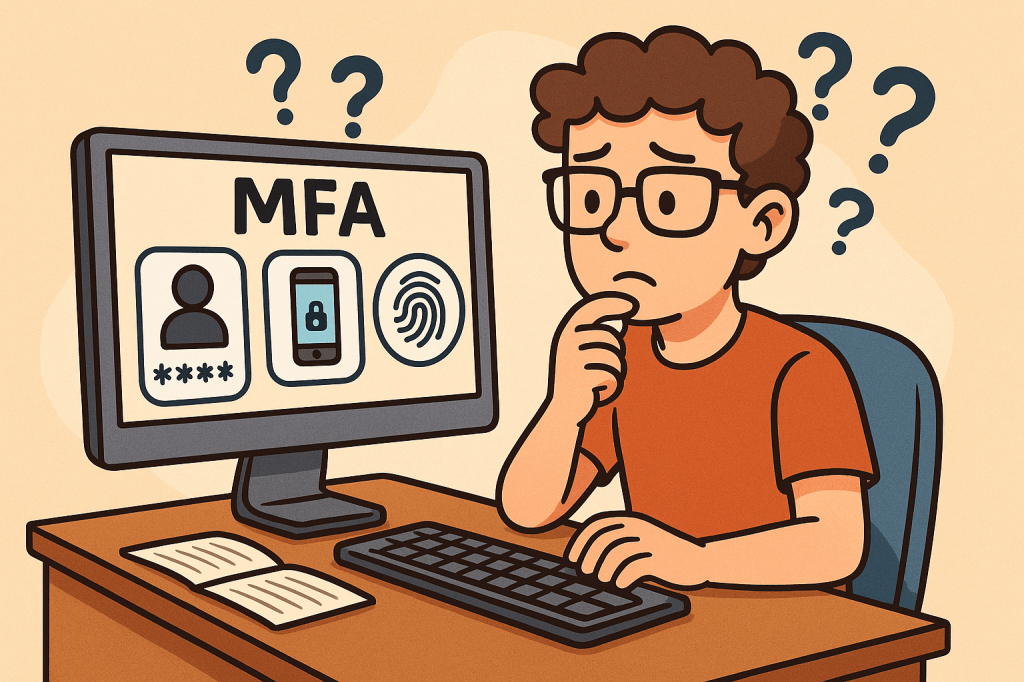
  • Strengthen login (as a second factor, MFA)
  • Approve sensitive actions (step-up auth)
  • Validate contact points (phone/email ownership)
  • Reduce fraud in payment or money movement flows

OTPs may be:

  • TOTP: time-based, generated locally in an authenticator app (e.g., 6-digit code rotating every 30s)
  • HOTP: counter-based, generated from a moving counter value
  • Out-of-band: delivered via SMS, email, or push (server sends the code out through another channel)

A Brief History (S/Key → HOTP → TOTP → Modern MFA)

  • 1981: Leslie Lamport introduces the concept of one-time passwords using hash chains.
  • 1990s (S/Key / OTP): Early challenge-response systems popularize one-time codes derived from hash chains (RFC 1760, later RFC 2289).
  • 2005 (HOTP, RFC 4226): Standardizes HMAC-based One-Time Password using a counter; each next code increments a counter.
  • 2011 (TOTP, RFC 6238): Standardizes Time-based OTP by replacing counter with time steps (usually 30 seconds), enabling app-based codes (Google Authenticator, Microsoft Authenticator, etc.).
  • 2010s–present: OTP becomes a mainstream second factor. The ecosystem expands with push approvals, number matching, device binding, and WebAuthn (which offers phishing-resistant MFA; OTP still widely used for reach and familiarity).

How OTP Works (with step-by-step flows)

1. TOTP (Time-based One-Time Password)

Idea: Client and server share a secret key. Every 30 seconds, both compute a new code from the secret + current time.

Generation (client/app):

  1. Determine current Unix time t.
  2. Compute time step T = floor(t / 30).
  3. Compute HMAC(secret, T) (e.g., HMAC-SHA-1/256).
  4. Dynamic truncate to 31-bit integer, then mod 10^digits (e.g., 10^6 → 6 digits).
  5. Display code like 413 229 (expires when the 30-second window rolls).

Verification (server):

  1. Recompute expected codes for T plus a small window (e.g., T-1, T, T+1) to tolerate clock skew.
  2. Compare user-entered code with any expected code.
  3. Enforce rate limiting and replay protection.

2. HOTP (Counter-based One-Time Password)

Idea: Instead of time, use a counter that increments on each code generation.

Generation: HMAC(secret, counter) → truncate → mod 10^digits.
Verification: Server allows a look-ahead window to resynchronize if client counters drift.

3. Out-of-Band Codes (SMS/Email/Push)

Idea: Server creates a random code and sends it through a side channel (e.g., SMS).
Verification: User types the received code; server checks match and expiration.

Pros: No app install; broad reach.
Cons: Vulnerable to SIM swap, SS7 weaknesses, email compromise, and phishing relays.

Core Components of an OTP System

  • Shared Secret (TOTP/HOTP): A per-user secret key (e.g., Base32) provisioned via QR code/URI during enrollment.
  • Code Generator:
    • Client-side (authenticator app) for TOTP/HOTP
    • Server-side generator for out-of-band codes
  • Delivery Channel: SMS, email, or push (for out-of-band); not needed for app-based TOTP/HOTP.
  • Verifier Service: Validates codes with timing/counter windows, rate limits, and replay detection.
  • Secure Storage: Store secrets with strong encryption and access controls (e.g., HSM or KMS).
  • Enrollment & Recovery: QR provisioning, backup codes, device change/reset flows.
  • Observability & Risk Engine: Logging, anomaly detection, geo/behavioral checks, adaptive step-up.

Benefits of Using OTP

  • Stronger security than passwords alone (defends against password reuse and basic credential stuffing).
  • Low friction & low cost (especially TOTP apps—no per-SMS fees).
  • Offline capability (TOTP works without network on the user device).
  • Standards-based & interoperable (HOTP/TOTP widely supported).
  • Flexible use cases: MFA, step-up approvals, transaction signing, device verification.

Weaknesses & Common Attacks

  • Phishing & Real-Time Relay: Attackers proxy login, capturing OTP and replaying instantly.
  • SIM Swap / SS7 Issues (SMS OTP): Phone number hijacking allows interception of SMS codes.
  • Email Compromise: If email is breached, emailed OTPs are exposed.
  • Malware/Overlays on Device: Can exfiltrate TOTP codes or intercept out-of-band messages.
  • Shared-Secret Risks: Poor secret handling during provisioning/storage leaks all future codes.
  • Clock Drift (TOTP): Device/server time mismatch causes false rejects.
  • Brute-force Guessing: Short codes require strict rate limiting and lockouts.
  • Usability & Recovery Gaps: Device loss without backup codes locks users out.

Note: OTP improves security but is not fully phishing-resistant. For high-risk scenarios, pair with phishing-resistant MFA (e.g., WebAuthn security keys or device-bound passkeys) and/or number-matching push.

When and How Should You Use OTP?

Use OTP when:

  • Adding MFA to protect accounts with moderate to high value.
  • Performing step-up auth for sensitive actions (password change, wire transfer).
  • Validating contact channels (phone/email ownership).
  • Operating offline contexts (TOTP works without data).

Choose the method:

  • TOTP app (recommended default): secure, cheap, offline, broadly supported.
  • SMS/email OTP: maximize reach; acceptable for low/medium risk with compensating controls.
  • Push approvals with number matching: good UX and better phishing defenses than raw OTP entry.
  • HOTP: niche, but useful for hardware tokens or counter-based devices.

Integration Guide for Your Software Development Lifecycle

1. Architecture Overview

  • Backend: OTP service (issue/verify), secret vault/KMS, rate limiter, audit logs.
  • Frontend: Enrollment screens (QR), verification forms, recovery/backup code flows.
  • Delivery (optional): SMS/email provider, push service.
  • Risk & Observability: Metrics, alerts, anomaly detection.

2. Enrollment Flow (TOTP)

  1. Generate a random per-user secret (160–256 bits).
  2. Store encrypted; never log secrets.
  3. Show otpauth:// URI as a QR code (issuer, account name, algorithm, digits, period).
  4. Ask user to type the current app code to verify setup.
  5. Issue backup codes; prompt to save securely.

3. Verification Flow (TOTP)

  1. User enters 6-digit code.
  2. Server recomputes expected codes for T-1..T+1.
  3. If match → success; else increment rate-limit counters and show safe errors.
  4. Log event and update risk signals.

4. Out-of-Band OTP Flow (SMS/Email)

  1. Server creates a random code (e.g., 6–8 digits), stores hash + expiry (e.g., 5 min).
  2. Send via chosen channel; avoid secrets in message templates.
  3. Verify user input; invalidate on success; limit attempts.

5. Code Examples (Quick Starts)

Java (Spring Security + TOTP using java-time + any TOTP lib):

// Pseudocode: verify TOTP code for user
boolean verifyTotp(String base32Secret, int userCode, long nowEpochSeconds) {
  long timeStep = 30;
  long t = nowEpochSeconds / timeStep;
  for (long offset = -1; offset <= 1; offset++) {
    int expected = Totp.generate(base32Secret, t + offset); // lib call
    if (expected == userCode) return true;
  }
  return false;
}

Node.js (TOTP with otplib or speakeasy):

const { authenticator } = require('otplib');
authenticator.options = { step: 30, digits: 6 }; // default
const isValid = authenticator.verify({
  token: userInput,
  secret: base32Secret
});

Python (pyotp):

import pyotp, time
totp = pyotp.TOTP(base32_secret, interval=30, digits=6)
is_valid = totp.verify(user_input, valid_window=1)  # allow ±1 step

6. Data Model & Storage

  • user_id, otp_type (TOTP/HOTP/SMS/email), secret_ref (KMS handle), enrolled_at, revoked_at
  • For out-of-band: otp_hash, expires_at, attempts, channel, destination_masked
  • Never store raw secrets or raw sent codes; store hash + salt for generated codes.

7. DevOps & Config

  • Secrets in KMS/HSM; rotate issuer keys periodically.
  • Rate limits: attempts per minute/hour/day; IP + account scoped.
  • Alerting: spikes in failures, drift errors, provider delivery issues.
  • Feature flags to roll out MFA gradually and enforce for riskier cohorts.

UX & Security Best Practices

  • Promote app-based TOTP over SMS/email by default; offer SMS/email as fallback.
  • Number matching for push approvals to mitigate tap-yes fatigue.
  • Backup codes: one-time printable set; show only on enrollment; allow regen with step-up.
  • Device time checks: prompt users if the clock is off; provide NTP sync tips.
  • Masked channels: show •••-•••-1234 rather than full phone/email.
  • Progressive enforcement: warn first, then require OTP for risky events.
  • Anti-phishing: distinguish trusted UI (e.g., app domain, passkeys), consider origin binding and link-proofing.
  • Accessibility & i18n: voice, large text, copy/paste, code grouping 123-456.

Testing & Monitoring Checklist

Functional

  • TOTP verification with ±1 step window
  • SMS/email resend throttling and code invalidation
  • Backup codes (single use)
  • Enrollment verification required before enablement

Security

  • Secrets stored via KMS/HSM; no logging of secrets/codes
  • Brute-force rate limits + exponential backoff
  • Replay protection (invalidate out-of-band codes on success)
  • Anti-automation (CAPTCHA/behavioral) where appropriate

Reliability

  • SMS/email provider failover or graceful degradation
  • Clock drift alarm; NTP health
  • Dashboards: success rate, latency, delivery failure, fraud signals

Glossary

  • OTP: One-Time Password—single-use code for auth or approvals.
  • HOTP (RFC 4226): HMAC-based counter-driven OTP.
  • TOTP (RFC 6238): Time-based OTP—rotates every fixed period (e.g., 30s).
  • MFA: Multi-Factor Authentication—two or more independent factors.
  • Step-Up Auth: Extra verification for high-risk actions.
  • Number Matching: Push approval shows a code the user must match, deterring blind approval.
  • WebAuthn/Passkeys: Phishing-resistant MFA based on public-key cryptography.

Final Thoughts

OTP is a powerful, standards-backed control that significantly raises the bar for attackers—if you implement it well. Prefer TOTP apps for security and cost, keep SMS/email for reach with compensating controls, and plan a path toward phishing-resistant options (WebAuthn) for your most sensitive use cases.

Multi-Factor Authentication (MFA): A Complete Guide

What is Multi-Factor Authentication?

In today’s digital world, security is more important than ever. Passwords alone are no longer enough to protect sensitive data, systems, and personal accounts. That’s where Multi-Factor Authentication (MFA) comes in. MFA adds an extra layer of security by requiring multiple forms of verification before granting access. In this post, we’ll explore what MFA is, its history, how it works, its main components, benefits, and practical ways to integrate it into modern software development processes.

What is Multi-Factor Authentication (MFA)?

Multi-Factor Authentication (MFA) is a security mechanism that requires users to provide two or more independent factors of authentication to verify their identity. Instead of relying solely on a username and password, MFA combines different categories of authentication to strengthen access security.

These factors usually fall into one of three categories:

  1. Something you know – passwords, PINs, or answers to security questions.
  2. Something you have – a physical device like a smartphone, hardware token, or smart card.
  3. Something you are – biometric identifiers such as fingerprints, facial recognition, or voice patterns.

A Brief History of MFA

  • 1960s – Passwords Introduced: Early computing systems introduced password-based authentication, but soon it became clear that passwords alone could be stolen or guessed.
  • 1980s – Two-Factor Authentication (2FA): The first wide adoption of hardware tokens emerged in the financial sector. RSA Security introduced tokens generating one-time passwords (OTPs).
  • 1990s – Wider Adoption: Enterprises began integrating smart cards and OTP devices for employees working with sensitive systems.
  • 2000s – Rise of Online Services: With e-commerce and online banking growing, MFA started becoming mainstream, using SMS-based OTPs and email confirmations.
  • 2010s – Cloud and Mobile Era: MFA gained momentum with apps like Google Authenticator, Authy, and push-based authentication, as cloud services required stronger protection.
  • Today – Ubiquity of MFA: MFA is now a standard security practice across industries, with regulations like GDPR, HIPAA, and PCI-DSS recommending or requiring it.

How Does MFA Work?

The MFA process follows these steps:

  1. Initial Login Attempt: A user enters their username and password.
  2. Secondary Challenge: After validating the password, the system prompts for a second factor (e.g., an OTP code, push notification approval, or biometric scan).
  3. Verification of Factors: The system verifies the additional factor(s).
  4. Access Granted or Denied: If all required factors are correct, the user gains access. Otherwise, access is denied.

MFA systems typically rely on:

  • Time-based One-Time Passwords (TOTP): Generated codes that expire quickly.
  • Push Notifications: Mobile apps sending approval requests.
  • Biometric Authentication: Fingerprint or facial recognition scans.
  • Hardware Tokens: Devices that produce unique, secure codes.

Main Components of MFA

  1. Authentication Factors: Knowledge, possession, and inherence (biometric).
  2. MFA Provider/Service: Software or platform managing authentication (e.g., Okta, Microsoft Authenticator, Google Identity Platform).
  3. User Device: Smartphone, smart card, or hardware token.
  4. Integration Layer: APIs and SDKs to connect MFA into existing applications.
  5. Policy Engine: Rules that determine when MFA is enforced (e.g., high-risk logins, remote access, or all logins).

Benefits of MFA

  • Enhanced Security: Strong protection against password theft, phishing, and brute-force attacks.
  • Regulatory Compliance: Meets security requirements in industries like finance, healthcare, and government.
  • Reduced Fraud: Prevents unauthorized access to financial accounts and sensitive systems.
  • Flexibility: Multiple methods available (tokens, biometrics, SMS, apps).
  • User Trust: Increases user confidence in the system’s security.

When and How Should We Use MFA?

MFA should be used whenever sensitive data or systems are accessed. Common scenarios include:

  • Online banking and financial transactions.
  • Corporate systems with confidential business data.
  • Cloud-based services (AWS, Azure, Google Cloud).
  • Email accounts and communication platforms.
  • Healthcare and government portals with personal data.

Organizations can enforce MFA selectively based on risk-based authentication—for example, requiring MFA only when users log in from new devices, unfamiliar locations, or during high-risk transactions.

Integrating MFA Into Software Development

To integrate MFA into modern software systems:

  1. Choose an MFA Provider: Options include Auth0, Okta, AWS Cognito, Azure AD, Google Identity.
  2. Use APIs & SDKs: Most MFA providers offer ready-to-use APIs, libraries, and plugins for web and mobile applications.
  3. Adopt Standards: Implement open standards like OAuth 2.0, OpenID Connect, and SAML with MFA extensions.
  4. Implement Risk-Based MFA: Use adaptive MFA policies (e.g., require MFA for admin access or when logging in from suspicious IPs).
  5. Ensure Usability: Provide multiple authentication options to avoid locking users out.
  6. Continuous Integration: Add MFA validation in CI/CD pipelines for admin and developer accounts accessing critical infrastructure.

Conclusion

Multi-Factor Authentication is no longer optional—it’s a necessity for secure digital systems. With its long history of evolution from simple passwords to advanced biometrics, MFA provides a robust defense against modern cyber threats. By integrating MFA into software development, organizations can safeguard users, comply with regulations, and build trust in their platforms.

What is a Man-in-the-Middle (MITM) Attack?

What is a man in the middle attack?

A Man-in-the-Middle (MITM) attack is when a third party secretly intercepts, reads, and possibly alters the communication between two parties who believe they are talking directly to each other. Think of it as someone quietly sitting between two people on a phone call, listening, possibly changing words, and passing the altered conversation on.

How MITM attacks work ?

A MITM attack has two essential parts: interception and optionally manipulation.

1) Interception (how the attacker gets between you and the other party)

The attacker places themselves on the network path so traffic sent from A → B goes through the attacker first. Common interception vectors (conceptual descriptions only):

  • Rogue Wi-Fi / Evil twin: attacker sets up a fake Wi-Fi hotspot with a convincing SSID (e.g., “CoffeeShop_WiFi”). Users connect and all traffic goes through the attacker’s machine.
  • ARP spoofing / ARP poisoning (local networks): attacker sends fake ARP messages on a LAN so traffic for the router or for another host is directed to the attacker’s NIC.
  • DNS spoofing / DNS cache poisoning: attacker poisons DNS responses so a domain name resolves to an IP address the attacker controls.
  • Compromised routers, proxies, or ISPs: if a router or upstream provider is compromised or misconfigured, traffic can be intercepted at that point.
  • BGP hijacking (on the internet backbone): attacker manipulates routing announcements to direct traffic over infrastructure they control.
  • Compromised certificate authorities or weak TLS setups: attacker abuses trust in certificates to intercept “secure” connections.

Important: the above are conceptual descriptions to help you understand how interception happens. I’m not providing exploit steps or tools to carry them out.

2) Manipulation (what the attacker can do with intercepted traffic)

Once traffic passes through the attacker, they can:

  • Eavesdrop — read plaintext communication (passwords, messages, session cookies).
  • Harvest credentials — capture login forms and credentials.
  • Modify data in transit — change web pages, inject malicious scripts, alter transactions.
  • Session hijack — steal session cookies or tokens to impersonate a user.
  • Downgrade connections — force a downgrade from HTTPS to HTTP or strip TLS (SSL stripping) if possible.
  • Impersonate endpoints — present fake certificates or proxy TLS connections to hide themselves.

Typical real-world scenarios / examples

  • You connect to “FreeAirportWiFi” and a fake hotspot captures your login to a webmail service.
  • On a corporate LAN, an attacker uses ARP spoofing to capture internal web traffic and collect session cookies.
  • DNS entries for a banking site are poisoned so users are sent to a look-alike site where credentials are harvested.
  • A corporate TLS-intercepting proxy (legitimate in some orgs) inspects HTTPS traffic — if misconfigured or if certificates are not validated correctly, this can be abused.

What’s the issue and how can MITM affect us?

MITM attacks threaten confidentiality, integrity, and authenticity:

  • Confidentiality breach: private messages, PII, payment details, health records can be exposed.
  • Credential theft & account takeover: stolen passwords or tokens lead to fraud, identity theft, or account compromises.
  • Financial loss / fraud: attackers can alter payment instructions (e.g., change bank account numbers).
  • Supply-chain or software tampering: updates or downloads could be altered.
  • Reputation and legal risk: businesses can lose user trust and face compliance issues if customer data is intercepted.

Small, everyday examples (end-user impact): stolen email logins, unauthorized purchases, unauthorized access to corporate systems. For organizations: data breach notifications, regulatory fines, and remediation costs.

How to prevent Man-in-the-Middle attacks — practical, defensible steps

Below are layered, defense-in-depth controls: user practices, network configuration, application design, and monitoring.

A. User & device best practices

  • Avoid public/untrusted Wi-Fi: treat public Wi-Fi as untrusted. If you must use it, use a reputable VPN.
  • Prefer mobile/cellular networks when doing sensitive transactions if a trusted Wi-Fi is not available.
  • Check HTTPS / certificate details for sensitive sites: browsers show padlock and certificate information (issuer, valid dates). If warnings appear, do not proceed.
  • Use Multi-Factor Authentication (MFA): even if credentials are stolen, MFA adds a barrier.
  • Keep devices patched: OS, browser, and app updates close known vulnerabilities attackers exploit.
  • Use reputable endpoint security (antivirus/EDR) that can detect suspicious network drivers or proxying.

B. Network & infrastructure controls

  • Use WPA2/WPA3 and strong Wi-Fi passwords; disable open Wi-Fi for business networks unless behind secure gateways.
  • Harden DNS: use DNSSEC where possible and validate DNS responses; consider DNS over HTTPS (DoH) or DNS over TLS (DoT) for clients.
  • Deploy network segmentation and limit broadcast domains (reduces ARP spoofing exposure).
  • Use secure routing practices and monitor BGP for suspicious route changes (for large networks / ISPs).
  • Disable unnecessary proxying and block rogue DHCP servers on internal networks.

C. TLS / application-level protections

  • Enforce HTTPS everywhere: redirect HTTP → HTTPS and ensure all resources load over HTTPS to avoid mixed-content issues.
  • Use HSTS (HTTP Strict Transport Security) with preload when appropriate — forces browsers to only use HTTPS for your domain.
  • Enable OCSP stapling and certificate transparency: reduces chances of accepting revoked/forged certs.
  • Prefer modern TLS versions and ciphers; disable older, vulnerable protocols (SSLv3, TLS 1.0/1.1).
  • Certificate pinning (in mobile apps or critical clients) — binds an app to a known certificate or public key to prevent forged certificates (use cautiously; requires careful update procedures).
  • Mutual TLS (mTLS) for machine-to-machine or internal high-security services — both sides verify certificates.
  • Use strong authentication and short-lived tokens for APIs; avoid relying solely on long-lived session cookies without binding.

D. Organizational policies & monitoring

  • Use enterprise VPNs for remote workers, with two-factor auth and endpoint posture checks.
  • Implement Intrusion Detection / Prevention (IDS/IPS) and network monitoring to spot ARP anomalies, rogue DHCP servers, unusual TLS/HTTPS flows, or unexpected proxying.
  • Log and review TLS handshakes, certs presented, and network flows — automated alerts for anomalous certificate issuers or frequent certificate changes.
  • Train users to recognize fake Wi-Fi, phishing, and certificate warnings.
  • Limit administrative privileges — reduce what an attacker can access with stolen credentials.
  • Adopt secure SDLC practices: ensure apps validate TLS, implement safe error handling, and do not suppress certificate validation during testing.

E. App developer guidance (to make MITM harder)

  • Never disable certificate validation in client code for production.
  • Implement certificate pinning where appropriate, with a safe update path (e.g., pin several keys or allow a backup).
  • Use OAuth / OpenID best practices (use PKCE for public clients).
  • Use secure cookie flags (Secure, HttpOnly, SameSite) and short session lifetimes.
  • Prefer token revocation and rotation; make stolen tokens short-lived.

Detecting a possible MITM (signs to watch for)

  • Browser security warnings about invalid certificates, untrusted issuers, or certificate name mismatches.
  • Frequent or unexpected TLS/HTTPS certificate changes for the same site.
  • Unusually slow connections or pages that change content unexpectedly.
  • Login failures that occur only on a certain network (e.g., at a coffee shop).
  • Unexpected prompts to install root certificates (red flag — don’t install unless from your trusted IT).
  • Repeated authentication prompts where you’d normally remain logged in.

If you suspect a MITM:

  1. Immediately disconnect from the network (turn off Wi-Fi/cable).
  2. Reconnect using a trusted network (e.g., mobile tethering) or VPN.
  3. Change critical passwords from a trusted network.
  4. Scan your device for malware.
  5. Notify your org’s security team and preserve logs if possible.

Quick checklist you can use / share

  • Use HTTPS everywhere (HSTS, OCSP stapling)
  • Enforce MFA across accounts
  • Don’t use public Wi-Fi for sensitive tasks; if you must, use VPN
  • Keep software and certificates up to date
  • Enable secure cookie flags and short sessions
  • Monitor network for ARP/DNS anomalies and certificate anomalies
  • Train users on Wi-Fi safety & certificate warnings

Short FAQ

Q: Is HTTPS enough to prevent MITM?
A: HTTPS/TLS dramatically reduces MITM risk if implemented and validated correctly. However, misconfigured TLS, compromised CAs, or users ignoring browser warnings can still enable MITM. Combine TLS with HSTS, OCSP stapling, and client-side checks for stronger protection.

Q: Can a corporate proxy cause MITM?
A: Some corporate proxies intentionally intercept TLS for inspection (they present their own certs to client devices that have a corporate root installed). That’s legitimate in many organizations but must be clearly controlled, configured, and audited. Misconfiguration or abuse could be risky.

Q: Should I use certificate pinning in my web app?
A: Pinning helps but requires careful operational planning to avoid locking out users when certs change. For mobile apps and sensitive connections, pinning to a set of public keys (not single cert) and having a backup plan is common.

Forward Secrecy in Computer Science: A Detailed Guide

What is forward secrecy?

What is Forward Secrecy?

Forward Secrecy (also called Perfect Forward Secrecy or PFS) is a cryptographic property that ensures the confidentiality of past communications even if the long-term private keys of a server are compromised in the future.

In simpler terms: if someone records your encrypted traffic today and later manages to steal the server’s private key, forward secrecy prevents them from decrypting those past messages.

This makes forward secrecy a powerful safeguard in modern security protocols, especially in an age where data is constantly being transmitted and stored.

A Brief History of Forward Secrecy

The concept of forward secrecy grew out of concerns around key compromise and long-term encryption risks:

  • 1976 – Diffie–Hellman key exchange introduced: Whitfield Diffie and Martin Hellman presented a method for two parties to establish a shared secret over an insecure channel. This idea laid the foundation for forward secrecy.
  • 1980s–1990s – Early SSL/TLS protocols: Early versions of SSL/TLS encryption primarily relied on static RSA keys. While secure at the time, they did not provide forward secrecy—meaning if a private RSA key was stolen, past encrypted sessions could be decrypted.
  • 2000s – TLS with Ephemeral Diffie–Hellman (DHE/ECDHE): Forward secrecy became more common with the adoption of ephemeral Diffie–Hellman key exchanges, where temporary session keys were generated for each communication.
  • 2010s – Industry adoption: Companies like Google, Facebook, and WhatsApp began enforcing forward secrecy in their security protocols to protect users against large-scale data breaches and surveillance.
  • Today: Forward secrecy is considered a best practice in modern cryptographic systems and is a default in most secure implementations of TLS 1.3.

How Does Forward Secrecy Work?

Forward secrecy relies on ephemeral key exchanges—temporary keys that exist only for the duration of a single session.

The process typically works like this:

  1. Key Agreement: Two parties (e.g., client and server) use a protocol like Diffie–Hellman Ephemeral (DHE) or Elliptic-Curve Diffie–Hellman Ephemeral (ECDHE) to generate a temporary session key.
  2. Ephemeral Nature: Once the session ends, the key is discarded and never stored permanently.
  3. Data Encryption: All messages exchanged during the session are encrypted with this temporary key.
  4. Protection: Even if the server’s private key is later compromised, attackers cannot use it to decrypt old traffic because the session keys were unique and have been destroyed.

This contrasts with static key exchanges, where a single private key could unlock all past communications if stolen.

Benefits of Forward Secrecy

Forward secrecy offers several key advantages:

  • Protection Against Key Compromise: If an attacker steals your long-term private key, they still cannot decrypt past sessions.
  • Data Privacy Over Time: Even if adversaries record encrypted traffic today, it will remain safe in the future.
  • Resilience Against Mass Surveillance: Prevents large-scale attackers from retroactively decrypting vast amounts of data.
  • Improved Security Practices: Encourages modern cryptographic standards such as TLS 1.3.

Example:

Imagine an attacker records years of encrypted messages between a bank and its customers. Later, they manage to steal the bank’s private TLS key.

  • Without forward secrecy: all those years of recorded traffic could be decrypted.
  • With forward secrecy: the attacker gains nothing—each past session had its own temporary key that is now gone.

Weaknesses and Limitations of Forward Secrecy

While forward secrecy is powerful, it is not without challenges:

  • Performance Overhead: Generating ephemeral keys requires more CPU resources, though this has become less of an issue with modern hardware.
  • Complex Implementations: Incorrectly implemented ephemeral key exchange protocols may introduce vulnerabilities.
  • Compatibility Issues: Older clients, servers, or protocols may not support DHE/ECDHE, leading to fallback on weaker, non-forward-secret modes.
  • No Protection for Current Sessions: If a session key is stolen during an active session, forward secrecy cannot help—it only protects past sessions.

Why and How Should We Use Forward Secrecy?

Forward secrecy is a must-use in today’s security landscape because:

  • Data breaches are inevitable, but forward secrecy reduces their damage.
  • Cloud services, messaging platforms, and financial institutions handle sensitive data daily.
  • Regulations and industry standards increasingly recommend or mandate forward secrecy.

Real-World Examples:

  • Google and Facebook: Enforce forward secrecy across their HTTPS connections to protect user data.
  • WhatsApp and Signal: Use end-to-end encryption with forward secrecy, ensuring messages cannot be decrypted even if long-term keys are compromised.
  • TLS 1.3 (2018): The newest version of TLS requires forward secrecy by default, pushing the industry toward safer encryption practices.

Integrating Forward Secrecy into Software Development

Here’s how you can adopt forward secrecy in your own development process:

  1. Use Modern Protocols: Prefer TLS 1.3 or TLS 1.2 with ECDHE key exchange.
  2. Update Cipher Suites: Configure servers to prioritize forward-secret cipher suites (e.g., ECDHE_RSA_WITH_AES_256_GCM_SHA384).
  3. Secure Messaging Systems: Implement end-to-end encryption protocols that leverage ephemeral keys.
  4. Code Reviews & Testing: Ensure forward secrecy is included in security testing and DevSecOps pipelines.
  5. Stay Updated: Regularly patch and upgrade libraries like OpenSSL, BoringSSL, or GnuTLS to ensure forward secrecy support.

Conclusion

Forward secrecy is no longer optional—it is a critical defense mechanism in modern cryptography. By ensuring that past communications remain private even after a key compromise, forward secrecy offers long-term protection in an increasingly hostile cyber landscape.

Integrating forward secrecy into your software development process not only enhances security but also builds user trust. With TLS 1.3, messaging protocols, and modern encryption libraries, adopting forward secrecy is easier than ever.

Homomorphic Encryption: A Comprehensive Guide

What is Homomorphic Encryption?

What is Homomorphic Encryption?

Homomorphic Encryption (HE) is an advanced form of encryption that allows computations to be performed on encrypted data without ever decrypting it. The result of the computation, once decrypted, matches the output as if the operations were performed on the raw, unencrypted data.

In simpler terms: you can run mathematical operations on encrypted information while keeping it private and secure. This makes it a powerful tool for data security, especially in environments where sensitive information needs to be processed by third parties.

A Brief History of Homomorphic Encryption

  • 1978 – Rivest, Adleman, Dertouzos (RAD paper): The concept was first introduced in their work on “Privacy Homomorphisms,” which explored how encryption schemes could support computations on ciphertexts.
  • 1982–2000s – Partial Homomorphism: Several encryption schemes were developed that supported only one type of operation (either addition or multiplication). Examples include RSA (multiplicative homomorphism) and Paillier (additive homomorphism).
  • 2009 – Breakthrough: Craig Gentry proposed the first Fully Homomorphic Encryption (FHE) scheme as part of his PhD thesis. This was a landmark moment, proving that it was mathematically possible to support arbitrary computations on encrypted data.
  • 2010s–Present – Improvements: Since Gentry’s breakthrough, researchers and companies (e.g., IBM, Microsoft, Google) have been working on making FHE more practical by improving performance and reducing computational overhead.

How Does Homomorphic Encryption Work?

At a high level, HE schemes use mathematical structures (like lattices, polynomials, or number theory concepts) to allow algebraic operations directly on ciphertexts.

  1. Encryption: Plaintext data is encrypted using a special homomorphic encryption scheme.
  2. Computation on Encrypted Data: Mathematical operations (addition, multiplication, etc.) are performed directly on the ciphertext.
  3. Decryption: The encrypted result is decrypted, yielding the same result as if the operations were performed on plaintext.

For example:

  • Suppose you encrypt numbers 4 and 5.
  • The server adds the encrypted values without knowing the actual numbers.
  • When you decrypt the result, you get 9.

This ensures that sensitive data remains secure during computation.

Variations of Homomorphic Encryption

There are different types of HE based on the level of operations supported:

  1. Partially Homomorphic Encryption (PHE): Supports only one operation (e.g., RSA supports multiplication, Paillier supports addition).
  2. Somewhat Homomorphic Encryption (SHE): Supports both addition and multiplication, but only for a limited number of operations before noise makes the ciphertext unusable.
  3. Fully Homomorphic Encryption (FHE): Supports unlimited operations of both addition and multiplication. This is the “holy grail” of HE but is computationally expensive.

Benefits of Homomorphic Encryption

  • Privacy Preservation: Data remains encrypted even during processing.
  • Enhanced Security: Third parties (e.g., cloud providers) can compute on data without accessing the raw information.
  • Regulatory Compliance: Helps organizations comply with privacy laws (HIPAA, GDPR) by securing sensitive data such as health or financial records.
  • Collaboration: Enables secure multi-party computation where organizations can jointly analyze data without exposing raw datasets.

Why and How Should We Use It?

We should use HE in cases where data confidentiality and secure computation are equally important. Traditional encryption secures data at rest and in transit, but HE secures data while in use.

Implementation steps include:

  1. Choosing a suitable library or framework (e.g., Microsoft SEAL, IBM HELib, PALISADE).
  2. Identifying use cases where sensitive computations are required (e.g., health analytics, secure financial transactions).
  3. Integrating HE into existing software through APIs or SDKs provided by these libraries.

Real World Examples of Homomorphic Encryption

  • Healthcare: Hospitals can encrypt patient data and send it to cloud servers for analysis (like predicting disease risks) without exposing sensitive medical records.
  • Finance: Banks can run fraud detection models on encrypted transaction data, ensuring privacy of customer information.
  • Machine Learning: Encrypted datasets can be used to train machine learning models securely, protecting training data from leaks.
  • Government & Defense: Classified information can be processed securely by contractors without disclosing the underlying sensitive details.

Integrating Homomorphic Encryption into Software Development

  1. Assess the Need: Determine if your application processes sensitive data that requires computation by third parties.
  2. Select an HE Library: Popular libraries include SEAL (Microsoft), HELib (IBM), and PALISADE (open-source).
  3. Design for Performance: HE is still computationally heavy; plan your architecture with efficient algorithms and selective encryption.
  4. Testing & Validation: Run test scenarios to validate that encrypted computations produce correct results.
  5. Deployment: Deploy as part of your microservices or cloud architecture, ensuring encrypted workflows where required.

Conclusion

Homomorphic Encryption is a game-changer in modern cryptography. While still in its early stages of practical adoption due to performance challenges, it provides a new paradigm of data security: protecting information not only at rest and in transit, but also during computation.

As the technology matures, more industries will adopt it to balance data utility with data privacy—a crucial requirement in today’s digital landscape.

Understanding Transport Layer Security (TLS): A Complete Guide

What is Transport Layer Security?

What is TLS?

Transport Layer Security (TLS) is a cryptographic protocol that ensures secure communication between computers over a network. It is the successor to Secure Sockets Layer (SSL) and is widely used to protect data exchanged across the internet, such as when browsing websites, sending emails, or transferring files.

TLS establishes a secure channel by encrypting the data, making sure that attackers cannot eavesdrop or tamper with the information. Today, TLS is a cornerstone of internet security and is fundamental to building trust in digital communications.

How Does TLS Work?

TLS operates in two major phases:

1. Handshake Phase

  • When a client (like a web browser) connects to a server (like a website), they first exchange cryptographic information.
  • The server presents its TLS certificate, which is issued by a trusted Certificate Authority (CA). This allows the client to verify the server’s authenticity.
  • A key exchange mechanism is used (e.g., RSA or Diffie-Hellman) to securely agree on a shared secret key.

2. Data Encryption Phase

  • After the handshake, both client and server use the shared key to encrypt the data.
  • This ensures confidentiality (data cannot be read by outsiders), integrity (data cannot be altered undetected), and authentication (you’re communicating with the right server).

Main Components of TLS

  1. TLS Handshake Protocol
    • Negotiates the encryption algorithms and establishes session keys.
  2. Certificates and Certificate Authorities (CAs)
    • Digital certificates validate the server’s identity.
    • CAs issue and verify these certificates to ensure trust.
  3. Public Key Infrastructure (PKI)
    • Uses asymmetric cryptography (public/private keys) for authentication and key exchange.
  4. Symmetric Encryption
    • Once the handshake is complete, data is encrypted with a shared symmetric key, which is faster and more efficient.
  5. Message Authentication Codes (MACs)
    • Ensure data integrity by verifying that transmitted messages are not altered.

Advantages and Benefits of TLS

  1. Confidentiality – Prevents unauthorized access by encrypting data in transit.
  2. Integrity – Detects and prevents data tampering.
  3. Authentication – Validates server (and sometimes client) identity using certificates.
  4. Trust & Compliance – Required for compliance with standards like PCI DSS, GDPR, and HIPAA.
  5. Performance with Security – Modern TLS versions (like TLS 1.3) are optimized for speed without compromising security.

When and How Should We Use TLS?

  • Websites & Web Applications: Protects HTTP traffic via HTTPS.
  • Email Communication: Secures SMTP, IMAP, and POP3.
  • APIs & Microservices: Ensures secure communication between distributed components.
  • File Transfers: Used in FTPS and SFTP for secure file exchange.
  • VoIP & Messaging: Protects real-time communication channels.

Simply put, TLS should be used anytime sensitive or private data is exchanged over a network.

Real-World Examples

  1. HTTPS Websites: Every secure website (with a padlock icon in browsers) uses TLS.
  2. Online Banking: TLS secures login credentials, financial transactions, and personal data.
  3. E-commerce Platforms: Protects payment information during checkout.
  4. Healthcare Systems: Secures patient data to comply with HIPAA.
  5. Cloud Services: Ensures secure API calls between cloud-based applications.

How to Integrate TLS into the Software Development Process

  1. Use HTTPS by Default
    • Always deploy TLS certificates on your web servers and enforce HTTPS connections.
  2. Automate Certificate Management
    • Use tools like Let’s Encrypt for free and automated certificate renewal.
  3. Secure APIs and Microservices
    • Apply TLS for internal service-to-service communication in microservice architectures.
  4. Enforce Strong TLS Configurations
    • Disable outdated protocols like SSL, TLS 1.0, and TLS 1.1.
    • Use TLS 1.2 or TLS 1.3 for stronger security.
  5. CI/CD Integration
    • Include TLS configuration tests in your pipeline to ensure secure deployments.
  6. Regular Security Audits
    • Continuously scan your applications and servers for weak TLS configurations.

Conclusion

Transport Layer Security (TLS) is not just a security protocol—it’s the backbone of secure digital communication. By encrypting data, authenticating identities, and preserving integrity, TLS builds trust between users and applications.

Whether you are building a website, developing an API, or running enterprise systems, integrating TLS into your software development process is no longer optional—it’s essential.

Simple Authentication and Security Layer (SASL): A Practical Guide

What is Simple Authentication and Security Layer?

SASL (Simple Authentication and Security Layer) is a framework that adds pluggable authentication and optional post-authentication security (integrity/confidentiality) to application protocols such as SMTP, IMAP, POP3, LDAP, XMPP, AMQP 1.0, Kafka, and more. Instead of hard-coding one login method into each protocol, SASL lets clients and servers negotiate from a menu of mechanisms (e.g., SCRAM, Kerberos/GSSAPI, OAuth bearer tokens, etc.).

What Is SASL?

SASL is a protocol-agnostic authentication layer defined so that an application protocol (like IMAP or LDAP) can “hook in” standardized auth exchanges without reinventing them. It specifies:

  • How a client and server negotiate an authentication mechanism
  • How they exchange challenges and responses for that mechanism
  • Optionally, how they enable a security layer after auth (message integrity and/or encryption)

Key idea: SASL = negotiation + mechanism plug-ins, not a single algorithm.

How SASL Works (Step by Step)

  1. Advertise capabilities
    The server advertises supported SASL mechanisms (e.g., SCRAM-SHA-256, GSSAPI, PLAIN, OAUTHBEARER).
  2. Client selects mechanism
    The client picks one mechanism it supports (optionally sending an initial response).
  3. Challenge–response exchange
    The server sends a challenge; the client replies with mechanism-specific data (proofs, nonces, tickets, tokens, etc.). Multiple rounds may occur.
  4. Authentication result
    On success, the server confirms authentication. Some mechanisms can now negotiate a security layer (per-message integrity/confidentiality). In practice, most modern deployments use TLS for the transport layer and skip SASL’s own security layer.
  5. Application traffic
    The client proceeds with the protocol (fetch mail, query directory, produce to Kafka, etc.), now authenticated (and protected by TLS and/or the SASL layer if negotiated).

Core Components & Concepts

  • Mechanism: The algorithm/protocol used to authenticate (e.g., SCRAM-SHA-256, GSSAPI, OAUTHBEARER, PLAIN).
  • Initial response: Optional first payload sent with the mechanism selection.
  • Challenge/response: The back-and-forth messages carrying proofs and metadata.
  • Security layer: Optional integrity/confidentiality after auth (distinct from TLS).
  • Channel binding: A way to bind auth to the outer TLS channel to prevent MITM downgrades (used by mechanisms like SCRAM with channel binding).

Common SASL Mechanisms (When to Use What)

MechanismWhat it isUse whenNotes
SCRAM-SHA-256/512Salted Challenge Response Authentication Mechanism using SHA-2You want strong password auth with no plaintext passwords on the wire and hashed+salted storageModern default for many systems (Kafka, PostgreSQL ≥10). Supports channel binding variants.
GSSAPI (Kerberos)Enterprise single sign-on via Kerberos ticketsYou have an Active Directory / Kerberos realm and want SSOExcellent for internal corp networks; more setup complexity.
OAUTHBEAREROAuth 2.0 bearer tokens in SASLYou issue/verify OAuth tokensGreat for cloud/microservices; aligns with identity providers (IdPs).
EXTERNALUse external credentials from the transport (e.g., TLS client cert)You use mutual TLSNo passwords; trust comes from certificates.
PLAINUsername/password in clear (over TLS)You already enforce TLS everywhere and need simplicityEasy but must require TLS. Do not use without TLS.
CRAM-MD5 / DIGEST-MD5Legacy challenge-responseLegacy interop onlyConsider migrating to SCRAM.

Practical default today: TLS + SCRAM-SHA-256 (or TLS + OAUTHBEARER if you already run OAuth).

Advantages & Benefits

  • Pluggable & future-proof: Swap mechanisms without changing the application protocol.
  • Centralized policy: Standardizes auth across many services.
  • Better password handling (with SCRAM): No plaintext at rest, resistant to replay.
  • Enterprise SSO (with GSSAPI): Kerberos tickets instead of passwords.
  • Cloud-friendly (with OAUTHBEARER): Leverage existing IdP and token lifecycles.
  • Interoperability: Widely implemented in mail, messaging, directory services, and databases.

When & How Should You Use SASL?

Use SASL when your protocol (or product) supports it natively and you need one or more of:

  • Strong password auth with modern hashing ⇒ choose SCRAM-SHA-256/512.
  • Single Sign-On in enterprise ⇒ choose GSSAPI (Kerberos).
  • IdP integration & short-lived credentials ⇒ choose OAUTHBEARER.
  • mTLS-based trust ⇒ choose EXTERNAL.
  • Simplicity under TLSPLAIN (TLS mandatory).

Deployment principles

  • Always enable TLS (or equivalent) even if the mechanism supports a security layer.
  • Prefer SCRAM over legacy mechanisms when using passwords.
  • Enforce mechanism allow-lists (e.g., disable PLAIN if TLS is off).
  • Use channel binding where available.
  • Centralize secrets in a secure vault and rotate regularly.

Real-World Use Cases (Deep-Dive)

1) Email: SMTP, IMAP, POP3

  • Goal: Authenticate mail clients to servers.
  • Mechanisms: PLAIN (over TLS), LOGIN (non-standard but common), SCRAM, OAUTHBEARER/XOAUTH2 for providers with OAuth.
  • Flow: Client connects with STARTTLS or SMTPS/IMAPS → server advertises mechanisms → client authenticates → proceeds to send/receive mail.
  • Why SASL: Broad client interop, ability to modernize from PLAIN to SCRAM/OAuth without changing SMTP/IMAP themselves.

2) LDAP Directory (SASL Bind)

  • Goal: Authenticate users/applications to a directory (OpenLDAP, 389-ds).
  • Mechanisms: GSSAPI (Kerberos SSO), EXTERNAL (TLS client certs), SCRAM, PLAIN (with TLS).
  • Why SASL: Flexible enterprise auth: service accounts via SCRAM, employees via Kerberos.

3) Kafka Producers/Consumers

  • Goal: Secure cluster access per client/app.
  • Mechanisms: SASL/SCRAM-SHA-256, SASL/OAUTHBEARER, SASL/GSSAPI in some shops.
  • Why SASL: Centralize identity, attach ACLs per principal, rotate secrets/tokens cleanly.

Kafka client example (SCRAM-SHA-256):

# client.properties
security.protocol=SASL_SSL
sasl.mechanism=SCRAM-SHA-256
sasl.jaas.config=org.apache.kafka.common.security.scram.ScramLoginModule required \
 username="app-user" \
 password="s3cr3t";

4) XMPP (Jabber)

  • Goal: Client-to-server and server-to-server auth.
  • Mechanisms: SCRAM, EXTERNAL (certs), sometimes GSSAPI.
  • Why SASL: Clean negotiation, modern password handling, works across diverse servers/clients.

5) PostgreSQL ≥ 10 (Database Logins)

  • Goal: Strong password auth for DB clients.
  • Mechanisms: SASL/SCRAM-SHA-256 preferred over MD5.
  • Why SASL: Mitigates plaintext/MD5 weaknesses; supports channel binding with TLS.

6) AMQP 1.0 Messaging (e.g., Apache Qpid, Azure Service Bus)

  • Goal: Authenticate publishers/consumers.
  • Mechanisms: PLAIN (over TLS), EXTERNAL, OAUTHBEARER depending on broker.
  • Why SASL: AMQP 1.0 defines SASL for its handshake, so it’s the standard path.

Implementation Patterns (Developers & Operators)

Choose mechanisms

  • Default: TLS + SCRAM-SHA-256
  • Enterprise SSO: TLS + GSSAPI
  • Cloud IdP: TLS + OAUTHBEARER (short-lived tokens)

Server hardening checklist

  • Require TLS for all auth (disable cleartext fallbacks)
  • Allow-list mechanisms (disable weak/legacy ones)
  • Rate-limit authentication attempts
  • Rotate secrets/tokens; enforce password policy for SCRAM
  • Audit successful/failed auths; alert on anomalies
  • Enable channel binding (if supported)

Client best practices

  • Verify server certificates and hostnames
  • Prefer SCRAM over PLAIN where offered
  • Cache/refresh OAuth tokens properly
  • Fail closed if the server downgrades mechanisms or TLS

Example: SMTP AUTH with SASL PLAIN (over TLS)

Use only over TLS. PLAIN sends credentials in a single base64-encoded blob.

S: 220 mail.example.com ESMTP
C: EHLO client.example
S: 250-AUTH PLAIN SCRAM-SHA-256
C: STARTTLS
S: 220 Ready to start TLS
... (TLS negotiated) ...
C: AUTH PLAIN AHVzZXJuYW1lAHN1cGVyLXNlY3JldA==
S: 235 2.7.0 Authentication successful

If available, prefer:

C: AUTH SCRAM-SHA-256 <initial-client-response>

SCRAM protects against replay and stores salted, hashed passwords server-side.

Limitations & Gotchas

  • Not a silver bullet: SASL standardizes auth, but you still need TLS, good secrets hygiene, and strong ACLs.
  • Mechanism mismatches: Client/Server must overlap on at least one mechanism.
  • Legacy clients: Some only support PLAIN/LOGIN; plan for a migration path.
  • Operational complexity: Kerberos and OAuth introduce infrastructure to manage.
  • Security layer confusion: Most deployments rely on TLS instead of SASL’s own integrity/confidentiality layer; ensure your team understands the difference.

Integration Into Your Software Development Process

Design phase

  • Decide your identity model (passwords vs. Kerberos vs. OAuth).
  • Select mechanisms accordingly; document the allow-list.

Implementation

  • Use well-maintained libraries (mail, LDAP, Kafka clients, Postgres drivers) that support your chosen mechanisms.
  • Wire in TLS first, then SASL.
  • Add config flags to switch mechanisms per environment (dev/stage/prod).

Testing

  • Unit tests for mechanism negotiation and error handling.
  • Integration tests in CI with TLS on and mechanism allow-lists enforced.
  • Negative tests: expired OAuth tokens, wrong SCRAM password, TLS downgrade attempts.

Operations

  • Centralize secrets in a vault; automate rotation.
  • Monitor auth logs; alert on brute-force patterns.
  • Periodically reassess supported mechanisms (deprecate legacy ones).

Summary

SASL gives you a clean, extensible way to add strong authentication to many protocols without bolting on one-off solutions. In modern systems, pairing TLS with SCRAM, GSSAPI, or OAUTHBEARER delivers robust security, smooth migrations, and broad interoperability—whether you’re running mail servers, directories, message brokers, or databases.

Understanding the Common Vulnerabilities and Exposures (CVE) System

When working in cybersecurity or software development, you may often hear about “CVE numbers” associated with vulnerabilities. But what exactly is the CVE system, and why is it so important? Let’s break it down.

What is the CVE System and Database?

CVE (Common Vulnerabilities and Exposures) is an international system that provides a standardized method of identifying and referencing publicly known cybersecurity vulnerabilities.
Each vulnerability is assigned a unique CVE Identifier (CVE-ID) such as CVE-2020-11988.

The official CVE database stores and catalogs these vulnerabilities, making them accessible for IT professionals, vendors, and security researchers worldwide. It ensures that everyone talks about the same issue in the same way.

Read more: Understanding the Common Vulnerabilities and Exposures (CVE) System

Who Maintains the CVE System?

The CVE system is maintained by MITRE Corporation, a non-profit organization funded by the U.S. government.
Additionally, the CVE Program is overseen by the U.S. Department of Homeland Security (DHS) Cybersecurity and Infrastructure Security Agency (CISA).

MITRE works with a network of CVE Numbering Authorities (CNAs) — organizations authorized to assign CVE IDs, such as major tech companies (Microsoft, Oracle, Google) and security research firms.

Benefits of the CVE System

  • Standardization: Provides a universal reference for vulnerabilities.
  • Transparency: Public access allows anyone to verify details.
  • Collaboration: Security vendors, researchers, and organizations can align their efforts.
  • Integration: Many tools (scanners, patch managers, vulnerability databases like NVD) rely on CVE IDs.
  • Prioritization: Helps organizations track and assess vulnerabilities consistently.

When and How Should We Use It?

You should use the CVE system whenever:

  • Assessing Security Risks – Check if your software or systems are affected by known CVEs.
  • Patch Management – Identify what vulnerabilities a patch addresses.
  • Vulnerability Scanning – Automated tools often map findings to CVE IDs.
  • Security Reporting – Reference CVE IDs when documenting incidents or compliance reports.

CVE Data Fields

Each CVE entry contains several fields to provide context and clarity. Common fields include:

  • CVE ID: Unique identifier (e.g., CVE-2021-34527).
  • Description: Summary of the vulnerability.
  • References: Links to advisories, vendor notes, and technical details.
  • Date Published/Modified: Timeline of updates.
  • Affected Products: List of impacted software, versions, or vendors.
  • Severity Information: Sometimes includes metrics like CVSS (Common Vulnerability Scoring System) scores.

Reporting New Vulnerabilities

If you discover a new security vulnerability, here’s how the reporting process typically works:

  1. Report to Vendor – Contact the software vendor or organization directly.
  2. CNA Assignment – If the vendor is a CNA, they can assign a CVE ID.
  3. Third-Party CNAs – If the vendor is not a CNA, you can submit the vulnerability to another authorized CNA or directly to MITRE.
  4. Validation and Publishing – The CNA/MITRE verifies the vulnerability, assigns a CVE ID, and publishes it in the database.

This process ensures consistency and that all stakeholders can quickly take action.

Final Thoughts

The CVE system is the backbone of vulnerability tracking in cybersecurity. By using CVEs, security professionals, vendors, and organizations can ensure they are talking about the same issues, prioritize fixes, and strengthen defenses.

Staying aware of CVEs — and contributing when new vulnerabilities are found — is essential for building a safer digital world.

Blog at WordPress.com.

Up ↑