Search

Software Engineer's Notes

Tag

Authentication

Risk-Based Authentication: A Smarter Way to Secure Users

What is risk based authentication?

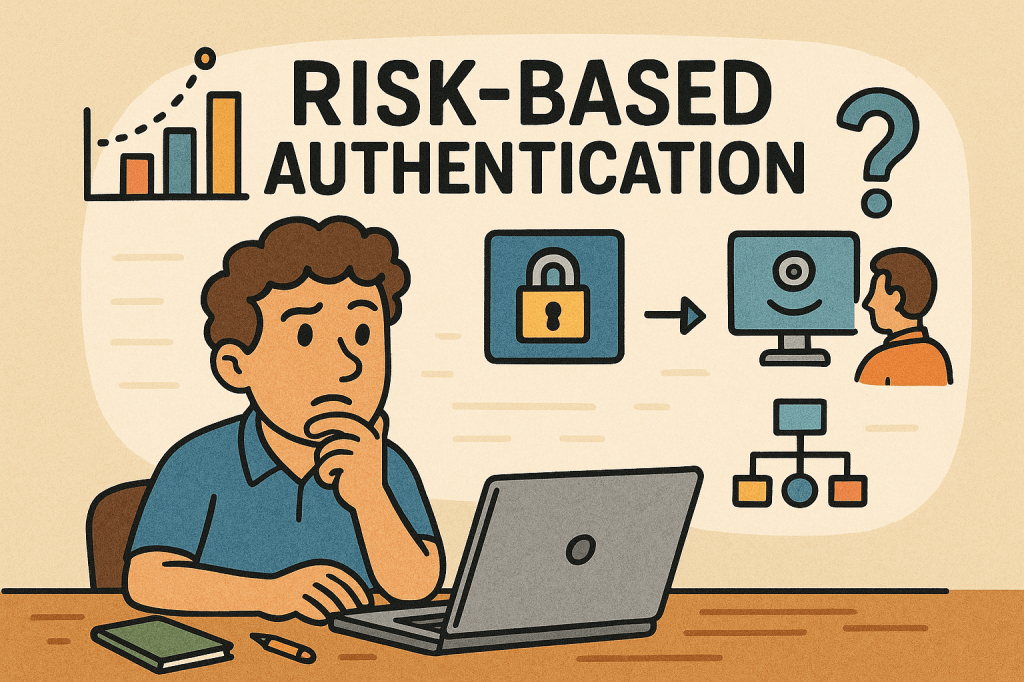
What is Risk-Based Authentication?

Risk-Based Authentication (RBA) is an adaptive security approach that evaluates the risk level of a login attempt and adjusts the authentication requirements accordingly. Instead of always requiring the same credentials (like a password and OTP), RBA looks at context—such as device, location, IP address, and user behavior—and decides whether to grant, challenge, or block access.

This method helps balance security and user experience, ensuring that legitimate users face fewer obstacles while suspicious attempts get stricter checks.

A Brief History of Risk-Based Authentication

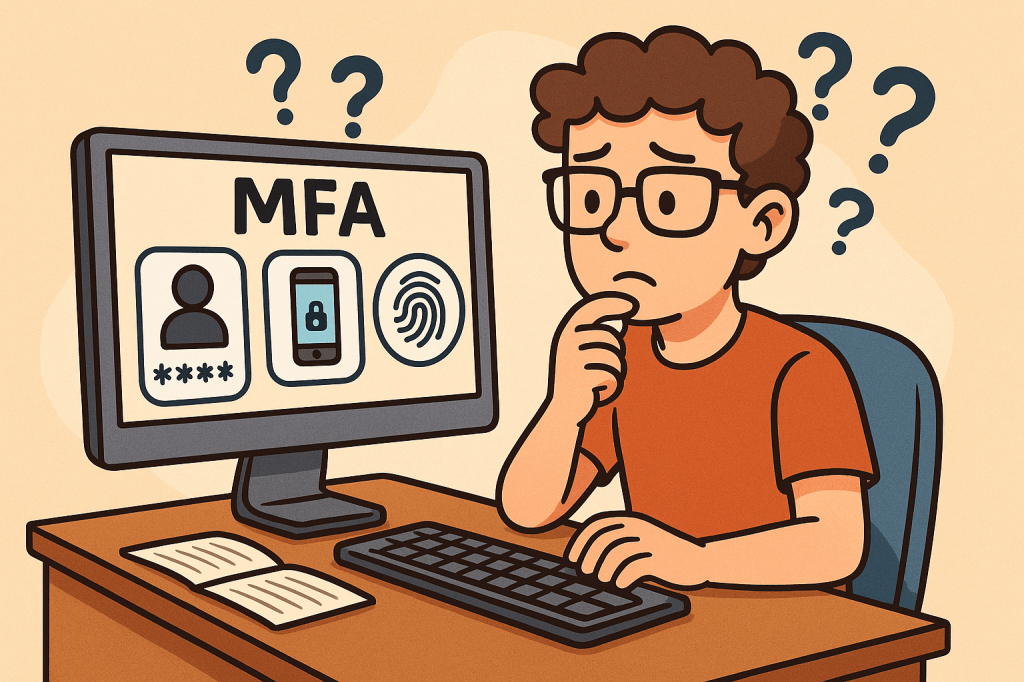
The concept of Risk-Based Authentication emerged in the early 2000s as online fraud and phishing attacks grew, especially in banking and financial services. Traditional two-factor authentication (2FA) was widely adopted, but it became clear that requiring extra steps for every login created friction for users.

Banks and e-commerce companies began exploring context-aware security, leveraging early fraud detection models. By the mid-2000s, vendors like RSA and large financial institutions were deploying adaptive authentication tools.

Over the years, with advancements in machine learning, behavioral analytics, and big data, RBA evolved into a more precise and seamless mechanism. Today, it’s a cornerstone of Zero Trust architectures and widely used in industries like finance, healthcare, and enterprise IT.

How Does Risk-Based Authentication Work?

RBA works by assigning a risk score to each login attempt, based on contextual signals. Depending on the score, the system decides the next step:

  1. Data Collection – Gather information such as:
    • Device type and fingerprint
    • IP address and geolocation
    • Time of access
    • User’s typical behavior (keystroke patterns, navigation habits)
  2. Risk Scoring – Use rules or machine learning to calculate the probability that the login is fraudulent.
  3. Decision Making – Based on thresholds:
    • Low Risk → Allow login with minimal friction.
    • Medium Risk → Ask for additional verification (OTP, security questions, push notification).
    • High Risk → Block the login or require strong multi-factor authentication.

Main Components of Risk-Based Authentication

  • Risk Engine – The core system that analyzes contextual data and assigns risk scores.
  • Data Sources – Inputs such as IP reputation, device fingerprints, geolocation, and behavioral biometrics.
  • Policy Rules – Configurable logic that defines how the system should respond to different risk levels.
  • Adaptive Authentication Methods – Secondary checks like OTPs, SMS codes, biometrics, or security keys triggered only when needed.
  • Integration Layer – APIs or SDKs that integrate RBA into applications, identity providers, or single sign-on systems.

Benefits of Risk-Based Authentication

  1. Improved Security
    • Detects abnormal behavior like unusual login locations or impossible travel scenarios.
    • Makes it harder for attackers to compromise accounts even with stolen credentials.
  2. Better User Experience
    • Reduces unnecessary friction for trusted users.
    • Only challenges users when risk is detected.
  3. Scalability
    • Works dynamically across millions of logins without overwhelming help desks.
  4. Compliance Support
    • Meets security standards (e.g., PSD2, HIPAA, PCI-DSS) by demonstrating adaptive risk mitigation.

Weaknesses of Risk-Based Authentication

While powerful, RBA isn’t flawless:

  • False Positives – Legitimate users may be flagged and challenged if they travel often or use different devices.
  • Bypass with Sophisticated Attacks – Advanced attackers may mimic device fingerprints or use botnets to appear “low risk.”
  • Complex Implementation – Requires integration with multiple data sources, tuning of risk models, and ongoing maintenance.
  • Privacy Concerns – Collecting and analyzing user behavior (like keystrokes or device details) may raise regulatory and ethical issues.

When and How to Use Risk-Based Authentication

RBA is best suited for environments where security risk is high but user convenience is critical, such as:

  • Online banking and financial services
  • E-commerce platforms
  • Enterprise single sign-on solutions
  • Healthcare portals and government services
  • SaaS platforms with global user bases

It’s especially effective when you want to strengthen authentication without forcing MFA on every single login.

Integrating RBA Into Your Software Development Process

To adopt RBA in your applications:

  1. Assess Security Requirements – Identify which applications and users require adaptive authentication.
  2. Choose an RBA Provider – Options include identity providers (Okta, Ping Identity, Azure AD, Keycloak with extensions) or building custom engines.
  3. Integrate via APIs/SDKs – Many RBA providers offer APIs that hook into your login and identity management system.
  4. Define Risk Policies – Set thresholds for low, medium, and high risk.
  5. Test and Tune Continuously – Use A/B testing and monitoring to reduce false positives and improve accuracy.
  6. Ensure Compliance – Review data collection methods to meet GDPR, CCPA, and other privacy laws.

Conclusion

Risk-Based Authentication provides the perfect balance between strong security and seamless usability. By adapting authentication requirements based on real-time context, it reduces friction for genuine users while blocking suspicious activity.

When thoughtfully integrated into software development processes, RBA can help organizations move towards a Zero Trust security model, protect sensitive data, and create a safer digital ecosystem.

One-Time Password (OTP): A Practical Guide for Engineers

What is One-Time Password?

What is a One-Time Password?

A One-Time Password (OTP) is a code (e.g., 6–8 digits) that’s valid for a single use and typically expires quickly (e.g., 30–60 seconds). OTPs are used to:

  • Strengthen login (as a second factor, MFA)
  • Approve sensitive actions (step-up auth)
  • Validate contact points (phone/email ownership)
  • Reduce fraud in payment or money movement flows

OTPs may be:

  • TOTP: time-based, generated locally in an authenticator app (e.g., 6-digit code rotating every 30s)
  • HOTP: counter-based, generated from a moving counter value
  • Out-of-band: delivered via SMS, email, or push (server sends the code out through another channel)

A Brief History (S/Key → HOTP → TOTP → Modern MFA)

  • 1981: Leslie Lamport introduces the concept of one-time passwords using hash chains.
  • 1990s (S/Key / OTP): Early challenge-response systems popularize one-time codes derived from hash chains (RFC 1760, later RFC 2289).
  • 2005 (HOTP, RFC 4226): Standardizes HMAC-based One-Time Password using a counter; each next code increments a counter.
  • 2011 (TOTP, RFC 6238): Standardizes Time-based OTP by replacing counter with time steps (usually 30 seconds), enabling app-based codes (Google Authenticator, Microsoft Authenticator, etc.).
  • 2010s–present: OTP becomes a mainstream second factor. The ecosystem expands with push approvals, number matching, device binding, and WebAuthn (which offers phishing-resistant MFA; OTP still widely used for reach and familiarity).

How OTP Works (with step-by-step flows)

1. TOTP (Time-based One-Time Password)

Idea: Client and server share a secret key. Every 30 seconds, both compute a new code from the secret + current time.

Generation (client/app):

  1. Determine current Unix time t.
  2. Compute time step T = floor(t / 30).
  3. Compute HMAC(secret, T) (e.g., HMAC-SHA-1/256).
  4. Dynamic truncate to 31-bit integer, then mod 10^digits (e.g., 10^6 → 6 digits).
  5. Display code like 413 229 (expires when the 30-second window rolls).

Verification (server):

  1. Recompute expected codes for T plus a small window (e.g., T-1, T, T+1) to tolerate clock skew.
  2. Compare user-entered code with any expected code.
  3. Enforce rate limiting and replay protection.

2. HOTP (Counter-based One-Time Password)

Idea: Instead of time, use a counter that increments on each code generation.

Generation: HMAC(secret, counter) → truncate → mod 10^digits.
Verification: Server allows a look-ahead window to resynchronize if client counters drift.

3. Out-of-Band Codes (SMS/Email/Push)

Idea: Server creates a random code and sends it through a side channel (e.g., SMS).
Verification: User types the received code; server checks match and expiration.

Pros: No app install; broad reach.
Cons: Vulnerable to SIM swap, SS7 weaknesses, email compromise, and phishing relays.

Core Components of an OTP System

  • Shared Secret (TOTP/HOTP): A per-user secret key (e.g., Base32) provisioned via QR code/URI during enrollment.
  • Code Generator:
    • Client-side (authenticator app) for TOTP/HOTP
    • Server-side generator for out-of-band codes
  • Delivery Channel: SMS, email, or push (for out-of-band); not needed for app-based TOTP/HOTP.
  • Verifier Service: Validates codes with timing/counter windows, rate limits, and replay detection.
  • Secure Storage: Store secrets with strong encryption and access controls (e.g., HSM or KMS).
  • Enrollment & Recovery: QR provisioning, backup codes, device change/reset flows.
  • Observability & Risk Engine: Logging, anomaly detection, geo/behavioral checks, adaptive step-up.

Benefits of Using OTP

  • Stronger security than passwords alone (defends against password reuse and basic credential stuffing).
  • Low friction & low cost (especially TOTP apps—no per-SMS fees).
  • Offline capability (TOTP works without network on the user device).
  • Standards-based & interoperable (HOTP/TOTP widely supported).
  • Flexible use cases: MFA, step-up approvals, transaction signing, device verification.

Weaknesses & Common Attacks

  • Phishing & Real-Time Relay: Attackers proxy login, capturing OTP and replaying instantly.
  • SIM Swap / SS7 Issues (SMS OTP): Phone number hijacking allows interception of SMS codes.
  • Email Compromise: If email is breached, emailed OTPs are exposed.
  • Malware/Overlays on Device: Can exfiltrate TOTP codes or intercept out-of-band messages.
  • Shared-Secret Risks: Poor secret handling during provisioning/storage leaks all future codes.
  • Clock Drift (TOTP): Device/server time mismatch causes false rejects.
  • Brute-force Guessing: Short codes require strict rate limiting and lockouts.
  • Usability & Recovery Gaps: Device loss without backup codes locks users out.

Note: OTP improves security but is not fully phishing-resistant. For high-risk scenarios, pair with phishing-resistant MFA (e.g., WebAuthn security keys or device-bound passkeys) and/or number-matching push.

When and How Should You Use OTP?

Use OTP when:

  • Adding MFA to protect accounts with moderate to high value.
  • Performing step-up auth for sensitive actions (password change, wire transfer).
  • Validating contact channels (phone/email ownership).
  • Operating offline contexts (TOTP works without data).

Choose the method:

  • TOTP app (recommended default): secure, cheap, offline, broadly supported.
  • SMS/email OTP: maximize reach; acceptable for low/medium risk with compensating controls.
  • Push approvals with number matching: good UX and better phishing defenses than raw OTP entry.
  • HOTP: niche, but useful for hardware tokens or counter-based devices.

Integration Guide for Your Software Development Lifecycle

1. Architecture Overview

  • Backend: OTP service (issue/verify), secret vault/KMS, rate limiter, audit logs.
  • Frontend: Enrollment screens (QR), verification forms, recovery/backup code flows.
  • Delivery (optional): SMS/email provider, push service.
  • Risk & Observability: Metrics, alerts, anomaly detection.

2. Enrollment Flow (TOTP)

  1. Generate a random per-user secret (160–256 bits).
  2. Store encrypted; never log secrets.
  3. Show otpauth:// URI as a QR code (issuer, account name, algorithm, digits, period).
  4. Ask user to type the current app code to verify setup.
  5. Issue backup codes; prompt to save securely.

3. Verification Flow (TOTP)

  1. User enters 6-digit code.
  2. Server recomputes expected codes for T-1..T+1.
  3. If match → success; else increment rate-limit counters and show safe errors.
  4. Log event and update risk signals.

4. Out-of-Band OTP Flow (SMS/Email)

  1. Server creates a random code (e.g., 6–8 digits), stores hash + expiry (e.g., 5 min).
  2. Send via chosen channel; avoid secrets in message templates.
  3. Verify user input; invalidate on success; limit attempts.

5. Code Examples (Quick Starts)

Java (Spring Security + TOTP using java-time + any TOTP lib):

// Pseudocode: verify TOTP code for user
boolean verifyTotp(String base32Secret, int userCode, long nowEpochSeconds) {
  long timeStep = 30;
  long t = nowEpochSeconds / timeStep;
  for (long offset = -1; offset <= 1; offset++) {
    int expected = Totp.generate(base32Secret, t + offset); // lib call
    if (expected == userCode) return true;
  }
  return false;
}

Node.js (TOTP with otplib or speakeasy):

const { authenticator } = require('otplib');
authenticator.options = { step: 30, digits: 6 }; // default
const isValid = authenticator.verify({
  token: userInput,
  secret: base32Secret
});

Python (pyotp):

import pyotp, time
totp = pyotp.TOTP(base32_secret, interval=30, digits=6)
is_valid = totp.verify(user_input, valid_window=1)  # allow ±1 step

6. Data Model & Storage

  • user_id, otp_type (TOTP/HOTP/SMS/email), secret_ref (KMS handle), enrolled_at, revoked_at
  • For out-of-band: otp_hash, expires_at, attempts, channel, destination_masked
  • Never store raw secrets or raw sent codes; store hash + salt for generated codes.

7. DevOps & Config

  • Secrets in KMS/HSM; rotate issuer keys periodically.
  • Rate limits: attempts per minute/hour/day; IP + account scoped.
  • Alerting: spikes in failures, drift errors, provider delivery issues.
  • Feature flags to roll out MFA gradually and enforce for riskier cohorts.

UX & Security Best Practices

  • Promote app-based TOTP over SMS/email by default; offer SMS/email as fallback.
  • Number matching for push approvals to mitigate tap-yes fatigue.
  • Backup codes: one-time printable set; show only on enrollment; allow regen with step-up.
  • Device time checks: prompt users if the clock is off; provide NTP sync tips.
  • Masked channels: show •••-•••-1234 rather than full phone/email.
  • Progressive enforcement: warn first, then require OTP for risky events.
  • Anti-phishing: distinguish trusted UI (e.g., app domain, passkeys), consider origin binding and link-proofing.
  • Accessibility & i18n: voice, large text, copy/paste, code grouping 123-456.

Testing & Monitoring Checklist

Functional

  • TOTP verification with ±1 step window
  • SMS/email resend throttling and code invalidation
  • Backup codes (single use)
  • Enrollment verification required before enablement

Security

  • Secrets stored via KMS/HSM; no logging of secrets/codes
  • Brute-force rate limits + exponential backoff
  • Replay protection (invalidate out-of-band codes on success)
  • Anti-automation (CAPTCHA/behavioral) where appropriate

Reliability

  • SMS/email provider failover or graceful degradation
  • Clock drift alarm; NTP health
  • Dashboards: success rate, latency, delivery failure, fraud signals

Glossary

  • OTP: One-Time Password—single-use code for auth or approvals.
  • HOTP (RFC 4226): HMAC-based counter-driven OTP.
  • TOTP (RFC 6238): Time-based OTP—rotates every fixed period (e.g., 30s).
  • MFA: Multi-Factor Authentication—two or more independent factors.
  • Step-Up Auth: Extra verification for high-risk actions.
  • Number Matching: Push approval shows a code the user must match, deterring blind approval.
  • WebAuthn/Passkeys: Phishing-resistant MFA based on public-key cryptography.

Final Thoughts

OTP is a powerful, standards-backed control that significantly raises the bar for attackers—if you implement it well. Prefer TOTP apps for security and cost, keep SMS/email for reach with compensating controls, and plan a path toward phishing-resistant options (WebAuthn) for your most sensitive use cases.

Multi-Factor Authentication (MFA): A Complete Guide

What is Multi-Factor Authentication?

In today’s digital world, security is more important than ever. Passwords alone are no longer enough to protect sensitive data, systems, and personal accounts. That’s where Multi-Factor Authentication (MFA) comes in. MFA adds an extra layer of security by requiring multiple forms of verification before granting access. In this post, we’ll explore what MFA is, its history, how it works, its main components, benefits, and practical ways to integrate it into modern software development processes.

What is Multi-Factor Authentication (MFA)?

Multi-Factor Authentication (MFA) is a security mechanism that requires users to provide two or more independent factors of authentication to verify their identity. Instead of relying solely on a username and password, MFA combines different categories of authentication to strengthen access security.

These factors usually fall into one of three categories:

  1. Something you know – passwords, PINs, or answers to security questions.
  2. Something you have – a physical device like a smartphone, hardware token, or smart card.
  3. Something you are – biometric identifiers such as fingerprints, facial recognition, or voice patterns.

A Brief History of MFA

  • 1960s – Passwords Introduced: Early computing systems introduced password-based authentication, but soon it became clear that passwords alone could be stolen or guessed.
  • 1980s – Two-Factor Authentication (2FA): The first wide adoption of hardware tokens emerged in the financial sector. RSA Security introduced tokens generating one-time passwords (OTPs).
  • 1990s – Wider Adoption: Enterprises began integrating smart cards and OTP devices for employees working with sensitive systems.
  • 2000s – Rise of Online Services: With e-commerce and online banking growing, MFA started becoming mainstream, using SMS-based OTPs and email confirmations.
  • 2010s – Cloud and Mobile Era: MFA gained momentum with apps like Google Authenticator, Authy, and push-based authentication, as cloud services required stronger protection.
  • Today – Ubiquity of MFA: MFA is now a standard security practice across industries, with regulations like GDPR, HIPAA, and PCI-DSS recommending or requiring it.

How Does MFA Work?

The MFA process follows these steps:

  1. Initial Login Attempt: A user enters their username and password.
  2. Secondary Challenge: After validating the password, the system prompts for a second factor (e.g., an OTP code, push notification approval, or biometric scan).
  3. Verification of Factors: The system verifies the additional factor(s).
  4. Access Granted or Denied: If all required factors are correct, the user gains access. Otherwise, access is denied.

MFA systems typically rely on:

  • Time-based One-Time Passwords (TOTP): Generated codes that expire quickly.
  • Push Notifications: Mobile apps sending approval requests.
  • Biometric Authentication: Fingerprint or facial recognition scans.
  • Hardware Tokens: Devices that produce unique, secure codes.

Main Components of MFA

  1. Authentication Factors: Knowledge, possession, and inherence (biometric).
  2. MFA Provider/Service: Software or platform managing authentication (e.g., Okta, Microsoft Authenticator, Google Identity Platform).
  3. User Device: Smartphone, smart card, or hardware token.
  4. Integration Layer: APIs and SDKs to connect MFA into existing applications.
  5. Policy Engine: Rules that determine when MFA is enforced (e.g., high-risk logins, remote access, or all logins).

Benefits of MFA

  • Enhanced Security: Strong protection against password theft, phishing, and brute-force attacks.
  • Regulatory Compliance: Meets security requirements in industries like finance, healthcare, and government.
  • Reduced Fraud: Prevents unauthorized access to financial accounts and sensitive systems.
  • Flexibility: Multiple methods available (tokens, biometrics, SMS, apps).
  • User Trust: Increases user confidence in the system’s security.

When and How Should We Use MFA?

MFA should be used whenever sensitive data or systems are accessed. Common scenarios include:

  • Online banking and financial transactions.
  • Corporate systems with confidential business data.
  • Cloud-based services (AWS, Azure, Google Cloud).
  • Email accounts and communication platforms.
  • Healthcare and government portals with personal data.

Organizations can enforce MFA selectively based on risk-based authentication—for example, requiring MFA only when users log in from new devices, unfamiliar locations, or during high-risk transactions.

Integrating MFA Into Software Development

To integrate MFA into modern software systems:

  1. Choose an MFA Provider: Options include Auth0, Okta, AWS Cognito, Azure AD, Google Identity.
  2. Use APIs & SDKs: Most MFA providers offer ready-to-use APIs, libraries, and plugins for web and mobile applications.
  3. Adopt Standards: Implement open standards like OAuth 2.0, OpenID Connect, and SAML with MFA extensions.
  4. Implement Risk-Based MFA: Use adaptive MFA policies (e.g., require MFA for admin access or when logging in from suspicious IPs).
  5. Ensure Usability: Provide multiple authentication options to avoid locking users out.
  6. Continuous Integration: Add MFA validation in CI/CD pipelines for admin and developer accounts accessing critical infrastructure.

Conclusion

Multi-Factor Authentication is no longer optional—it’s a necessity for secure digital systems. With its long history of evolution from simple passwords to advanced biometrics, MFA provides a robust defense against modern cyber threats. By integrating MFA into software development, organizations can safeguard users, comply with regulations, and build trust in their platforms.

Salted Challenge Response Authentication Mechanism (SCRAM): A Practical Guide

What is Salted Challenge Response Authentication Mechanism?

SCRAM authenticates users without sending passwords, stores only derived keys (not plaintext), and prevents replay attacks with nonces and salts. It’s a modern alternative to legacy password schemes and is available via SASL in many servers and clients.

What Is SCRAM?

Salted Challenge Response Authentication Mechanism (SCRAM) is a password-based authentication protocol standardized by the IETF (commonly used as a SASL mechanism). Instead of transmitting the user’s password, SCRAM proves knowledge of it through a challenge-response exchange using:

  • a salt (unique per account),
  • a nonce (unique per session),
  • an iteration count (work factor),
  • and a key-derivation function (e.g., PBKDF2 with HMAC-SHA-256).

Common variants: SCRAM-SHA-1, SCRAM-SHA-256, and SCRAM-SHA-512 (some deployments also use channel binding for MITM protection).

How SCRAM Works (Step-by-Step)

Notation: H() = hash (e.g., SHA-256), HMAC(k,m), KDF(password, salt, iterations) = PBKDF2-HMAC.

  1. Client → Server: client-first-message
    Sends username and a fresh client nonce nc.
  2. Server → Client: server-first-message
    Looks up user’s stored auth data, returns:
    • salt s (from account record),
    • iteration count i,
    • server nonce ns (fresh, often concatenated with nc).
  3. Client computes keys locally
    • SaltedPassword = KDF(password, s, i)
    • ClientKey = HMAC(SaltedPassword, "Client Key")
    • StoredKey = H(ClientKey)
    • Builds an auth message transcript (the exact strings of the three messages).
  4. Client → Server: client-final-message
    Sends:
    • combined nonce (nc+ns),
    • ClientProof = ClientKey XOR HMAC(StoredKey, AuthMessage)
      (This proves the client knows the password without sending it.)
  5. Server verifies
    • Recomputes StoredKey from its stored data, verifies ClientProof.
    • If valid, computes ServerKey = HMAC(SaltedPassword, "Server Key") and
      ServerSignature = HMAC(ServerKey, AuthMessage).
  6. Server → Client: server-final-message
    Returns ServerSignature so the client can verify it’s talking to the real server.

What the server stores: never the plaintext password. It stores salt, iteration count, and either the SaltedPassword or the derived StoredKey and ServerKey (or values sufficient to recompute/verify them).

Main Features & Components

  • Salting: Unique per-user salt thwarts rainbow tables.
  • Key Derivation with Work Factor: Iterations make brute force slower.
  • Challenge-Response with Nonces: Prevents replay attacks.
  • Mutual Authentication: Client verifies the server via ServerSignature.
  • No Plaintext Passwords in Transit or at Rest: Only derived values are stored/transmitted.
  • Channel Binding (optional): Binds auth to the underlying TLS channel to deter MITM.

Benefits & Advantages

  • Strong security with passwords: Better than Basic/Digest/PLAIN (without TLS).
  • Minimal leakage if DB is stolen: Attackers get salts and derived keys, not plaintext.
  • Replay-resistant: Nonces and signed transcripts block replays.
  • Standards-based & widely supported: Kafka, PostgreSQL, MongoDB, IMAP/SMTP, XMPP, LDAP, etc.
  • No PKI dependency: Works with or without TLS (though TLS is strongly recommended).

When & How to Use SCRAM

Use SCRAM when you:

  • need password-based auth with solid defenses (microservices, message brokers, DBs),
  • require mutual verification (client also verifies server),
  • want a drop-in option supported by SASL frameworks and libraries.

Pair it with TLS in any hostile network. Prefer SCRAM-SHA-256 or stronger. Enable channel binding where client/server stacks support it.

Real-World Use Cases

  • Message brokers: Kafka clusters using SASL/SCRAM for client-to-broker auth.
  • Databases: PostgreSQL and MongoDB deployments using SCRAM-SHA-256.
  • Email/XMPP/LDAP: SASL SCRAM to avoid password exposure and replays.
  • Enterprise gateways: Reverse proxies terminating TLS and relaying SCRAM to backends.

Implementation Blueprint (Server-Side)

Account creation / password change

  • Generate random salt (16–32 bytes).
  • Choose iterations (e.g., 65,536+; tune for latency).
  • Compute SaltedPassword = KDF(password, salt, iterations).
  • Derive and store either:
    • StoredKey = H(HMAC(SaltedPassword, "Client Key"))
    • ServerKey = HMAC(SaltedPassword, "Server Key")
    • plus salt, iterations, username
    • (Optionally store SaltedPassword if your library expects it, but avoid storing plaintext or unsalted hashes.)

Authentication flow (pseudocode)

# server-first-message
record = lookup(username)
nonce_s  = random()
send { salt: record.salt, iter: record.iter, nonce: client_nonce + nonce_s }

# client-final-message arrives with ClientProof and combined nonce
authMsg = transcript(clientFirst, serverFirst, clientFinalWithoutProof)

# Verify proof
ClientSignature = HMAC(record.StoredKey, authMsg)
ClientKey = XOR(ClientProof, ClientSignature)
StoredKey' = H(ClientKey)
if StoredKey' != record.StoredKey: reject

# Success: send server signature for mutual auth
ServerSignature = HMAC(record.ServerKey, authMsg)
return { server_signature: ServerSignature }

Storage schema (example)

users(
  id PK,
  username UNIQUE,
  salt VARBINARY(32),
  iterations INT,
  stored_key VARBINARY(32 or 64),
  server_key VARBINARY(32 or 64),
  updated_at TIMESTAMP
)

Security Best Practices

  • Always use TLS, and enable channel binding if your stack supports it.
  • Strong randomness for salts and nonces (CSPRNG).
  • High iteration counts tuned to your latency budget; revisit yearly.
  • Rate-limit and lockout policies to deter online guessing.
  • Audit and rotate credentials; support password upgrades (e.g., SHA-1 → SHA-256).
  • Side-channel hygiene: constant-time comparisons; avoid verbose error messages.

Integrating SCRAM into Your Software Development Process

1) Design & Requirements

  • Decide on algorithm (prefer SCRAM-SHA-256 or higher) and iterations.
  • Define migration plan from existing auth (fallback or forced reset).

2) Implementation

  • Use a well-maintained SASL/SCRAM library for your language/runtime.
  • Centralize KDF and nonce/salt generation utilities.
  • Add feature flags to switch mechanisms and iteration counts.

3) Configuration & DevOps

  • Store salts/keys only in your DB; protect backups.
  • Secrets (e.g., TLS keys) in a vault; enforce mTLS between services where applicable.
  • Add dashboards for auth failures, lockouts, and latency.

4) Testing

  • Unit-test transcripts against known vectors from your library/docs.
  • Property/fuzz tests for parser edge cases (attribute order, malformed messages).
  • Integration tests with TLS on/off, and with channel binding if used.

5) Rollout

  • Canary a subset of users/services.
  • Monitor failure rates and latency; adjust iterations if needed.
  • Backfill/migrate user records on next login or via scheduled jobs.

Comparison Cheat Sheet

MechanismSends Password?Server StoresReplay-ResistantMutual AuthNotes
Basic (over TLS)Yes (base64)Plain/Hash (app-defined)NoNoOnly acceptable with strong TLS; still weak vs replays if tokens leak.
DigestNoHash of passwordPartiallyNoOutdated; weaker KDF and known issues.
PLAIN (over TLS)YesApp-definedNoNoOnly safe inside TLS; still exposes password at app layer.
SCRAMNoSalted keysYesYesModern default for password auth; supports channel binding.
OAuth 2.0/OIDCN/ATokensYesYes (via TLS + signatures)Token-based; different tradeoffs and flow.

Developer Quick-Start (Language-Agnostic)

  • Pick a library that supports SCRAM-SHA-256 and (if possible) channel binding.
  • Server config: enable the SCRAM mechanism; set minimum iteration count and required hash.
  • Client config: select SCRAM mechanism; supply username/password; verify server signature.
  • Migrations: on user login, if you detect an old scheme (e.g., SHA-1), re-derive keys with SHA-256 and higher iterations and update the record.

FAQs

Do I still need TLS with SCRAM?
Yes. SCRAM protects passwords and gives mutual auth, but TLS protects confidentiality/integrity of all data and enables channel binding.

Which hash should I choose?
Use SCRAM-SHA-256 or stronger. Avoid SHA-1 for new systems.

How many iterations?
Start with a value that adds ~50–150 ms on your hardware per attempt, then adjust based on throughput/latency targets.

Final Checklist

  • SCRAM-SHA-256 enabled on server and clients
  • Unique salt per user, secure CSPRNG
  • Iterations set and documented; metrics in place
  • TLS enforced; channel binding on where supported
  • Tests cover transcripts, edge cases, and migrations
  • Monitoring, rate-limiting, and lockouts configured

Simple Authentication and Security Layer (SASL): A Practical Guide

What is Simple Authentication and Security Layer?

SASL (Simple Authentication and Security Layer) is a framework that adds pluggable authentication and optional post-authentication security (integrity/confidentiality) to application protocols such as SMTP, IMAP, POP3, LDAP, XMPP, AMQP 1.0, Kafka, and more. Instead of hard-coding one login method into each protocol, SASL lets clients and servers negotiate from a menu of mechanisms (e.g., SCRAM, Kerberos/GSSAPI, OAuth bearer tokens, etc.).

What Is SASL?

SASL is a protocol-agnostic authentication layer defined so that an application protocol (like IMAP or LDAP) can “hook in” standardized auth exchanges without reinventing them. It specifies:

  • How a client and server negotiate an authentication mechanism
  • How they exchange challenges and responses for that mechanism
  • Optionally, how they enable a security layer after auth (message integrity and/or encryption)

Key idea: SASL = negotiation + mechanism plug-ins, not a single algorithm.

How SASL Works (Step by Step)

  1. Advertise capabilities
    The server advertises supported SASL mechanisms (e.g., SCRAM-SHA-256, GSSAPI, PLAIN, OAUTHBEARER).
  2. Client selects mechanism
    The client picks one mechanism it supports (optionally sending an initial response).
  3. Challenge–response exchange
    The server sends a challenge; the client replies with mechanism-specific data (proofs, nonces, tickets, tokens, etc.). Multiple rounds may occur.
  4. Authentication result
    On success, the server confirms authentication. Some mechanisms can now negotiate a security layer (per-message integrity/confidentiality). In practice, most modern deployments use TLS for the transport layer and skip SASL’s own security layer.
  5. Application traffic
    The client proceeds with the protocol (fetch mail, query directory, produce to Kafka, etc.), now authenticated (and protected by TLS and/or the SASL layer if negotiated).

Core Components & Concepts

  • Mechanism: The algorithm/protocol used to authenticate (e.g., SCRAM-SHA-256, GSSAPI, OAUTHBEARER, PLAIN).
  • Initial response: Optional first payload sent with the mechanism selection.
  • Challenge/response: The back-and-forth messages carrying proofs and metadata.
  • Security layer: Optional integrity/confidentiality after auth (distinct from TLS).
  • Channel binding: A way to bind auth to the outer TLS channel to prevent MITM downgrades (used by mechanisms like SCRAM with channel binding).

Common SASL Mechanisms (When to Use What)

MechanismWhat it isUse whenNotes
SCRAM-SHA-256/512Salted Challenge Response Authentication Mechanism using SHA-2You want strong password auth with no plaintext passwords on the wire and hashed+salted storageModern default for many systems (Kafka, PostgreSQL ≥10). Supports channel binding variants.
GSSAPI (Kerberos)Enterprise single sign-on via Kerberos ticketsYou have an Active Directory / Kerberos realm and want SSOExcellent for internal corp networks; more setup complexity.
OAUTHBEAREROAuth 2.0 bearer tokens in SASLYou issue/verify OAuth tokensGreat for cloud/microservices; aligns with identity providers (IdPs).
EXTERNALUse external credentials from the transport (e.g., TLS client cert)You use mutual TLSNo passwords; trust comes from certificates.
PLAINUsername/password in clear (over TLS)You already enforce TLS everywhere and need simplicityEasy but must require TLS. Do not use without TLS.
CRAM-MD5 / DIGEST-MD5Legacy challenge-responseLegacy interop onlyConsider migrating to SCRAM.

Practical default today: TLS + SCRAM-SHA-256 (or TLS + OAUTHBEARER if you already run OAuth).

Advantages & Benefits

  • Pluggable & future-proof: Swap mechanisms without changing the application protocol.
  • Centralized policy: Standardizes auth across many services.
  • Better password handling (with SCRAM): No plaintext at rest, resistant to replay.
  • Enterprise SSO (with GSSAPI): Kerberos tickets instead of passwords.
  • Cloud-friendly (with OAUTHBEARER): Leverage existing IdP and token lifecycles.
  • Interoperability: Widely implemented in mail, messaging, directory services, and databases.

When & How Should You Use SASL?

Use SASL when your protocol (or product) supports it natively and you need one or more of:

  • Strong password auth with modern hashing ⇒ choose SCRAM-SHA-256/512.
  • Single Sign-On in enterprise ⇒ choose GSSAPI (Kerberos).
  • IdP integration & short-lived credentials ⇒ choose OAUTHBEARER.
  • mTLS-based trust ⇒ choose EXTERNAL.
  • Simplicity under TLSPLAIN (TLS mandatory).

Deployment principles

  • Always enable TLS (or equivalent) even if the mechanism supports a security layer.
  • Prefer SCRAM over legacy mechanisms when using passwords.
  • Enforce mechanism allow-lists (e.g., disable PLAIN if TLS is off).
  • Use channel binding where available.
  • Centralize secrets in a secure vault and rotate regularly.

Real-World Use Cases (Deep-Dive)

1) Email: SMTP, IMAP, POP3

  • Goal: Authenticate mail clients to servers.
  • Mechanisms: PLAIN (over TLS), LOGIN (non-standard but common), SCRAM, OAUTHBEARER/XOAUTH2 for providers with OAuth.
  • Flow: Client connects with STARTTLS or SMTPS/IMAPS → server advertises mechanisms → client authenticates → proceeds to send/receive mail.
  • Why SASL: Broad client interop, ability to modernize from PLAIN to SCRAM/OAuth without changing SMTP/IMAP themselves.

2) LDAP Directory (SASL Bind)

  • Goal: Authenticate users/applications to a directory (OpenLDAP, 389-ds).
  • Mechanisms: GSSAPI (Kerberos SSO), EXTERNAL (TLS client certs), SCRAM, PLAIN (with TLS).
  • Why SASL: Flexible enterprise auth: service accounts via SCRAM, employees via Kerberos.

3) Kafka Producers/Consumers

  • Goal: Secure cluster access per client/app.
  • Mechanisms: SASL/SCRAM-SHA-256, SASL/OAUTHBEARER, SASL/GSSAPI in some shops.
  • Why SASL: Centralize identity, attach ACLs per principal, rotate secrets/tokens cleanly.

Kafka client example (SCRAM-SHA-256):

# client.properties
security.protocol=SASL_SSL
sasl.mechanism=SCRAM-SHA-256
sasl.jaas.config=org.apache.kafka.common.security.scram.ScramLoginModule required \
 username="app-user" \
 password="s3cr3t";

4) XMPP (Jabber)

  • Goal: Client-to-server and server-to-server auth.
  • Mechanisms: SCRAM, EXTERNAL (certs), sometimes GSSAPI.
  • Why SASL: Clean negotiation, modern password handling, works across diverse servers/clients.

5) PostgreSQL ≥ 10 (Database Logins)

  • Goal: Strong password auth for DB clients.
  • Mechanisms: SASL/SCRAM-SHA-256 preferred over MD5.
  • Why SASL: Mitigates plaintext/MD5 weaknesses; supports channel binding with TLS.

6) AMQP 1.0 Messaging (e.g., Apache Qpid, Azure Service Bus)

  • Goal: Authenticate publishers/consumers.
  • Mechanisms: PLAIN (over TLS), EXTERNAL, OAUTHBEARER depending on broker.
  • Why SASL: AMQP 1.0 defines SASL for its handshake, so it’s the standard path.

Implementation Patterns (Developers & Operators)

Choose mechanisms

  • Default: TLS + SCRAM-SHA-256
  • Enterprise SSO: TLS + GSSAPI
  • Cloud IdP: TLS + OAUTHBEARER (short-lived tokens)

Server hardening checklist

  • Require TLS for all auth (disable cleartext fallbacks)
  • Allow-list mechanisms (disable weak/legacy ones)
  • Rate-limit authentication attempts
  • Rotate secrets/tokens; enforce password policy for SCRAM
  • Audit successful/failed auths; alert on anomalies
  • Enable channel binding (if supported)

Client best practices

  • Verify server certificates and hostnames
  • Prefer SCRAM over PLAIN where offered
  • Cache/refresh OAuth tokens properly
  • Fail closed if the server downgrades mechanisms or TLS

Example: SMTP AUTH with SASL PLAIN (over TLS)

Use only over TLS. PLAIN sends credentials in a single base64-encoded blob.

S: 220 mail.example.com ESMTP
C: EHLO client.example
S: 250-AUTH PLAIN SCRAM-SHA-256
C: STARTTLS
S: 220 Ready to start TLS
... (TLS negotiated) ...
C: AUTH PLAIN AHVzZXJuYW1lAHN1cGVyLXNlY3JldA==
S: 235 2.7.0 Authentication successful

If available, prefer:

C: AUTH SCRAM-SHA-256 <initial-client-response>

SCRAM protects against replay and stores salted, hashed passwords server-side.

Limitations & Gotchas

  • Not a silver bullet: SASL standardizes auth, but you still need TLS, good secrets hygiene, and strong ACLs.
  • Mechanism mismatches: Client/Server must overlap on at least one mechanism.
  • Legacy clients: Some only support PLAIN/LOGIN; plan for a migration path.
  • Operational complexity: Kerberos and OAuth introduce infrastructure to manage.
  • Security layer confusion: Most deployments rely on TLS instead of SASL’s own integrity/confidentiality layer; ensure your team understands the difference.

Integration Into Your Software Development Process

Design phase

  • Decide your identity model (passwords vs. Kerberos vs. OAuth).
  • Select mechanisms accordingly; document the allow-list.

Implementation

  • Use well-maintained libraries (mail, LDAP, Kafka clients, Postgres drivers) that support your chosen mechanisms.
  • Wire in TLS first, then SASL.
  • Add config flags to switch mechanisms per environment (dev/stage/prod).

Testing

  • Unit tests for mechanism negotiation and error handling.
  • Integration tests in CI with TLS on and mechanism allow-lists enforced.
  • Negative tests: expired OAuth tokens, wrong SCRAM password, TLS downgrade attempts.

Operations

  • Centralize secrets in a vault; automate rotation.
  • Monitor auth logs; alert on brute-force patterns.
  • Periodically reassess supported mechanisms (deprecate legacy ones).

Summary

SASL gives you a clean, extensible way to add strong authentication to many protocols without bolting on one-off solutions. In modern systems, pairing TLS with SCRAM, GSSAPI, or OAUTHBEARER delivers robust security, smooth migrations, and broad interoperability—whether you’re running mail servers, directories, message brokers, or databases.

Understanding Central Authentication Service (CAS): A Complete Guide

When building modern applications and enterprise systems, managing user authentication across multiple services is often a challenge. One solution that has stood the test of time is the Central Authentication Service (CAS) protocol. In this post, we’ll explore what CAS is, its history, how it works, who uses it, and its pros and cons.

What is CAS?

The Central Authentication Service (CAS) is an open-source, single sign-on (SSO) protocol that allows users to access multiple applications with just one set of login credentials. Instead of requiring separate logins for each application, CAS authenticates the user once and then shares that authentication with other trusted systems.

This makes it particularly useful in organizations where users need seamless access to a variety of internal and external services.

A Brief History of CAS

CAS was originally developed at Yale University in 2001 to solve the problem of students and faculty needing multiple logins for different campus systems.

Over the years, CAS has evolved into a widely adopted open standard, supported by the Apereo Foundation (a nonprofit organization that also manages open-source educational software projects). Today, CAS is actively maintained and widely used in higher education, enterprises, and government systems.

How CAS Works: The Protocol

The CAS protocol is based on the principle of single sign-on through ticket validation. Here’s a simplified breakdown of how it works:

  1. User Access Request
    A user tries to access a protected application (called a “CAS client”).
  2. Redirection to CAS Server
    If the user is not yet authenticated, the client redirects them to the CAS server (centralized authentication service).
  3. User Authentication
    The CAS server prompts the user to log in (username/password or another supported method).
  4. Ticket Granting
    Once authenticated, the CAS server issues a ticket (a unique token) and redirects the user back to the client.
  5. Ticket Validation
    The client contacts the CAS server to validate the ticket. If valid, the user is granted access.
  6. Single Sign-On
    For subsequent applications, the user does not need to re-enter credentials. CAS recognizes the existing session and provides access automatically.

This ticket-based flow ensures security, while the centralized server manages authentication logic.

Who Uses CAS?

CAS is widely adopted across different domains:

  • Universities & Colleges → Many higher education institutions rely on CAS to provide seamless login across portals, course systems, and email services.
  • Government Agencies → Used to simplify user access across multiple public-facing systems.
  • Enterprises → Adopted by businesses for internal systems integration.
  • Open-source Projects → Integrated into tools that require centralized authentication.

When to Use CAS?

CAS is a great choice when:

  • You have multiple applications that require login.
  • You want to reduce password fatigue for users.
  • Security and centralized authentication management are critical.
  • You prefer an open-source, standards-based protocol with strong community support.

If your system is small or only requires one authentication endpoint, CAS might be overkill.

Advantages of CAS

Single Sign-On (SSO): Users only log in once and gain access to multiple services.
Open-Source & Flexible: Backed by the Apereo community with strong support.
Wide Integration Support: Works with web, desktop, and mobile applications.
Extensible Authentication Methods: Supports username/password, multi-factor authentication, LDAP, OAuth, and more.
Strong Security Model: Ticket validation ensures tokens cannot be reused across systems.

Disadvantages of CAS

Initial Setup Complexity: Requires configuring both CAS server and client applications.
Overhead for Small Systems: If you only have one or two applications, CAS may add unnecessary complexity.
Learning Curve: Developers and administrators need to understand the CAS flow, ticketing, and integration details.
Dependency on CAS Server Availability: If the CAS server goes down, authentication for all connected apps may fail.

Conclusion

The Central Authentication Service (CAS) remains one of the most robust and reliable single sign-on protocols in use today. With its origins in academia and adoption across industries, it has proven to be a secure, scalable solution for organizations that need centralized authentication.

If your system involves multiple applications and user logins, adopting CAS could streamline your authentication strategy, improve user experience, and strengthen overall security.

Blog at WordPress.com.

Up ↑