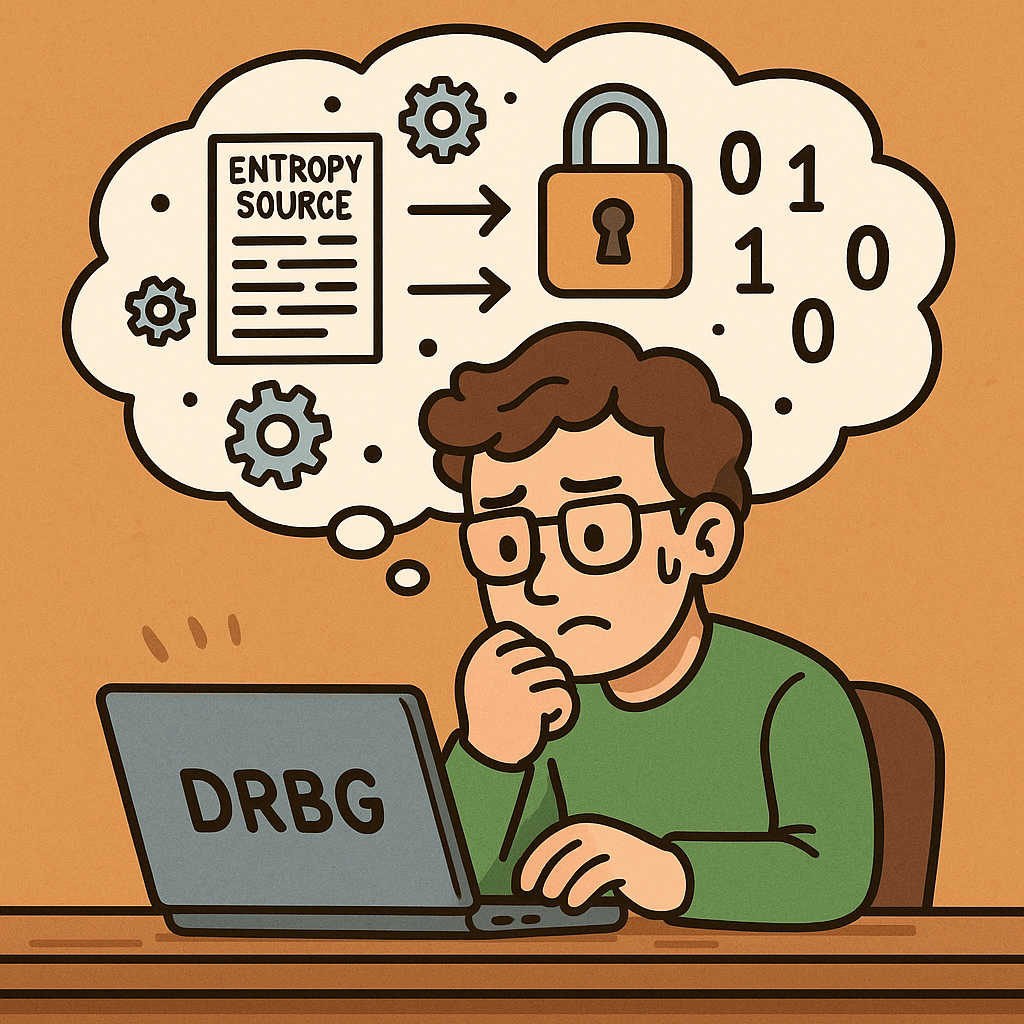
Random number generation is a cornerstone of modern cryptography and secure systems. However, not all random numbers are created equal. To achieve high levels of security, the National Institute of Standards and Technology (NIST) has published recommendations for using Deterministic Random Bit Generators (DRBGs). These guidelines are formalized in the NIST Special Publication 800-90 series and provide a standard framework for generating random bits securely.
In this blog, we will explore what these recommendations are, their historical background, key features, benefits, real-world examples, and how they apply in today’s software development.
What is Recommendation for Random Number Generation Using DRBGs?
The recommendation refers to a set of standards—particularly NIST SP 800-90A, 800-90B, and 800-90C—that define how DRBGs should be designed, implemented, and used in cryptographic applications.
A Deterministic Random Bit Generator (DRBG) is an algorithm that generates a sequence of random-looking bits from a given initial value called a seed. Unlike true random number generators that rely on physical randomness, DRBGs are algorithmic but are designed to be cryptographically secure.
Historical Background
The journey toward secure DRBGs began when the cryptographic community identified weaknesses in naive pseudo-random number generators (PRNGs).
Early PRNGs (1960s–1990s): Many used simple linear congruential methods, which were fast but not secure for cryptography.
Rise of Cryptographic Applications (1990s): Secure communications, encryption, and authentication required stronger randomness sources.
NIST Recommendations (2001 onwards): NIST introduced the SP 800-90 series to formalize standards for DRBGs.
SP 800-90A (2006, revised 2012): Defined approved DRBG mechanisms based on cryptographic primitives such as hash functions, block ciphers, and HMACs.
SP 800-90B (2018): Provided guidance for entropy sources to seed DRBGs reliably.
SP 800-90C (2018): Offered frameworks for combining entropy sources with DRBGs to ensure robustness.
This history reflects the evolution from weak PRNGs to robust, standard-driven DRBGs in critical security infrastructures.
Key Features of DRBG Recommendations
NIST’s recommendations for DRBGs highlight several critical features:
Cryptographic Strength: Uses secure primitives (HMAC, SHA-2, AES) to ensure unpredictability of outputs.
Seed and Reseed Mechanisms: Defines how entropy is collected and used to initialize and refresh the generator.
Backtracking Resistance: Even if an attacker learns the current internal state, they cannot reconstruct past outputs.
Prediction Resistance: Future outputs remain secure even if some information about the internal state leaks.
Health Tests: Ensures that entropy sources and generator outputs pass statistical and consistency checks.
Benefits and Advantages
Implementing DRBG recommendations provides several benefits:
Security Assurance: Compliance with NIST standards ensures robustness against known cryptanalytic attacks.
Regulatory Compliance: Many industries (finance, government, healthcare) require adherence to NIST guidelines.
Consistency Across Platforms: Developers can rely on well-defined, interoperable algorithms.
Scalability: DRBGs are efficient and suitable for large-scale cryptographic systems.
Forward and Backward Security: Protects past and future randomness even in case of partial
Real-World Examples
TLS/SSL (Secure Communications): DRBGs are used to generate session keys in protocols like TLS. Without secure random numbers, encrypted traffic could be decrypted.
Cryptographic Tokens: Authentication tokens, API keys, and session identifiers often rely on DRBGs for uniqueness and unpredictability.
Digital Signatures: Secure randomness is required in algorithms like ECDSA or RSA to ensure signatures cannot be forged.
Hardware Security Modules (HSMs): HSMs use DRBG standards internally to generate keys and nonces in banking and government-grade security applications.
Operating System Randomness APIs: Functions like /dev/urandom (Linux) or CryptGenRandom (Windows) are based on DRBG-like mechanisms following these recommendations.
How Can We Integrate DRBG Recommendations in Software Development?
Use Approved Libraries: Always rely on vetted cryptographic libraries (e.g., OpenSSL, BouncyCastle) that implement NIST-approved DRBGs.
Check Compliance: Ensure your software meets NIST SP 800-90A/B/C requirements if working in regulated industries.
Seed Properly: Incorporate high-quality entropy sources when initializing DRBGs.
Regular Reseeding: Implement reseeding policies to maintain long-term security.
Audit and Testing: Conduct regular security testing, including randomness quality checks.
Conclusion
The NIST recommendations for DRBGs are not just academic—they form the backbone of secure random number generation in modern cryptography. By following these standards, developers and organizations can ensure that their security systems remain resistant to attacks, compliant with regulations, and reliable across applications.
In modern computing, randomness plays a vital role in security, encryption, authentication, and even everyday applications. But not all randomness is created equal. When dealing with sensitive data, we need something much stronger than just “random”—we need cryptographically secure pseudo-random number generators (CSPRNGs). In this blog, we’ll explore what they are, their history, how they work, and why they’re so important in software development.
What is a Cryptographically Secure Pseudo-Random Number Generator?
A CSPRNG is a type of algorithm that generates numbers that appear random but are actually produced by a deterministic process. Unlike regular pseudo-random number generators (PRNGs), which may be predictable with enough knowledge of their internal state, CSPRNGs are specifically designed to withstand cryptographic attacks.
In other words, even if an attacker observes many outputs from a CSPRNG, they should not be able to determine the next output or deduce the internal state.
A Brief History of CSPRNGs
The history of random number generation in cryptography dates back to the early days of secure communications:
1940s – WWII era: Randomness was used in encryption systems like the one-time pad, which relied on truly random keys. However, generating and distributing such randomness securely was impractical.
1960s–1970s: As computers evolved, researchers began designing algorithms to simulate randomness. Early pseudo-random generators (like Linear Congruential Generators) were fast but not secure for cryptographic use.
1980s–1990s: With the rise of public-key cryptography (RSA, Diffie-Hellman), stronger random number generation became critical. This led to the development of algorithms like Blum Blum Shub (1986) and Yarrow (1999).
2000s–Today: Modern operating systems now include secure random number sources, such as /dev/random and /dev/urandom in Unix-like systems, and CryptGenRandom or CNG in Windows. Algorithms like Fortuna and HMAC_DRBG are widely used in cryptographic libraries.
Features and Characteristics of CSPRNGs
CSPRNGs are different from regular PRNGs because they meet strict cryptographic requirements. Key features include:
Unpredictability: Given past outputs, the next output cannot be guessed.
Resistance to State Compromise: Even if some internal state is leaked, it should not compromise past or future outputs.
High Entropy Source: They often draw from unpredictable system events (e.g., mouse movements, keystrokes, network interrupts).
Deterministic Expansion: Once seeded with secure entropy, they can generate large amounts of secure random data.
Standards Compliance: Many are defined by standards like NIST SP 800-90A.
How Does a CSPRNG Work?
At its core, a CSPRNG works in two stages:
Seeding (Entropy Collection): The system gathers entropy from unpredictable sources like hardware noise, CPU timings, or environmental factors.
Expansion (Pseudo-Random Generation): The seed is processed through a secure algorithm (such as AES in counter mode, SHA-256 hashing, or HMAC). This allows the generator to produce a long stream of secure pseudo-random numbers.
For example:
A hash-based CSPRNG applies a secure hash function to seed data repeatedly.
A block cipher-based CSPRNG encrypts counters with a secret seed to produce outputs.
Both approaches ensure that the output is indistinguishable from true randomness.
Why is it Important?
CSPRNGs are the backbone of modern security. Without them, encryption and authentication systems would be predictable and vulnerable. Their importance spans across:
Key Generation: Secure keys for symmetric and asymmetric cryptography.
Session Tokens: Secure identifiers for logins and sessions.
Nonces and IVs: Ensuring uniqueness in encryption schemes.
Password Salt Generation: Preventing rainbow table attacks.
Without cryptographic security in random numbers, attackers could exploit weaknesses and compromise entire systems.
Advantages and Benefits
Security Assurance: Provides unpredictable randomness that resists cryptanalysis.
Scalability: Can produce large amounts of random data from a small seed.
Versatility: Used in encryption, authentication, simulations, and secure protocols.
Backward and Forward Secrecy: Protects both past and future outputs even if part of the state is exposed.
Standardization: Recognized and trusted across industries.
When and How Should We Use It?
You should use CSPRNGs whenever randomness has a security impact:
Generating cryptographic keys (RSA, AES, ECC).
Creating session identifiers or API tokens.
Producing salts and nonces for password hashing and encryption.
In secure protocols (TLS, SSH, IPsec).
For non-security tasks (like shuffling items in a game), a regular PRNG may suffice. But for anything involving sensitive data, always use a CSPRNG.
Integrating CSPRNGs into Software Development
Most modern languages and frameworks provide built-in CSPRNG libraries. Integration usually involves using the recommended secure API instead of regular random functions. Examples:
Java:SecureRandom class.
Python:secrets module or os.urandom().
C/C++:getrandom(), /dev/urandom, or libraries like OpenSSL.
JavaScript (Web):window.crypto.getRandomValues().
.NET:RNGCryptoServiceProvider or RandomNumberGenerator.
Best Practices for Integration:
Always use language-provided CSPRNG libraries (don’t roll your own).
Ensure proper seeding with entropy from the OS.
Use latest libraries that comply with security standards.
Apply code reviews and security audits to confirm correct usage.
Conclusion
Cryptographically Secure Pseudo-Random Number Generators are one of the unsung heroes of modern computing. They ensure that our communications, logins, and transactions remain safe from attackers. By understanding their history, characteristics, and applications, we can better integrate them into our software development processes and build secure systems.
Whenever security is at stake, always rely on a CSPRNG—because in cryptography, true randomness matters.
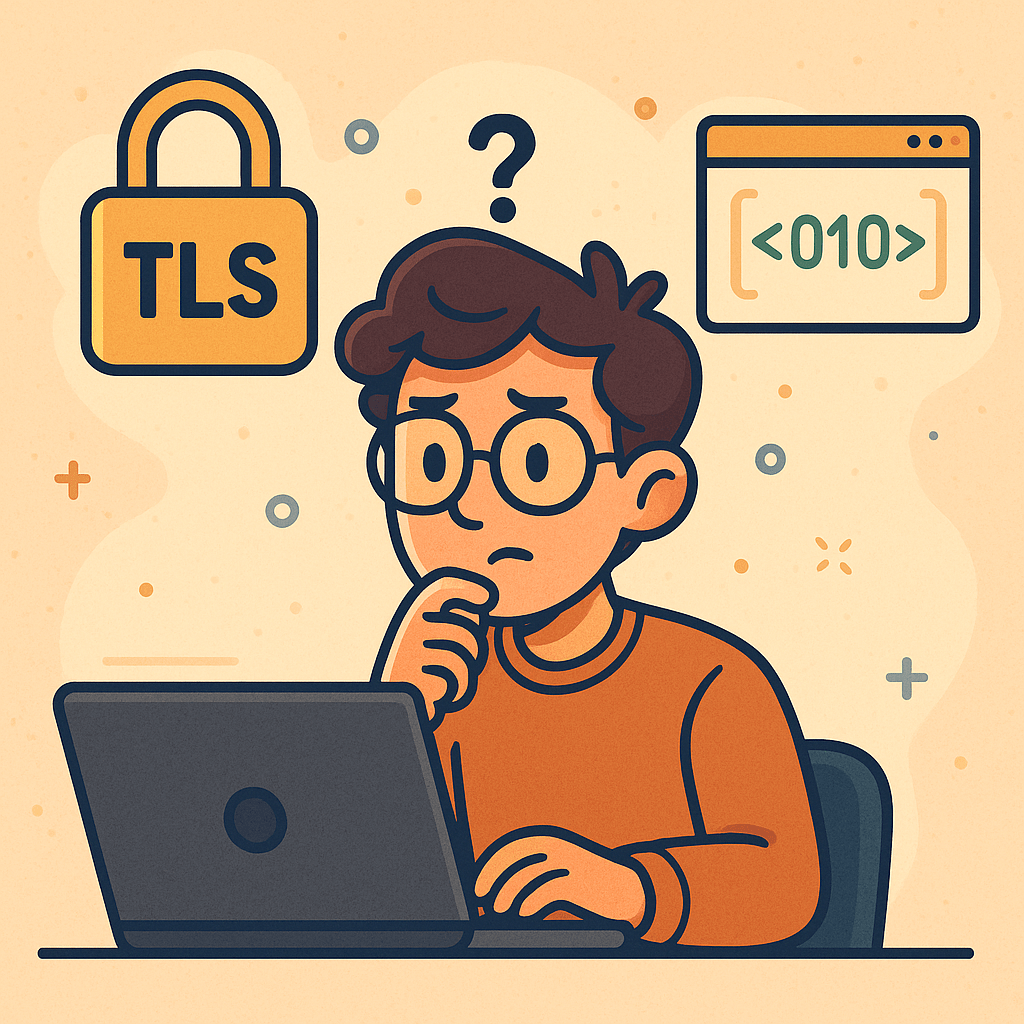
Transport Layer Security (TLS) is a cryptographic protocol that ensures secure communication between computers over a network. It is the successor to Secure Sockets Layer (SSL) and is widely used to protect data exchanged across the internet, such as when browsing websites, sending emails, or transferring files.
TLS establishes a secure channel by encrypting the data, making sure that attackers cannot eavesdrop or tamper with the information. Today, TLS is a cornerstone of internet security and is fundamental to building trust in digital communications.
How Does TLS Work?
TLS operates in two major phases:
1. Handshake Phase
When a client (like a web browser) connects to a server (like a website), they first exchange cryptographic information.
The server presents its TLS certificate, which is issued by a trusted Certificate Authority (CA). This allows the client to verify the server’s authenticity.
A key exchange mechanism is used (e.g., RSA or Diffie-Hellman) to securely agree on a shared secret key.
2. Data Encryption Phase
After the handshake, both client and server use the shared key to encrypt the data.
This ensures confidentiality (data cannot be read by outsiders), integrity (data cannot be altered undetected), and authentication (you’re communicating with the right server).
Main Components of TLS
TLS Handshake Protocol
Negotiates the encryption algorithms and establishes session keys.
Certificates and Certificate Authorities (CAs)
Digital certificates validate the server’s identity.
CAs issue and verify these certificates to ensure trust.
Public Key Infrastructure (PKI)
Uses asymmetric cryptography (public/private keys) for authentication and key exchange.
Symmetric Encryption
Once the handshake is complete, data is encrypted with a shared symmetric key, which is faster and more efficient.
Message Authentication Codes (MACs)
Ensure data integrity by verifying that transmitted messages are not altered.
Advantages and Benefits of TLS
Confidentiality – Prevents unauthorized access by encrypting data in transit.
Integrity – Detects and prevents data tampering.
Authentication – Validates server (and sometimes client) identity using certificates.
Trust & Compliance – Required for compliance with standards like PCI DSS, GDPR, and HIPAA.
Performance with Security – Modern TLS versions (like TLS 1.3) are optimized for speed without compromising security.
When and How Should We Use TLS?
Websites & Web Applications: Protects HTTP traffic via HTTPS.
Email Communication: Secures SMTP, IMAP, and POP3.
APIs & Microservices: Ensures secure communication between distributed components.
File Transfers: Used in FTPS and SFTP for secure file exchange.
VoIP & Messaging: Protects real-time communication channels.
Simply put, TLS should be used anytime sensitive or private data is exchanged over a network.
Real-World Examples
HTTPS Websites: Every secure website (with a padlock icon in browsers) uses TLS.
Online Banking: TLS secures login credentials, financial transactions, and personal data.
E-commerce Platforms: Protects payment information during checkout.
Healthcare Systems: Secures patient data to comply with HIPAA.
Cloud Services: Ensures secure API calls between cloud-based applications.
How to Integrate TLS into the Software Development Process
Use HTTPS by Default
Always deploy TLS certificates on your web servers and enforce HTTPS connections.
Automate Certificate Management
Use tools like Let’s Encrypt for free and automated certificate renewal.
Secure APIs and Microservices
Apply TLS for internal service-to-service communication in microservice architectures.
Enforce Strong TLS Configurations
Disable outdated protocols like SSL, TLS 1.0, and TLS 1.1.
Use TLS 1.2 or TLS 1.3 for stronger security.
CI/CD Integration
Include TLS configuration tests in your pipeline to ensure secure deployments.
Regular Security Audits
Continuously scan your applications and servers for weak TLS configurations.
Conclusion
Transport Layer Security (TLS) is not just a security protocol—it’s the backbone of secure digital communication. By encrypting data, authenticating identities, and preserving integrity, TLS builds trust between users and applications.
Whether you are building a website, developing an API, or running enterprise systems, integrating TLS into your software development process is no longer optional—it’s essential.
SCRAM authenticates users without sending passwords, stores only derived keys (not plaintext), and prevents replay attacks with nonces and salts. It’s a modern alternative to legacy password schemes and is available via SASL in many servers and clients.
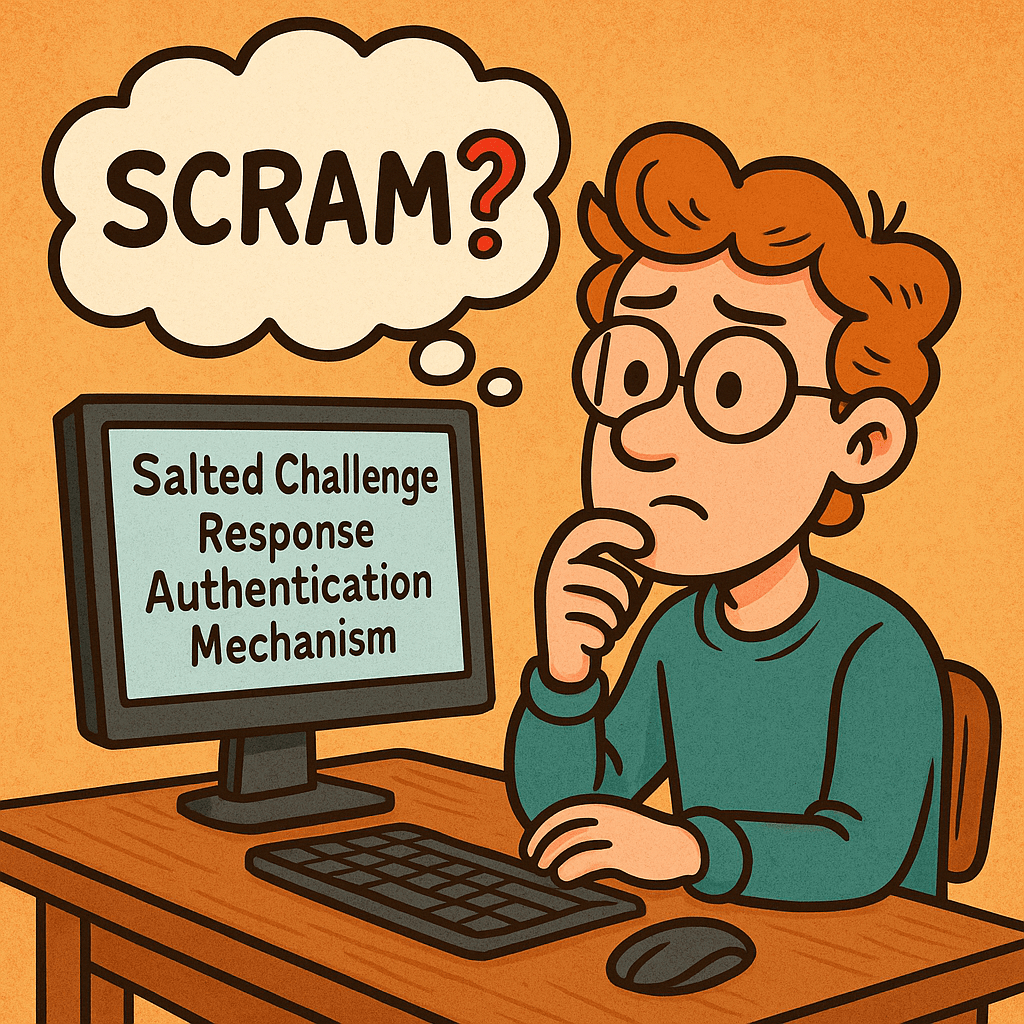
What Is SCRAM?
Salted Challenge Response Authentication Mechanism (SCRAM) is a password-based authentication protocol standardized by the IETF (commonly used as a SASL mechanism). Instead of transmitting the user’s password, SCRAM proves knowledge of it through a challenge-response exchange using:
a salt (unique per account),
a nonce (unique per session),
an iteration count (work factor),
and a key-derivation function (e.g., PBKDF2 with HMAC-SHA-256).
Common variants: SCRAM-SHA-1, SCRAM-SHA-256, and SCRAM-SHA-512 (some deployments also use channel binding for MITM protection).
Client → Server: client-first-message Sends username and a fresh client noncenc.
Server → Client: server-first-message Looks up user’s stored auth data, returns:
salts (from account record),
iteration counti,
server noncens (fresh, often concatenated with nc).
Client computes keys locally
SaltedPassword = KDF(password, s, i)
ClientKey = HMAC(SaltedPassword, "Client Key")
StoredKey = H(ClientKey)
Builds an auth message transcript (the exact strings of the three messages).
Client → Server: client-final-message Sends:
combined nonce (nc+ns),
ClientProof = ClientKey XOR HMAC(StoredKey, AuthMessage) (This proves the client knows the password without sending it.)
Server verifies
Recomputes StoredKey from its stored data, verifies ClientProof.
If valid, computes ServerKey = HMAC(SaltedPassword, "Server Key") and ServerSignature = HMAC(ServerKey, AuthMessage).
Server → Client: server-final-message Returns ServerSignature so the client can verify it’s talking to the real server.
What the server stores:never the plaintext password. It stores salt, iteration count, and either the SaltedPassword or the derived StoredKey and ServerKey (or values sufficient to recompute/verify them).
Main Features & Components
Salting: Unique per-user salt thwarts rainbow tables.
Key Derivation with Work Factor: Iterations make brute force slower.
Challenge-Response with Nonces: Prevents replay attacks.
Mutual Authentication: Client verifies the server via ServerSignature.
No Plaintext Passwords in Transit or at Rest: Only derived values are stored/transmitted.
Channel Binding (optional): Binds auth to the underlying TLS channel to deter MITM.
Benefits & Advantages
Strong security with passwords: Better than Basic/Digest/PLAIN (without TLS).
Minimal leakage if DB is stolen: Attackers get salts and derived keys, not plaintext.
Replay-resistant: Nonces and signed transcripts block replays.
users(
  id PK,
  username UNIQUE,
  salt VARBINARY(32),
  iterations INT,
  stored_key VARBINARY(32 or 64),
  server_key VARBINARY(32 or 64),
  updated_at TIMESTAMP
)
Security Best Practices
Always use TLS, and enable channel binding if your stack supports it.
Strong randomness for salts and nonces (CSPRNG).
High iteration counts tuned to your latency budget; revisit yearly.
Rate-limit and lockout policies to deter online guessing.
Audit and rotate credentials; support password upgrades (e.g., SHA-1 → SHA-256).
Integrating SCRAM into Your Software Development Process
1) Design & Requirements
Decide on algorithm (prefer SCRAM-SHA-256 or higher) and iterations.
Define migration plan from existing auth (fallback or forced reset).
2) Implementation
Use a well-maintained SASL/SCRAM library for your language/runtime.
Centralize KDF and nonce/salt generation utilities.
Add feature flags to switch mechanisms and iteration counts.
3) Configuration & DevOps
Store salts/keys only in your DB; protect backups.
Secrets (e.g., TLS keys) in a vault; enforce mTLS between services where applicable.
Add dashboards for auth failures, lockouts, and latency.
4) Testing
Unit-test transcripts against known vectors from your library/docs.
Property/fuzz tests for parser edge cases (attribute order, malformed messages).
Integration tests with TLS on/off, and with channel binding if used.
5) Rollout
Canary a subset of users/services.
Monitor failure rates and latency; adjust iterations if needed.
Backfill/migrate user records on next login or via scheduled jobs.
Comparison Cheat Sheet
Mechanism
Sends Password?
Server Stores
Replay-Resistant
Mutual Auth
Notes
Basic (over TLS)
Yes (base64)
Plain/Hash (app-defined)
No
No
Only acceptable with strong TLS; still weak vs replays if tokens leak.
Digest
No
Hash of password
Partially
No
Outdated; weaker KDF and known issues.
PLAIN (over TLS)
Yes
App-defined
No
No
Only safe inside TLS; still exposes password at app layer.
SCRAM
No
Salted keys
Yes
Yes
Modern default for password auth; supports channel binding.
OAuth 2.0/OIDC
N/A
Tokens
Yes
Yes (via TLS + signatures)
Token-based; different tradeoffs and flow.
Developer Quick-Start (Language-Agnostic)
Pick a library that supports SCRAM-SHA-256 and (if possible) channel binding.
Server config: enable the SCRAM mechanism; set minimum iteration count and required hash.
Client config: select SCRAM mechanism; supply username/password; verify server signature.
Migrations: on user login, if you detect an old scheme (e.g., SHA-1), re-derive keys with SHA-256 and higher iterations and update the record.
FAQs
Do I still need TLS with SCRAM? Yes. SCRAM protects passwords and gives mutual auth, but TLS protects confidentiality/integrity of all data and enables channel binding.
Which hash should I choose? Use SCRAM-SHA-256 or stronger. Avoid SHA-1 for new systems.
How many iterations? Start with a value that adds ~50–150 ms on your hardware per attempt, then adjust based on throughput/latency targets.
Final Checklist
SCRAM-SHA-256 enabled on server and clients
Unique salt per user, secure CSPRNG
Iterations set and documented; metrics in place
TLS enforced; channel binding on where supported
Tests cover transcripts, edge cases, and migrations
Monitoring, rate-limiting, and lockouts configured
In modern software development, testing is a crucial step to ensure the stability, quality, and reliability of applications. Among different types of testing, Smoke Testing stands out as one of the simplest yet most effective methods to quickly assess whether a build is stable enough for further testing.
This blog explores what smoke testing is, how it works, its features, benefits, real-world use cases, and how you can integrate it into your software development process.
What is Smoke Testing?
Smoke Testing (also called Build Verification Testing) is a type of software testing that ensures the most important functions of an application work correctly after a new build or release.
The term comes from hardware testing, where engineers would power up a device for the first time and check if it “smoked.” In software, the idea is similar — if the application fails during smoke testing, it’s not ready for deeper functional or regression testing.
Main Features and Components of Smoke Testing
Build Verification
Performed on new builds to check if the application is stable enough for further testing.
Critical Functionality Check
Focuses only on the essential features like login, navigation, data input, and core workflows.
Shallow and Wide Testing
Covers all major areas of the application without going into too much detail.
Automation or Manual Execution
Can be executed manually for small projects or automated for CI/CD pipelines.
Fast Feedback
Provides developers and testers with immediate insights into build quality.
How Does Smoke Testing Work?
The process of smoke testing generally follows these steps:
Receive the Build
A new build is deployed from the development team.
Deploy in Test Environment
The build is installed in a controlled testing environment.
Execute Smoke Test Cases
Testers run predefined test cases focusing on core functionality (e.g., login, saving records, basic navigation).
Evaluate the Results
If the smoke test passes, the build is considered stable for further testing.
If it fails, the build is rejected, and the issues are reported back to developers.
Benefits of Smoke Testing
Early Detection of Major Defects
Prevents wasted effort on unstable builds.
Saves Time and Effort
Quickly identifies whether further testing is worthwhile.
Improves Build Stability
Ensures only stable builds reach deeper levels of testing.
Supports Continuous Integration
Automated smoke tests provide fast feedback in CI/CD pipelines.
Boosts Confidence
Developers and testers gain assurance that the software is fundamentally working.
When and How Should We Use Smoke Testing?
After Every New Build
Run smoke tests to validate basic functionality before regression or system testing.
During Continuous Integration/Delivery (CI/CD)
Automate smoke tests to ensure each code commit does not break critical functionality.
In Agile Environments
Use smoke testing at the end of every sprint to ensure incremental builds remain stable.
Real-World Use Cases of Smoke Testing
Web Applications
Example: After a new deployment of an e-commerce platform, smoke tests might check if users can log in, add items to a cart, and proceed to checkout.
Mobile Applications
Example: For a banking app, smoke tests ensure users can log in, view account balances, and transfer funds before more advanced testing begins.
Enterprise Systems
Example: In large ERP systems, smoke tests verify whether dashboards load, reports generate, and user roles function properly.
CI/CD Pipelines
Example: Automated smoke tests run after every commit in Jenkins or GitHub Actions, ensuring no critical features are broken.
How to Integrate Smoke Testing Into Your Software Development Process
Define Critical Features
Identify the most important features that must always work.
Create Reusable Test Cases
Write simple but broad test cases that cover the entire system’s core functionalities.
Automate Whenever Possible
Use testing frameworks like Selenium, Cypress, or JUnit to automate smoke tests.
Integrate With CI/CD Tools
Configure Jenkins, GitLab CI, or GitHub Actions to trigger smoke tests after every build.
Continuous Monitoring
Regularly review and update smoke test cases as the application evolves.
Conclusion
Smoke testing acts as the first line of defense in software testing. It ensures that critical functionalities are intact before investing time and resources into deeper testing activities. Whether you’re working with web apps, mobile apps, or enterprise systems, smoke testing helps maintain build stability and improves overall software quality.
By integrating smoke testing into your CI/CD pipeline, you can speed up development cycles, reduce risks, and deliver stable, reliable software to your users.
SASL (Simple Authentication and Security Layer) is a framework that adds pluggable authentication and optional post-authentication security (integrity/confidentiality) to application protocols such as SMTP, IMAP, POP3, LDAP, XMPP, AMQP 1.0, Kafka, and more. Instead of hard-coding one login method into each protocol, SASL lets clients and servers negotiate from a menu of mechanisms (e.g., SCRAM, Kerberos/GSSAPI, OAuth bearer tokens, etc.).
What Is SASL?
SASL is a protocol-agnostic authentication layer defined so that an application protocol (like IMAP or LDAP) can “hook in” standardized auth exchanges without reinventing them. It specifies:
How a client and server negotiate an authentication mechanism
How they exchange challenges and responses for that mechanism
Optionally, how they enable a security layer after auth (message integrity and/or encryption)
Key idea: SASL = negotiation + mechanism plug-ins, not a single algorithm.
How SASL Works (Step by Step)
Advertise capabilities The server advertises supported SASL mechanisms (e.g., SCRAM-SHA-256, GSSAPI, PLAIN, OAUTHBEARER).
Client selects mechanism The client picks one mechanism it supports (optionally sending an initial response).
Challenge–response exchange The server sends a challenge; the client replies with mechanism-specific data (proofs, nonces, tickets, tokens, etc.). Multiple rounds may occur.
Authentication result On success, the server confirms authentication. Some mechanisms can now negotiate a security layer (per-message integrity/confidentiality). In practice, most modern deployments use TLS for the transport layer and skip SASL’s own security layer.
Application traffic The client proceeds with the protocol (fetch mail, query directory, produce to Kafka, etc.), now authenticated (and protected by TLS and/or the SASL layer if negotiated).
Core Components & Concepts
Mechanism: The algorithm/protocol used to authenticate (e.g., SCRAM-SHA-256, GSSAPI, OAUTHBEARER, PLAIN).
Initial response: Optional first payload sent with the mechanism selection.
Challenge/response: The back-and-forth messages carrying proofs and metadata.
Security layer: Optional integrity/confidentiality after auth (distinct from TLS).
Channel binding: A way to bind auth to the outer TLS channel to prevent MITM downgrades (used by mechanisms like SCRAM with channel binding).
Common SASL Mechanisms (When to Use What)
Mechanism
What it is
Use when
Notes
SCRAM-SHA-256/512
Salted Challenge Response Authentication Mechanism using SHA-2
You want strong password auth with no plaintext passwords on the wire and hashed+salted storage
Modern default for many systems (Kafka, PostgreSQL ≥10). Supports channel binding variants.
GSSAPI (Kerberos)
Enterprise single sign-on via Kerberos tickets
You have an Active Directory / Kerberos realm and want SSO
Excellent for internal corp networks; more setup complexity.
OAUTHBEARER
OAuth 2.0 bearer tokens in SASL
You issue/verify OAuth tokens
Great for cloud/microservices; aligns with identity providers (IdPs).
EXTERNAL
Use external credentials from the transport (e.g., TLS client cert)
You use mutual TLS
No passwords; trust comes from certificates.
PLAIN
Username/password in clear (over TLS)
You already enforce TLS everywhere and need simplicity
Easy but must require TLS. Do not use without TLS.
CRAM-MD5 / DIGEST-MD5
Legacy challenge-response
Legacy interop only
Consider migrating to SCRAM.
Practical default today: TLS + SCRAM-SHA-256 (or TLS + OAUTHBEARER if you already run OAuth).
Advantages & Benefits
Pluggable & future-proof: Swap mechanisms without changing the application protocol.
Centralized policy: Standardizes auth across many services.
Better password handling (with SCRAM): No plaintext at rest, resistant to replay.
Enterprise SSO (with GSSAPI): Kerberos tickets instead of passwords.
Cloud-friendly (with OAUTHBEARER): Leverage existing IdP and token lifecycles.
Interoperability: Widely implemented in mail, messaging, directory services, and databases.
When & How Should You Use SASL?
Use SASL when your protocol (or product) supports it natively and you need one or more of:
Strong password auth with modern hashing ⇒ choose SCRAM-SHA-256/512.
Single Sign-On in enterprise ⇒ choose GSSAPI (Kerberos).
SCRAM protects against replay and stores salted, hashed passwords server-side.
Limitations & Gotchas
Not a silver bullet: SASL standardizes auth, but you still need TLS, good secrets hygiene, and strong ACLs.
Mechanism mismatches: Client/Server must overlap on at least one mechanism.
Legacy clients: Some only support PLAIN/LOGIN; plan for a migration path.
Operational complexity: Kerberos and OAuth introduce infrastructure to manage.
Security layer confusion: Most deployments rely on TLS instead of SASL’s own integrity/confidentiality layer; ensure your team understands the difference.
Integration Into Your Software Development Process
Design phase
Decide your identity model (passwords vs. Kerberos vs. OAuth).
Select mechanisms accordingly; document the allow-list.
Implementation
Use well-maintained libraries (mail, LDAP, Kafka clients, Postgres drivers) that support your chosen mechanisms.
Wire in TLS first, then SASL.
Add config flags to switch mechanisms per environment (dev/stage/prod).
Testing
Unit tests for mechanism negotiation and error handling.
Integration tests in CI with TLS on and mechanism allow-lists enforced.
SASL gives you a clean, extensible way to add strong authentication to many protocols without bolting on one-off solutions. In modern systems, pairing TLS with SCRAM, GSSAPI, or OAUTHBEARER delivers robust security, smooth migrations, and broad interoperability—whether you’re running mail servers, directories, message brokers, or databases.
Contact testing is a software testing approach where different components, services, or systems that “contact” each other are tested to ensure they communicate correctly. It focuses on the integration points between units or modules, rather than testing each component in isolation.
The goal is to verify that the interfaces, data exchanges, and dependencies between components work as expected. While unit tests validate the logic inside a module, contact tests validate the correctness of the connections between modules.
In short: contact testing ensures that pieces of software can talk to each other reliably.
How Does Contact Testing Work?
Contact testing works by simulating real interactions between two or more components in a controlled environment.
Identify contact points – Determine where modules, APIs, or services interact (e.g., function calls, REST endpoints, message brokers).
Define contracts and expectations – Define what inputs, outputs, and protocols the interaction should follow.
Set up a test environment – Create a test harness or mock services to replicate real communication.
Execute tests – Run tests that validate requests, responses, data formats, error handling, and edge cases.
Validate results – Ensure both sides of the interaction behave correctly.
Example: If a front-end application makes a call to a backend API, contact tests check if:
The request is formatted correctly (headers, payload, authentication).
The backend responds with the correct status codes and data structures.
Error scenarios (timeouts, invalid data) are handled properly.
Features and Components of Contact Testing
Interface Validation
Ensures APIs, methods, and endpoints conform to expected definitions.
Data Contract Verification
Confirms that the structure, types, and formats of exchanged data are correct.
Dependency Testing
Validates that dependent services respond as expected.
Error Handling Checks
Tests how systems behave under failures (network issues, incorrect inputs).
Automation Support
Easily integrated into CI/CD pipelines for continuous validation.
Environment Simulation
Uses stubs, mocks, or test doubles to mimic dependencies when the real ones are unavailable.
Advantages and Benefits
Early Bug Detection
Detects integration issues before deployment.
Improved Reliability
Ensures systems interact smoothly, reducing runtime errors.
Better Communication Between Teams
Clearly defined contracts improve collaboration between frontend, backend, and third-party teams.
Supports Agile and Microservices
Critical in distributed systems where many services interact.
Reduced Production Failures
By validating assumptions early, fewer surprises occur in production.
When and How Should We Use Contact Testing?
When to Use
When multiple teams build components independently.
When integrating third-party APIs or services.
In microservices architectures with many dependencies.
Before full end-to-end testing to catch issues early.
How to Use
Define contracts (OpenAPI/Swagger for REST APIs, Protobuf for gRPC).
Create automated tests that verify requests and responses.
Run tests as part of CI/CD pipelines after unit tests but before full system tests.
Use tools like Pact, WireMock, or Postman/Newman for contract and contact testing.
Real-World Examples
E-commerce Platform
Frontend calls backend to fetch product details. Contact tests verify that product IDs, prices, and stock status are correctly retrieved.
Payment Gateway Integration
Contact tests ensure the application sends payment requests correctly and handles responses (success, failure, timeout) as expected.
Microservices in Banking
Account service and transaction service communicate via REST APIs. Contact tests validate data formats (account number, balance) and error handling (invalid accounts, insufficient funds).
Healthcare System
Contact tests ensure patient records shared between hospital modules follow the correct format and confidentiality rules.
How to Integrate Contact Testing into the Software Development Process
Define Contracts Early
Use schemas or interface definitions as a shared agreement between teams.
Implement Contact Tests Alongside Unit Tests
Ensure each service’s contact points are tested before integration.
Automate in CI/CD Pipelines
Run contact tests automatically on pull requests and deployments.
Use Mock Servers
For unavailable or costly dependencies, use mock servers to simulate interactions.
Continuous Monitoring
Extend contact testing into production with monitoring tools to detect real-world deviations.
Conclusion
Contact testing is a crucial step between unit testing and full system testing. It ensures that modules, services, and APIs can communicate correctly, reducing integration risks. By incorporating contact tests into your development lifecycle, you improve software reliability, minimize production issues, and enable smoother collaboration across teams.
Whether you’re building microservices, APIs, or integrating third-party tools, contact testing helps validate trust at every connection point.
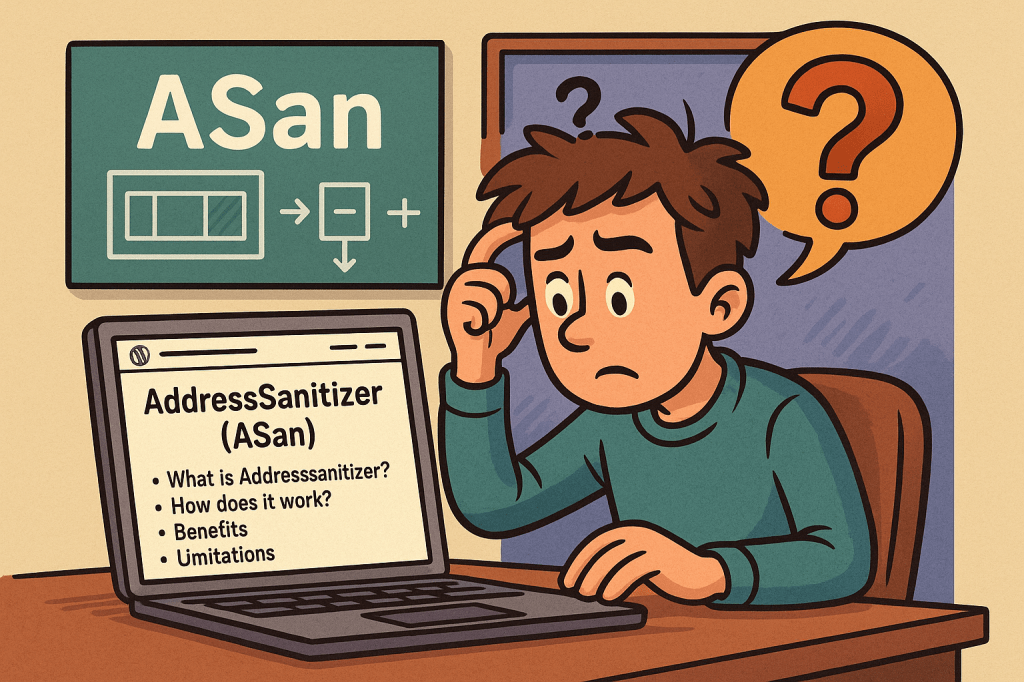
AddressSanitizer (ASan) is a fast memory error detector built into modern compilers (Clang/LLVM and GCC). When you compile your C/C++ (and many C-compatible) programs with ASan, the compiler injects checks that catch hard-to-debug memory bugs at runtime, then prints a readable, symbolized stack trace to help you fix them.
Finds (most common):
Heap/stack/global buffer overflows & underflows
Use-after-free and use-after-scope (return)
Double-free and invalid free
Memory leaks (via LeakSanitizer integration)
How does ASan work (deep dive)
ASan adds lightweight instrumentation to your binary and links a runtime that monitors memory accesses:
Shadow Memory: ASan maintains a “shadow” map where every 8 bytes of application memory correspond to 1 byte in shadow memory. A non-zero shadow byte marks memory as poisoned (invalid); a zero marks it valid. Every load/store checks the shadow first.
Redzones (Poisoned Guards): Around each allocated object (heap, stack, globals), ASan places redzones—small poisoned regions. If code overreads or overwrites into a redzone, ASan trips immediately with an error report.
Quarantine for Frees: Freed heap blocks aren’t immediately reused—they go into a quarantine and stay poisoned for a while. Accessing them becomes a use-after-free that ASan can catch reliably.
Stack & Global Instrumentation: The compiler lays out extra redzones around stack and global objects, poisoning/unpoisoning as scopes begin and end. This helps detect use-after-scope and overflows on local arrays.
Intercepted Library Calls: Common libc/allocator functions (e.g., malloc, memcpy) are intercepted so ASan can keep metadata accurate and report clearer diagnostics.
Detailed Reports & Symbolization: On error, ASan prints the access type/size, the exact location, the allocation site, and a symbolized backtrace (when built with debug info), plus hints (“allocated here”, “freed here”).
Benefits
High signal, low friction: You recompile with a flag; no code changes needed in most cases.
Fast enough for day-to-day testing: Typically 1.5–2× CPU overhead—often fine for local runs and CI.
Scenario: A PNG decoder reads width/height from the file, under-validates them, and writes past a heap buffer.
With ASan: First failing test triggers an out-of-bounds write report with call stacks for both the write and the allocation site. You fix the bounds check and add regression tests.
Use-After-Free in a Web Server
Scenario: Request object freed on one path but referenced later by a logger.
With ASan: The access to the freed pointer immediately faults with a use-after-free report. Quarantine ensures it crashes deterministically instead of “works on my machine.”
Stack Buffer Overflow in Protocol Handler
Scenario: A stack array sized on assumptions gets overrun by a longer header.
With ASan: Redzones around stack objects catch it as soon as the bad write occurs, pointing to the exact function and line.
Memory Leaks in CLI Tool
Scenario: Early returns skip frees.
With ASan + LeakSanitizer: Run tests; at exit, you get a leak summary with allocation stacks. You patch the code and verify the leak disappears.
Fuzzing Third-Party Libraries
Scenario: You integrate libFuzzer to stress a JSON library.
With ASan: Any corruptor input hitting memory issues produces actionable reports, turning “mysterious crashes” into clear bugs.
Integrating ASan into Your Software Development Process
1) Add a dedicated “sanitizer” build
Create a separate build target/profile (e.g., Debug-ASAN).
Compile everything you can with -fsanitize=address (apps, libs, tests).
Keep symbols: -g -fno-omit-frame-pointer.
2) Run unit/integration tests under ASan
In CI, add a job that builds with ASan and runs your full test suite.
Fail the pipeline on any ASan report (halt_on_error=1).
3) Use helpful ASAN_OPTIONS (per target or globally)
Run them in separate builds; mixing TSan with others is generally not recommended.
7) Pre-release and nightly sweeps
Run heavier test suites (fuzzers, long-running integration tests) nightly under ASan.
Gate releases on “no sanitizer regressions.”
8) Production strategy
Typically don’t run ASan in production (overhead + noisy reports).
If necessary, use shadow deploys or limited canaries with low traffic and aggressive alerting.
Developer Tips & Troubleshooting
Crashing in malloc/new interceptors? Ensure you link the sanitizer runtime last or use the compiler driver (don’t manually juggle libs).
False positives from assembly or custom allocators? Add minimal suppressions and comments; also review for real bugs—ASan is usually right.
Random hangs/timeouts under fuzzing? Start with smaller corpora and lower timeouts; increase gradually.
Build system gotchas: Ensure both compile and link steps include -fsanitize=address.
FAQ
Q: Can I use ASan with C only? Yes. It works great for C and C++ (and many C-compatible FFI layers).
Q: Does ASan slow everything too much? For local and CI testing, the trade-off is almost always worth it. Typical overhead: ~1.5–2× CPU, ~2–3× RAM.
Q: Do I need to change my code? Usually no. Compile/link with the flags and run. You might tweak build scripts or add suppressions for a few low-level spots.
A minimal “Starter Checklist”
Add an ASan build target to your project (CMake/Make/Bazel).
Ensure -g and -fno-omit-frame-pointer are on.
Add a CI job that runs tests with ASAN_OPTIONS=halt_on_error=1:detect_leaks=1.
Document how to read ASan reports and where symbol files live.
Fuzzing is an automated testing technique that feeds large numbers of malformed, unexpected, or random inputs to a program to find crashes, hangs, memory corruption, and other security/robustness bugs. This post explains what fuzzing is, key features and types, how it works (step-by-step), advantages and limitations, real-world use cases, and exactly how to integrate fuzzing into a modern software development process.
What is fuzzing?
Fuzzing (or “fuzz testing”) is an automated technique for finding bugs by supplying a program with many inputs that are unusual, unexpected, or deliberately malformed, and observing for failures (crashes, assertion failures, timeouts, resource leaks, incorrect output, etc.). Fuzzers range from simple random-input generators to sophisticated, feedback-driven engines that learn which inputs exercise new code paths.
Fuzzing is widely used both for security (discovering vulnerabilities an attacker could exploit) and for general robustness testing (finding crashes and undefined behaviour).
Key features (explained)
Automated input generation
Fuzzers automatically produce a large volume of test inputs — orders of magnitude more than manual testing — which increases the chance of hitting rare edge cases.
Monitoring and detection
Fuzzers monitor the program for signals of failure: crashes, memory-safety violations (use-after-free, buffer overflow), assertion failures, infinite loops/timeouts, and sanitizer reports.
Coverage / feedback guidance
Modern fuzzers use runtime feedback (e.g., code coverage) to prefer inputs that exercise previously unvisited code paths, greatly improving effectiveness over pure random mutation.
Instrumentation
Instrumentation (compile-time or runtime) gathers execution information such as branch coverage, comparisons, or tainting. This enables coverage-guided fuzzing and faster discovery of interesting inputs.
Test harness / drivers
The target often needs a harness — a small wrapper that feeds inputs to a specific function or module — letting fuzzers target internal code directly instead of whole applications.
Minimization and corpus management
Good fuzzing workflows reduce (minimize) crashing inputs to the smallest test case that still reproduces the issue, and manage corpora of “interesting” seeds to guide future fuzzing.
Triage and deduplication
After crashes are detected, automated triage groups duplicates (same root cause), classifies severity, and collects debugging artifacts (stack trace, sanitizer output).
How fuzzing works — step by step
Choose the target
Could be a file parser (image, audio), protocol handler, CLI, library function, or an API endpoint.
Prepare a harness
Create a small driver that receives raw bytes (or structured samples), calls the function under test, and reports failures. For binaries, you can fuzz the whole process; for libraries, fuzz the API function directly.
Select a fuzzer and configure
Pick a fuzzer (mutation-based, generation-based, coverage-guided, etc.) and configure timeouts, memory limits, sanitizers, and the initial corpus (seed files).
Instrumentation / sanitizers
Build the target with sanitizers (AddressSanitizer, UndefinedBehaviorSanitizer, LeakSanitizer) and with coverage hooks (if using coverage-guided fuzzing). Instrumentation enables detection and feedback.
Run the fuzzer
The fuzzer runs thousands to millions of inputs, mutating seeds, tracking coverage, and prioritizing inputs that increase coverage.
Detect and record failures
On crash or sanitizer report, the fuzzer saves the input and a log, optionally minimizing the input and capturing a stack trace.
Triage
Deduplicate crashes (e.g., by stack trace), prioritize (security impact, reproducibility), and assign to developers with reproduction steps.
Fix & regress
Developers fix bugs and add new regression tests (the minimized crashing input) to the test suite to prevent regressions.
Continuous fuzzing
Add long-running fuzzing to nightly/CI (or to a fuzzing infrastructure) to keep finding issues as code changes.
Types of fuzzing
By knowledge of the target
Black-box fuzzing
No knowledge of internal structure. Inputs are sent to the program and only external outcomes are observed (e.g., crash/no crash).
Cheap and easy to set up, but less efficient for deep code.
White-box fuzzing
Uses program analysis (symbolic execution or constraint solving) to craft inputs that satisfy specific paths/conditions.
Can find deep logical bugs but is computationally expensive and may not scale to large codebases.
Grey-box fuzzing
Hybrid approach: uses lightweight instrumentation (coverage) to guide mutations. Most modern practical fuzzers (AFL-family, libFuzzer) are grey-box.
Good balance of performance and depth.
By generation strategy
Mutation-based
Start from seed inputs and apply random or guided mutations (bit flips, splice, insert). Effective when good seeds exist.
Generation-based
Inputs are generated from a model/grammar (e.g., a JSON generator or network protocol grammar). Good for structured inputs and when valid format is critical.
Grammar-based
Use a formal grammar of the input format to generate syntactically valid/interesting inputs, often combined with mutation.
By goal/technique
Coverage-guided fuzzing
Uses runtime coverage to prefer inputs that exercise new code paths. Highly effective for native code.
Differential fuzzing
Runs the same input against multiple implementations (e.g., different JSON parsers) and looks for inconsistencies in outputs.
Mutation + symbolic (concolic)
Combines concrete execution with symbolic analysis to solve comparisons and reach guarded branches.
Network / protocol fuzzing
Sends malformed packets/frames to network services; may require stateful harnesses to exercise authentication or session flows.
API / REST fuzzing
Targets HTTP APIs with unexpected payloads, parameter fuzzing, header fuzzing, and sequence fuzzing (order of calls).
Advantages and benefits
High bug-finding power
Finds crashes, memory errors, and edge cases that manual tests and static analysis often miss.
Scalable and parallelizable
Many fuzzers scale horizontally — run multiple instances on many cores/machines.
Security-driven
Effective at revealing exploitable memory-safety bugs (especially for C/C++), reducing attack surface.
Automatable
Can be integrated into CI/CD or as long-running background jobs (nightly fuzzers).
Low human effort per test
After harness creation and configuration, fuzzing generates and runs vast numbers of tests automatically.
Regression prevention
Crashes found by fuzzing become regression tests that prevent reintroduction of bugs.
Limitations and considerations
Need a good harness or seeds
Mutation fuzzers need representative seed corpus; generation fuzzers need accurate grammars/models.
Can be noisy
Many crashes may be duplicates or low priority; triage is essential.
Not a silver bullet
Fuzzing targets runtime bugs; it won’t find logical errors that don’t cause abnormal behaviour unless you instrument checks.
Resource usage
Fuzzing can be CPU- and time-intensive. Long-running fuzzing infrastructure helps.
Coverage vs depth tradeoff
Coverage-guided fuzzers are excellent for code coverage, but for complex semantic checks you may need white-box techniques or custom checks.
Real-world examples (practical case studies)
Example 1 — Image parser in a media library
Scenario: A C++ image decoding library processes user-supplied images. What you do:
Create a harness that takes raw bytes and calls the image decode function.
Seed with a handful of valid image files (PNG, JPEG).
Build with AddressSanitizer (ASan) and compile-time coverage instrumentation.
Run a coverage-guided fuzzer (mutation-based) for several days. Outcome: Fuzzer generates a malformed chunk that causes a heap buffer overflow. ASan detects it; the input is minimized and stored. Developer fixes bounds check and adds the minimized file as a regression test.
Why effective: Parsers contain lots of complex branches; small malformed bytes often trigger deep logic leading to memory safety issues.
Example 2 — HTTP API fuzzing for a microservice
Scenario: A REST microservice parses JSON payloads and stores data. What you do:
Use a REST fuzzer that mutates fields, numbers, strings, and structure (or use generation from OpenAPI spec + mutation).
Include authentication tokens and sequence flows (create → update → delete).
Monitor for crashes, unhandled exceptions, incorrect status codes, and resource consumption. Outcome: Fuzzer finds an unexpected null pointer when a certain nested structure is missing — leads to 500 errors. Fix adds input validation and better error handling.
Why effective: APIs often trust input structure; fuzzing uncovers missing validation, parsing edge cases, or unintended code paths.
Example 3 — Kernel / driver fuzzing (security focused)
Scenario: Fuzzing a kernel-facing driver interface (e.g., ioctls). What you do:
Use a specialized kernel fuzzer that generates syscall sequences or malformed ioctl payloads, and runs on instrumented kernel builds.
Use persistent fuzzing clusters to run millions of testcases. Outcome: Discover a use-after-free triggered by a race of ioctl calls; leads to CVE fix.
Why effective: Low-level concise interfaces are high-risk; fuzzers explore sequences and inputs that humans rarely test.
How and when to use fuzzing (practical guidance)
When to fuzz
Parsers and deserializers (image, audio, video, document formats).
Newly written code — fuzz early to catch regressions.
Third-party code you integrate: fuzzing can reveal hidden assumptions.
How to pick a strategy
If you have sample files → start with coverage-guided mutation fuzzer and seeds.
If input is structured (grammar) → use grammar-based or generation fuzzers.
If testing across implementations → differential fuzzing.
If deep logical constraints exist → consider white-box/concolic tooling or property-based tests.
Integrating fuzzing into your development process
Here’s a practical, step-by-step integration plan that works for teams of all sizes.
1) Start small — pick one high-value target
Choose a small, high-risk component (parser, protocol handler, or a library function).
Create a minimal harness that feeds arbitrary bytes (or structured inputs) to the function.
2) Build for fuzzing
Compile with sanitizers (ASan, UBSan) and enable coverage instrumentation (clang’s libFuzzer or AFL compile options).
Add deterministic seed corpus (valid samples) and known edge cases.
3) Local experiments
Run quick local fuzzing sessions to ensure harness is stable and crashes are reproducible.
Implement simple triage: crash minimization and stack traces.
4) Add fuzzing to CI (short runs)
Add a lightweight fuzz job to CI that runs for a short time (e.g., 10–30 minutes) on PRs that touch the target code.
If new issues are found, the PR should fail or annotate with findings.
5) Long-running fuzzing infrastructure
Run continuous/overnight fuzzing on dedicated workers (or cloud instances). Persist corpora and crashes.
Use parallel instances with different seeds and mutation strategies.
6) Automate triage and ticket creation
Use existing tools (or scripts) to group duplicate crashes, collect sanitizer outputs, and file tickets or create GitHub issues with reproducer and stack trace.
7) Make regressions tests mandatory
Every fix must include the minimized crashing input as a unit/regression test. Add file to tests/fuzz/regressors.
8) Expand coverage across the codebase
Once comfortable, gradually add more targets, including third-party libraries, and integrate API fuzzing for microservices.
9) Operational practices
Monitor fuzzing metrics: code coverage, unique crashes, time to first crash, triage backlog.
Rotate seeds, update grammars, and re-run fuzzers after major changes.
Educate developers on writing harnesses and interpreting sanitizer output.
Practical tips & best practices
Use sanitizers (ASan/UBSan/MSan) to catch subtle memory and undefined behaviour.
Start with good seeds — a few valid samples dramatically improves mutation fuzzers.
Minimize crashing inputs automatically to simplify debugging.
Keep harnesses stable — harnesses that themselves crash or leak make fuzzing results noisy.
Persist and version corpora — adding new seeds that found coverage helps future fuzzes.
Prioritize triage — a backlog of unanalyzed crashes wastes value.
Use fuzzing results as developer-owned responsibilities — failing to fix crashes undermines confidence in fuzzing.
Example minimal harness (pseudocode)
C (using libFuzzer-style entry):
#include <stddef.h>
#include <stdint.h>

// target function in your library
extern int parse_image(const uint8_t *data, size_t size);

int LLVMFuzzerTestOneInput(const uint8_t *data, size_t size) {
    // call into the library under test
    parse_image(data, size);
    return 0; // non-zero indicates error to libFuzzer
}
Python harness for a CLI program (mutation via custom fuzzer):
import subprocess, tempfile

def run_one(input_bytes):
    with tempfile.NamedTemporaryFile() as f:
        f.write(input_bytes)
        f.flush()
        subprocess.run(["/path/to/mytool", f.name], timeout=5)

# fuzzing loop (very simple)
import os, random
seeds = [b"\x89PNG...", b"\xff\xd8..."]
while True:
    s = bytearray(random.choice(seeds))
    # random mutation
    for _ in range(10):
        i = random.randrange(len(s))
        s[i] = random.randrange(256)
    try:
        run_one(bytes(s))
    except Exception as e:
        print("Crash:", e)
        break
Suggested tools & ecosystem (conceptual, pick what fits your stack)
CI integration: run short fuzz sessions in PR checks; long runs on scheduled runners.
Note: choose tools that match your language and build system. For many C/C++ projects, libFuzzer + ASan is a well-supported starter combo; for binaries without recompilation, AFL with QEMU mode or network fuzzers may be used.
Quick checklist to get started (copy into your project README)
Pick target (parser, API, library function).
Create minimal harness and seed corpus.
Build with sanitizers and coverage instrumentation.
Run a local fuzzing session and collect crashes.
Minimize crashes and add regressors to test suite.
Add short fuzz job to PR CI; schedule long fuzz runs nightly.
Automate triage and track issues.
Conclusion
Fuzzing is one of the highest-leverage testing techniques for finding low-level crashes and security bugs. Start with one target, instrument with sanitizers and coverage, run both short CI fuzz jobs and long-running background fuzzers, and make fixing and regressing fuzz-found issues part of your development flow. Over time you’ll harden parsers, network stacks, and critical code paths — often catching bugs that would have become security incidents in production.


Recent Comments